
 SAP SD Debit Memo Processing is one type of complaint handling processing facilitated by SAP in order to charge the customer with new account receivables. It usually occurs because the person in charge failed to input the right price in the original billing document (the price is too low) and for the company to not suffer loss, we need to create a subsequent document (debit memo).
In SAP terms, there are two documents that will be involved in this process: Debit Memo Request and Debit Memo Invoice.
Within this document, I am going to explain the steps along with screenshots from SAP system. I assume you are familiar with SAP Sales and Distribution processes (sales area, document type, pricing procedure, etc.). Be aware that I am not going to explain deeper in some processes like printing out a document or how the pricing works. It is beyond this tutorial.
SAP SD Debit Memo Processing Flow
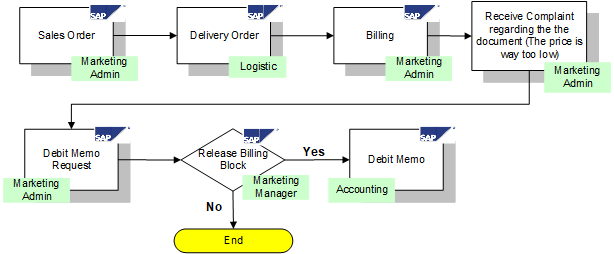
The picture above is self-explanatory. The whole process begins with a Sales Order, Delivery Order, and Billing; and then comes the complaint. I am going to explain the bottom-half part of the process (you may find the prior processes in other tutorials of SAP SD training).
SAP SD Debit Memo Processing Steps
Let’s go through SAP SD Debit Memo Processing process step by step and provide the necessary explanation.
Step 1
You have to create a debit memo request document as a pre-requisite document before creating a debit memo (invoice).
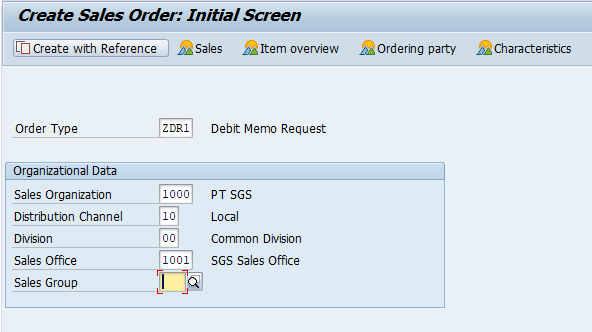
1A. Run the transaction VA01, select the sales document type (debit memo request) and enter the necessary sales area.
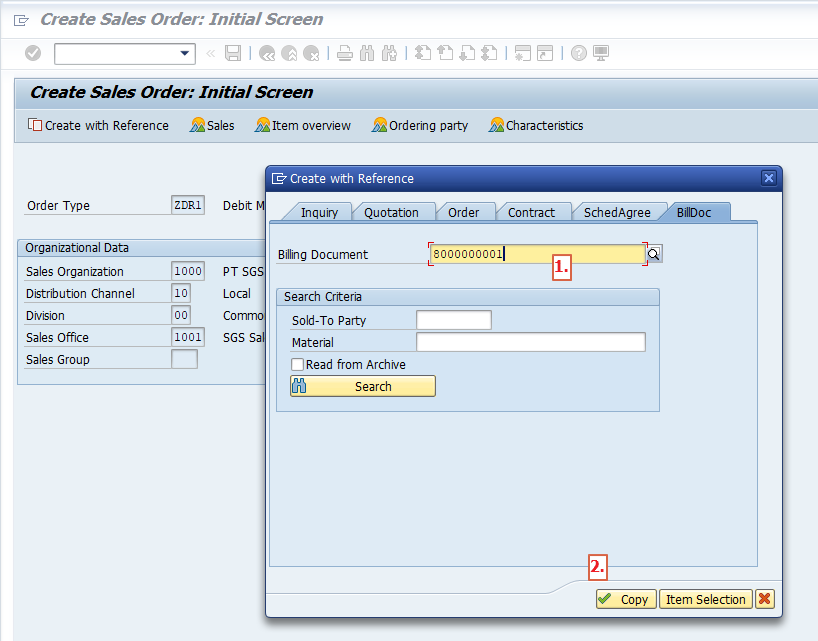
1B. Press the “Enter” button. You have to look up your client’s business process whether they need a previous document to be referenced or it can be made independently. For this document, I will make it mandatory to put the previous generated billing document, so a new pop up will show up.
- Fill the field with the billing document.
- Click “Copy” or press enter button.
1C. The copy control procedure will do magic by referencing all of the information taken out from that billing document (partner function information, the quantity, even the price).
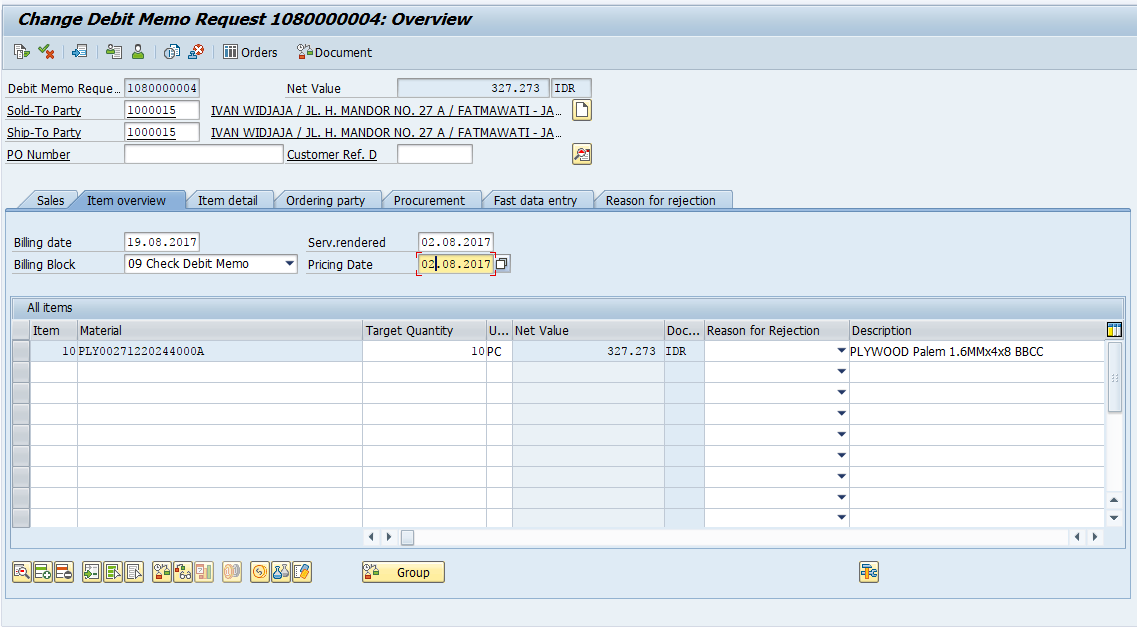
The Overview screen that is displayed upon you is almost identical with your regular sales order creation process except the billing block is now automatically filled (which is set by the configuration). Based on the role, only the authorized person will be able to release it. With respect to the process flow, the marketing manager will release it by putting it blank.
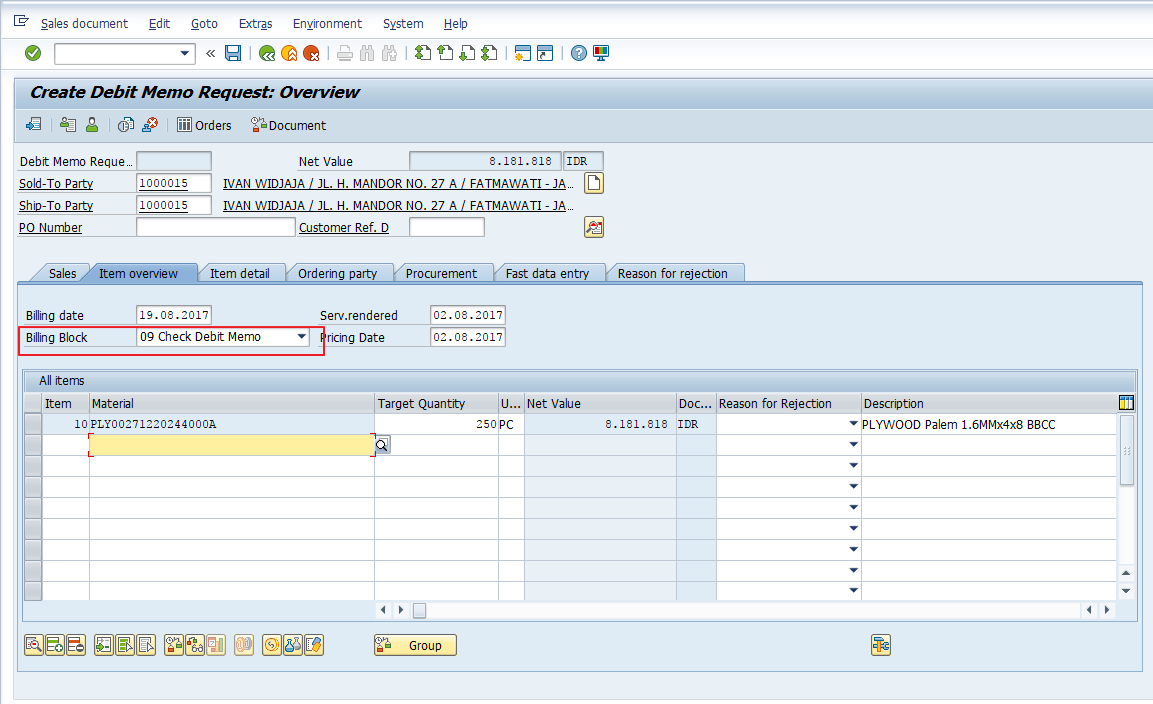
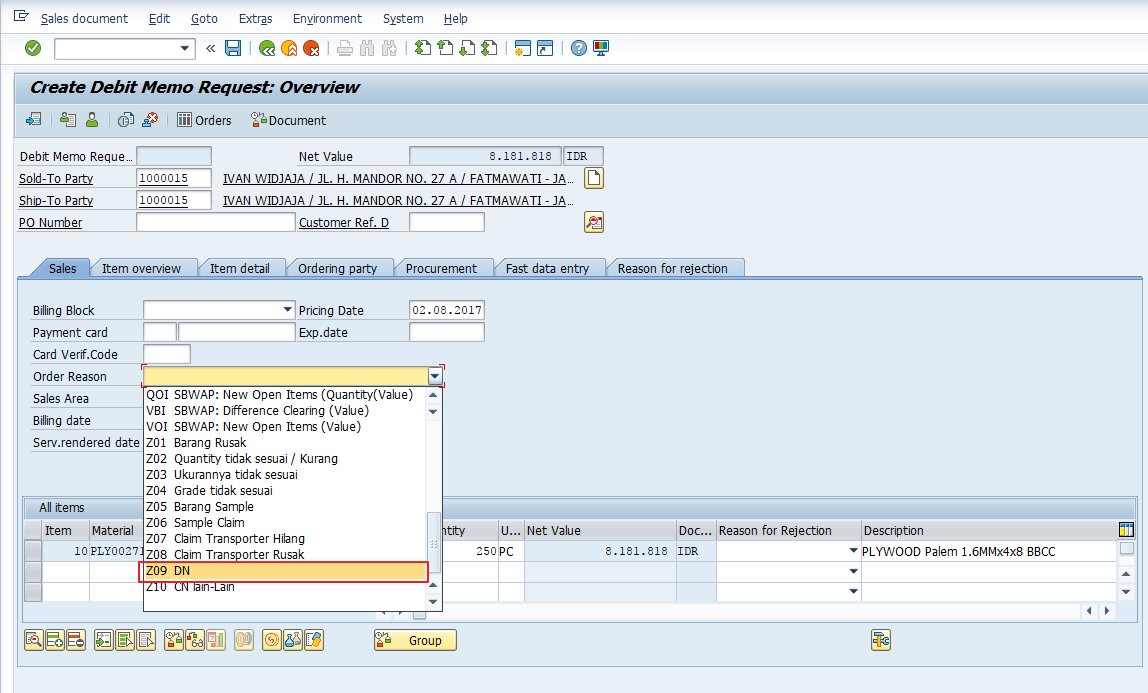
1D. Let’s select the “Sales” tab. In this screen, we are going to fill out the “Order Reason” field as one of mandatory requirement for debit memo request document.
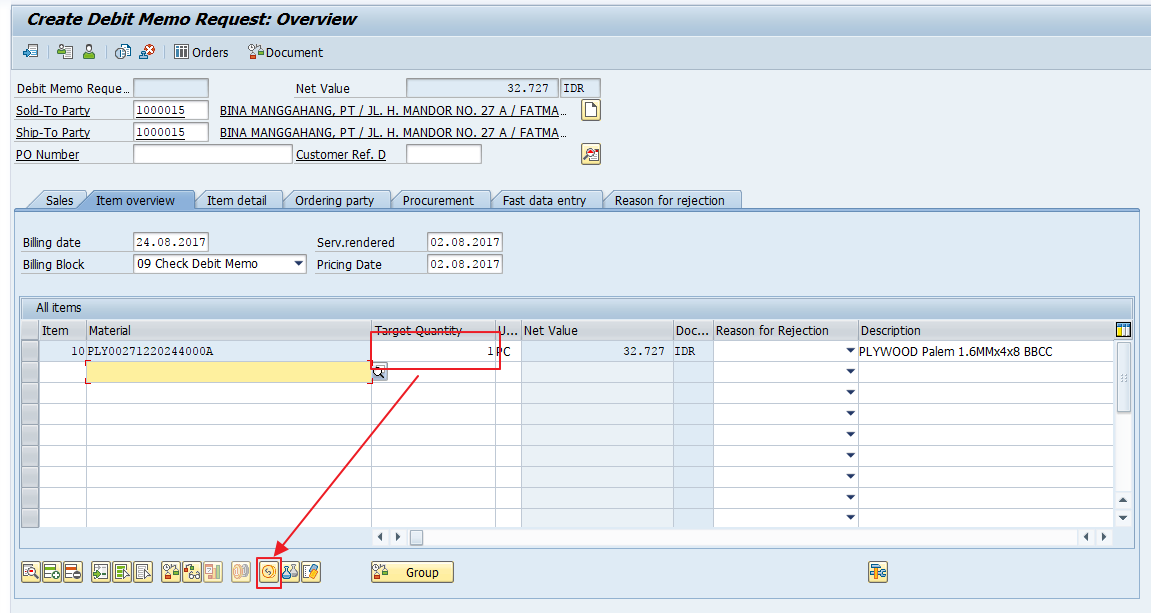
1E. As I mentioned before, the quantity is copied from the previous billing document which is reflected in the target quantity field. If you want the debit memo request refers only to a part of the billed quantity, you can adjust the target quantity field accordingly. Otherwise, if you want to make a debit memo which contains the only the difference value (additional receivable), change the quantity to 1 and then go to item -> conditions.
Note that the quantity here is used to determine the net value (price x quantity). This quantity will not go through posting goods issue process and thus it will not be delivered.
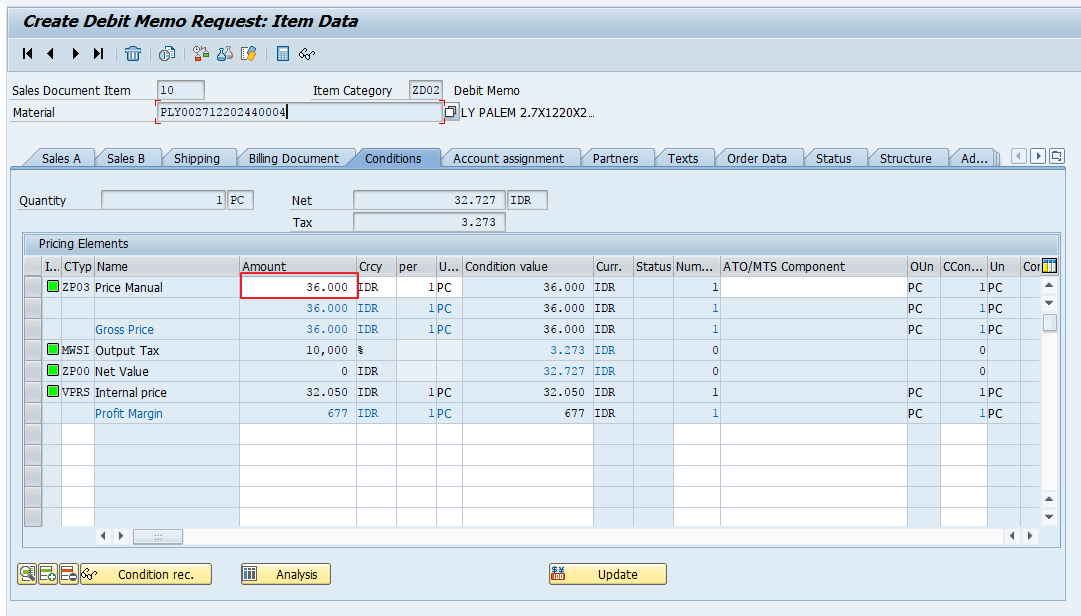
1F. Input the price; this is based on the price configuration. Obviously, you cannot change/enter the price, if the price is based on master data pricing.
1G. Now you’ve already completed all the necessary information to create a debit memo request document. To make sure that you didn’t forget some information, run an incompletion log by navigating to the menu Edit -> Incompletion Log.
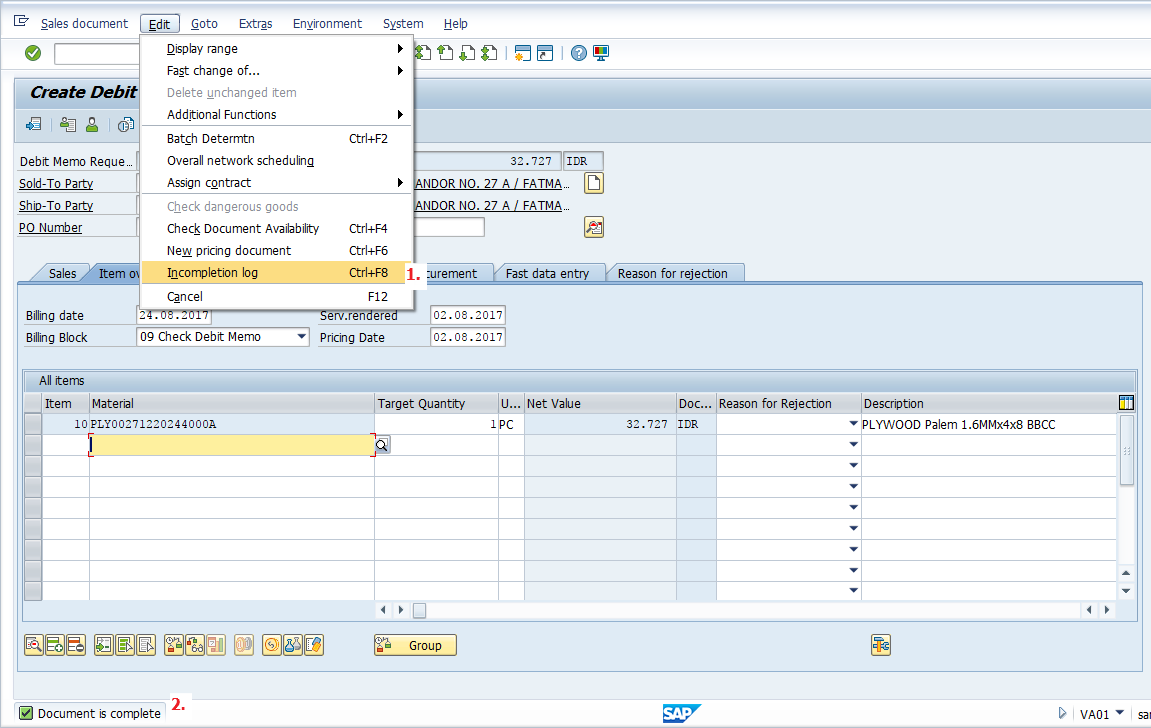
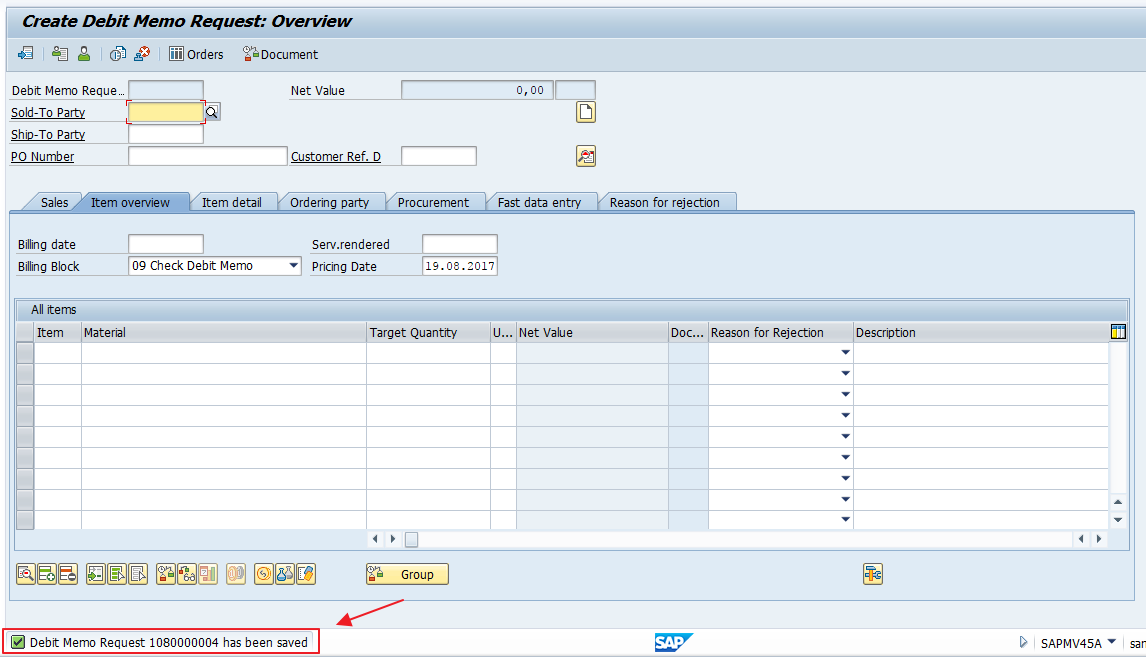
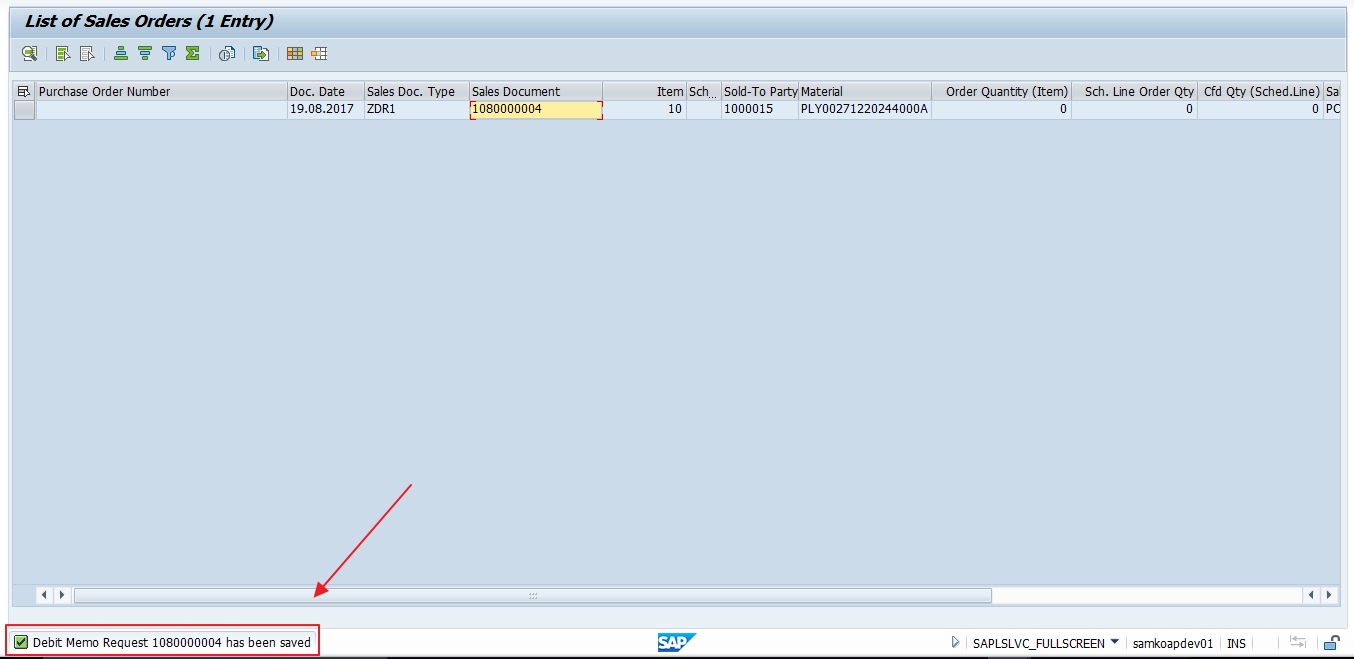
Make sure the message is as shown above, “Document is complete”. No things left behind. Click on the save button ![]() , and the system will create a debit memo request.
, and the system will create a debit memo request.
Step 2
Based on the segregation of duties profile, a marketing admin will not be authorized to release the document. Based on our scenario, only the sales manager can review the document and make a justification whether or not this new document granted to be billed to the customer.
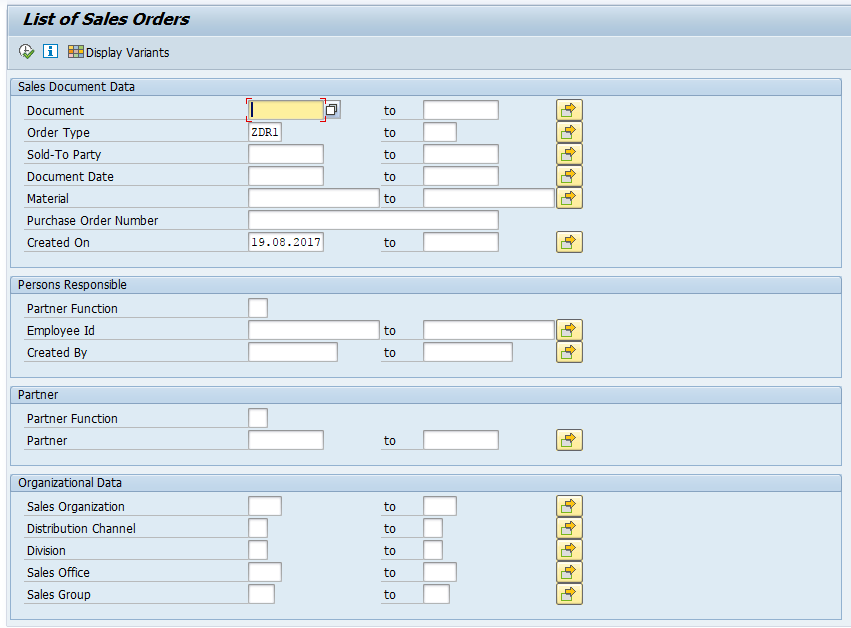
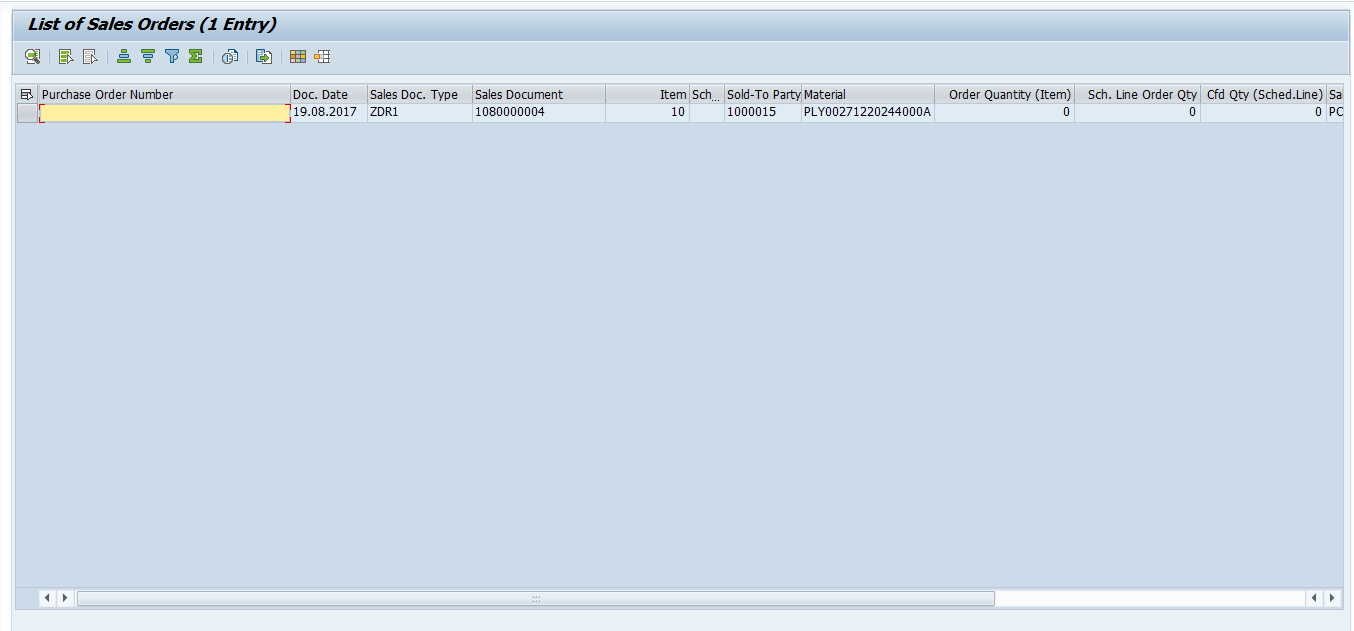
2A. The sales manager may run the standard report to look up if there is new complains document created today through VA05 transaction. In the selection screen, enter the necessary information to filter out the document specific to the debit memo request. Click the execute button ![]() .
.
2B. Double click on the document. You will be redirected to a VA02 screen automatically (or you can run the VA02 transaction separately).
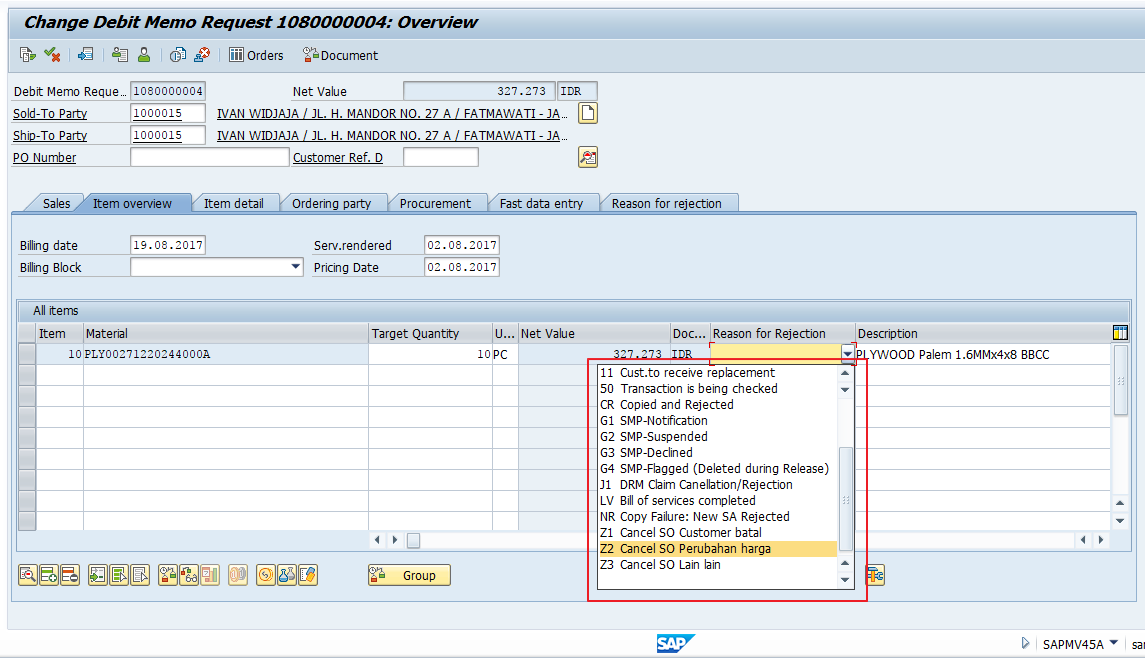
2C. The sales manager is authorized to release the debit memo request by making the “Billing Block” blank if she agrees to release it.

2D. If the sales manager decided to reject the document, he may select a value from the list of the ‘Reason for Rejection” field.
2E. Either way click “Save” button (![]() ). The system will take you to the list of documents with a notification that you have made a modification.
). The system will take you to the list of documents with a notification that you have made a modification.
Step 3
Now, we are at the final step of SAP SD Debit Memo Processing. Like any other request document, debit memo request is an order-related billing document. The released document is eligible for creation of a billing document based on it.
For this tutorial, the authorized person to create the billing is the accounting department. They will run VF01 transaction to create the debit memo.
3A. Type in the debit memo request document, select the Billing Type and enter the Billing Date. You can also leave it blank, the system will the copy it from the document creation date. Press “Enter”.
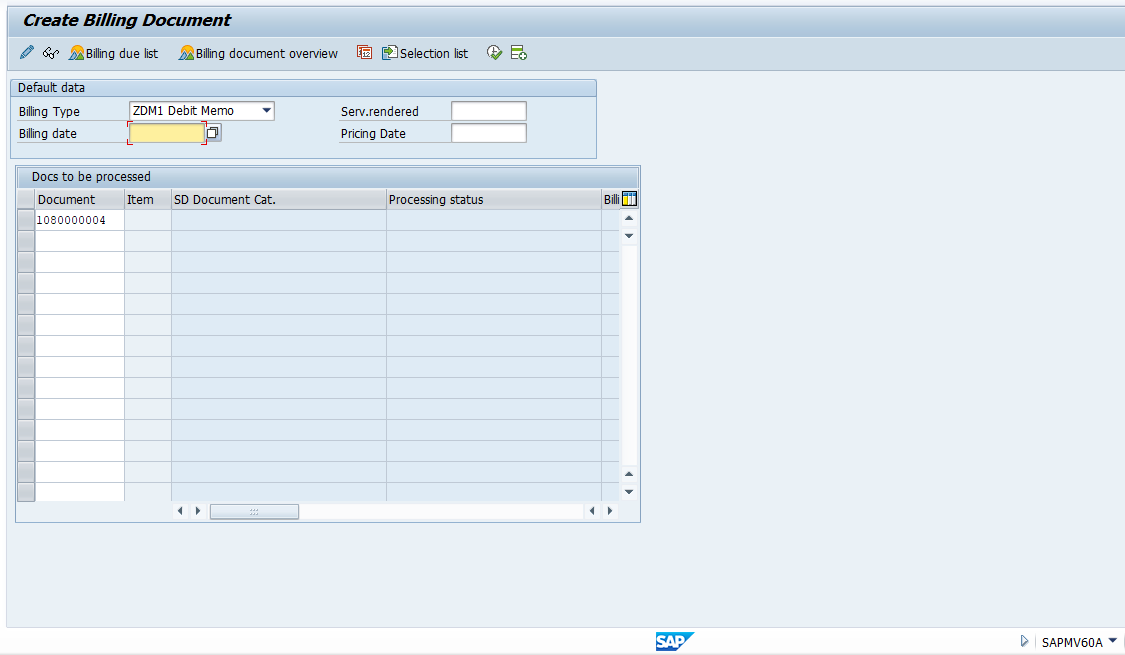
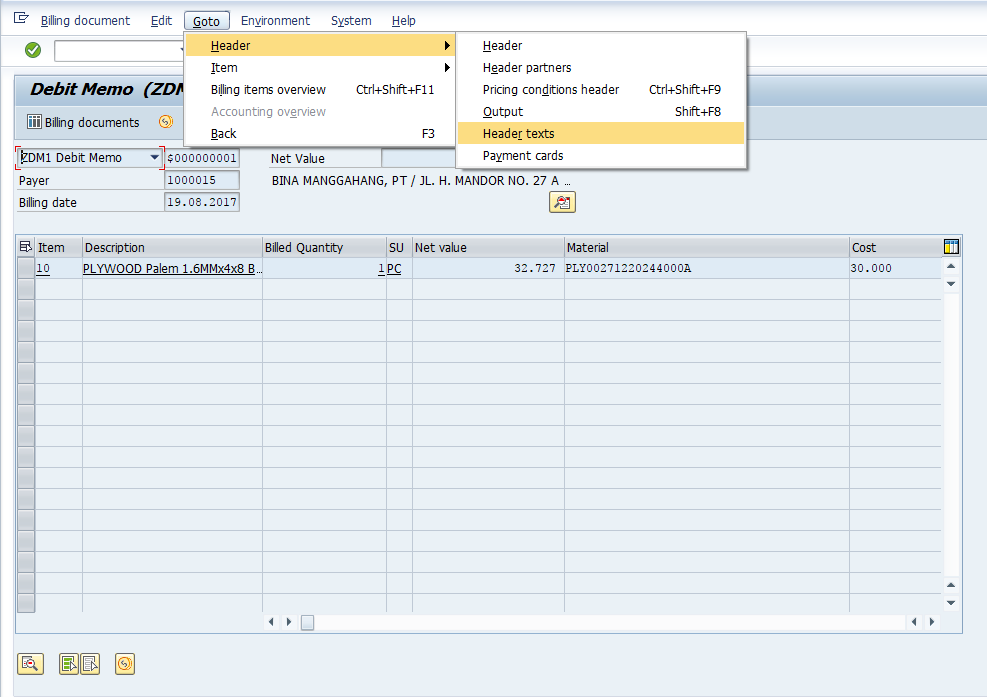
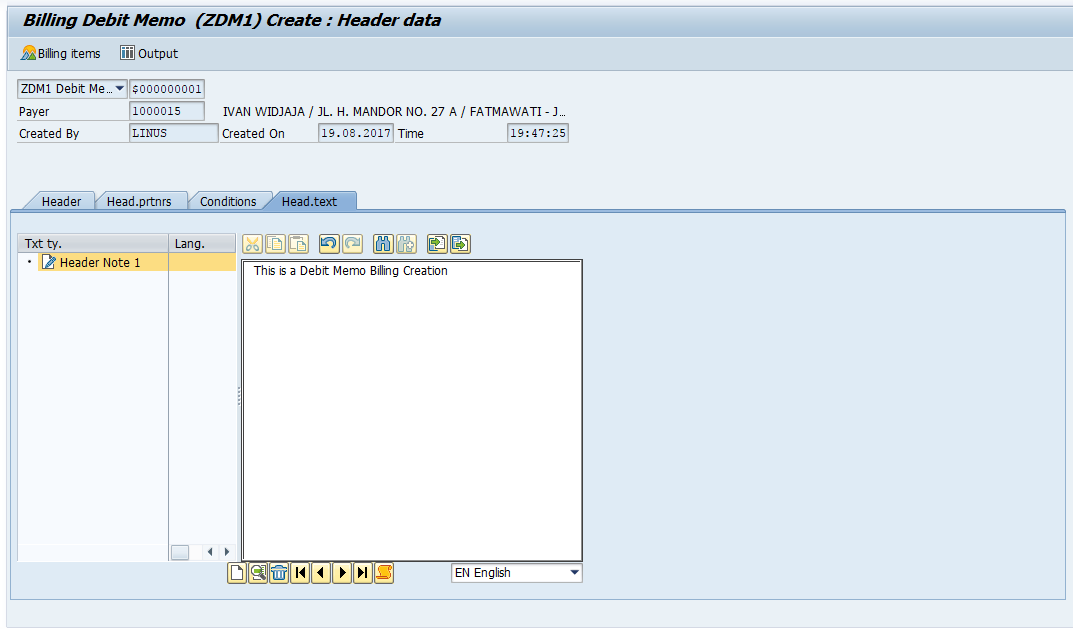
3B. Before you can save it, you might want to input text(s) for printing purposes.
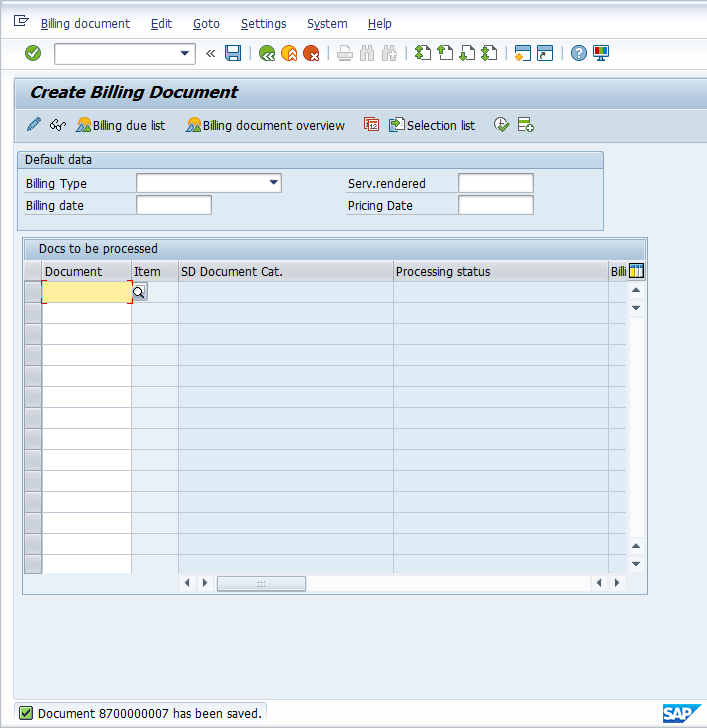
3C. Click the save button ![]() and now have a debit memo invoice that basically creates a new revenue item.
and now have a debit memo invoice that basically creates a new revenue item.
3D. As an alternative of using transaction VF01, you can also run transaction VF04 for collective billing creation. Input the necessary information to filter the debit memo request document only. Then, click on “Display Billing List” button.

3E. Click the “Collective Billing Document” button to process the debit memo request and create a debit memo.


3F. After the debit memo billing was created, we can check the generated accounting document. Run the transaction VF03 and it will show your debit memo document automatically. Click the “Accounting” button after you fill in the debit memo number in VF03.
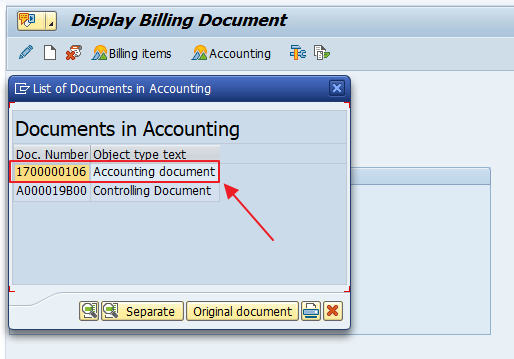
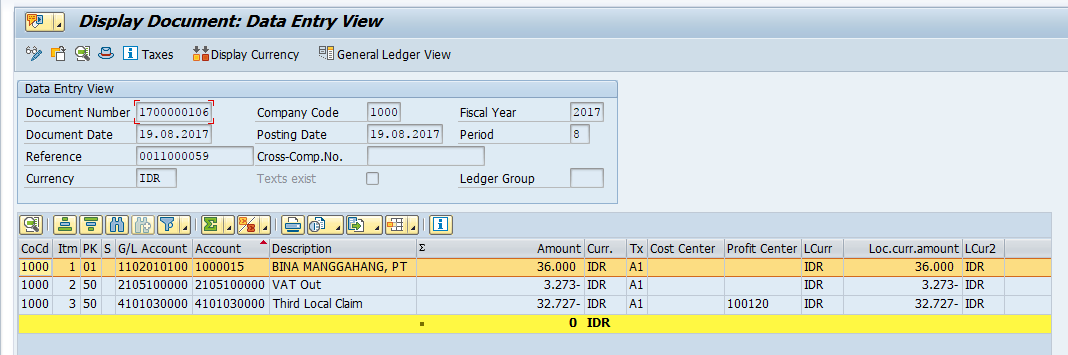
You may notice that the accounting entry for the debit memo is the same as in a normal invoice. This is because you simply add a new revenue line item for this customer.
Common Problem with SAP SD Debit Memo Processing
1. My client’s business process requires the pricing for debit memo to be entered manual in a different condition type (instead of copying it from a billing document). How to achieve that?
First, you need create a new condition type that will be assigned to the pricing procedure. Then, in the debit memo request, go to the item tab “Conditions” and delete the referenced base price. Next, enter the manual condition type (that you created for this purpose) with a new amount.
2. I am going to create a debit memo without reference to a previous billing document. Is it possible?
Yes. Go to the configuration for the debit memo request document type (transaction VOV8). Set the “Reference Mandatory” field blank.
—
Did you like this tutorial? Have any questions or comments? We would love to hear your feedback in the comments section below. It’d be a big help for us, and hopefully it’s something we can address for you in improvement of our free SAP SD tutorials.
Navigation Links
Go to next lesson: SAP SD Return Order Process
Go to previous lesson: SAP SD Credit Memo Processing
Go to overview of the course: SAP SD Training
Great Overview and very professional . content , sequence and language top class
Absolutely agree.
Is it possible to create a delivery order at this proccess? That is: Debit Memo Request -> Delivery Order -> Debit Memo. We need this scenario to fix a Return. Thanks!
Great job !!!
Very useful thanks.