
 Welcome to the tutorial on SAP Time Constraint Class. We explained the concept of Time Constraints in a separate tutorial within the Personnel Administration module. The concept of SAP Time Constraint Class is related to it, however it is applicable only to Time Management infotypes.
SAP Time Constraint Class – Definition
Time Constraint Classes are used to specify how the system reacts to collisions in time data. A collision implies that there is an existing record of a time infotype for an employee for a certain period, and the user attempts to create another record of a time infotype for the same employee for the same period or a part of the same period.
For example, assume that an Absence record of type “Vacation” has been entered for an employee for the period 6th February to 20th February 2017.
A user then tries to create an Absence record of type “Sickness” for the same employee for the period 6th February to 7th February.
Now, it is only logical that the employee cannot be both sick and on vacation at the same time, that is on 6th and 7th February. This is precisely what is meant by the term “Collision”. So how should the system react to this collision? Should the system allow the creation of the new record, or should it throw an error?
The answer can vary based on the type of time information and hence the system’s reaction is customizable. This customization is achieved with the help of Time Constraint Classes. We will learn how this is done later in this tutorial.
Example
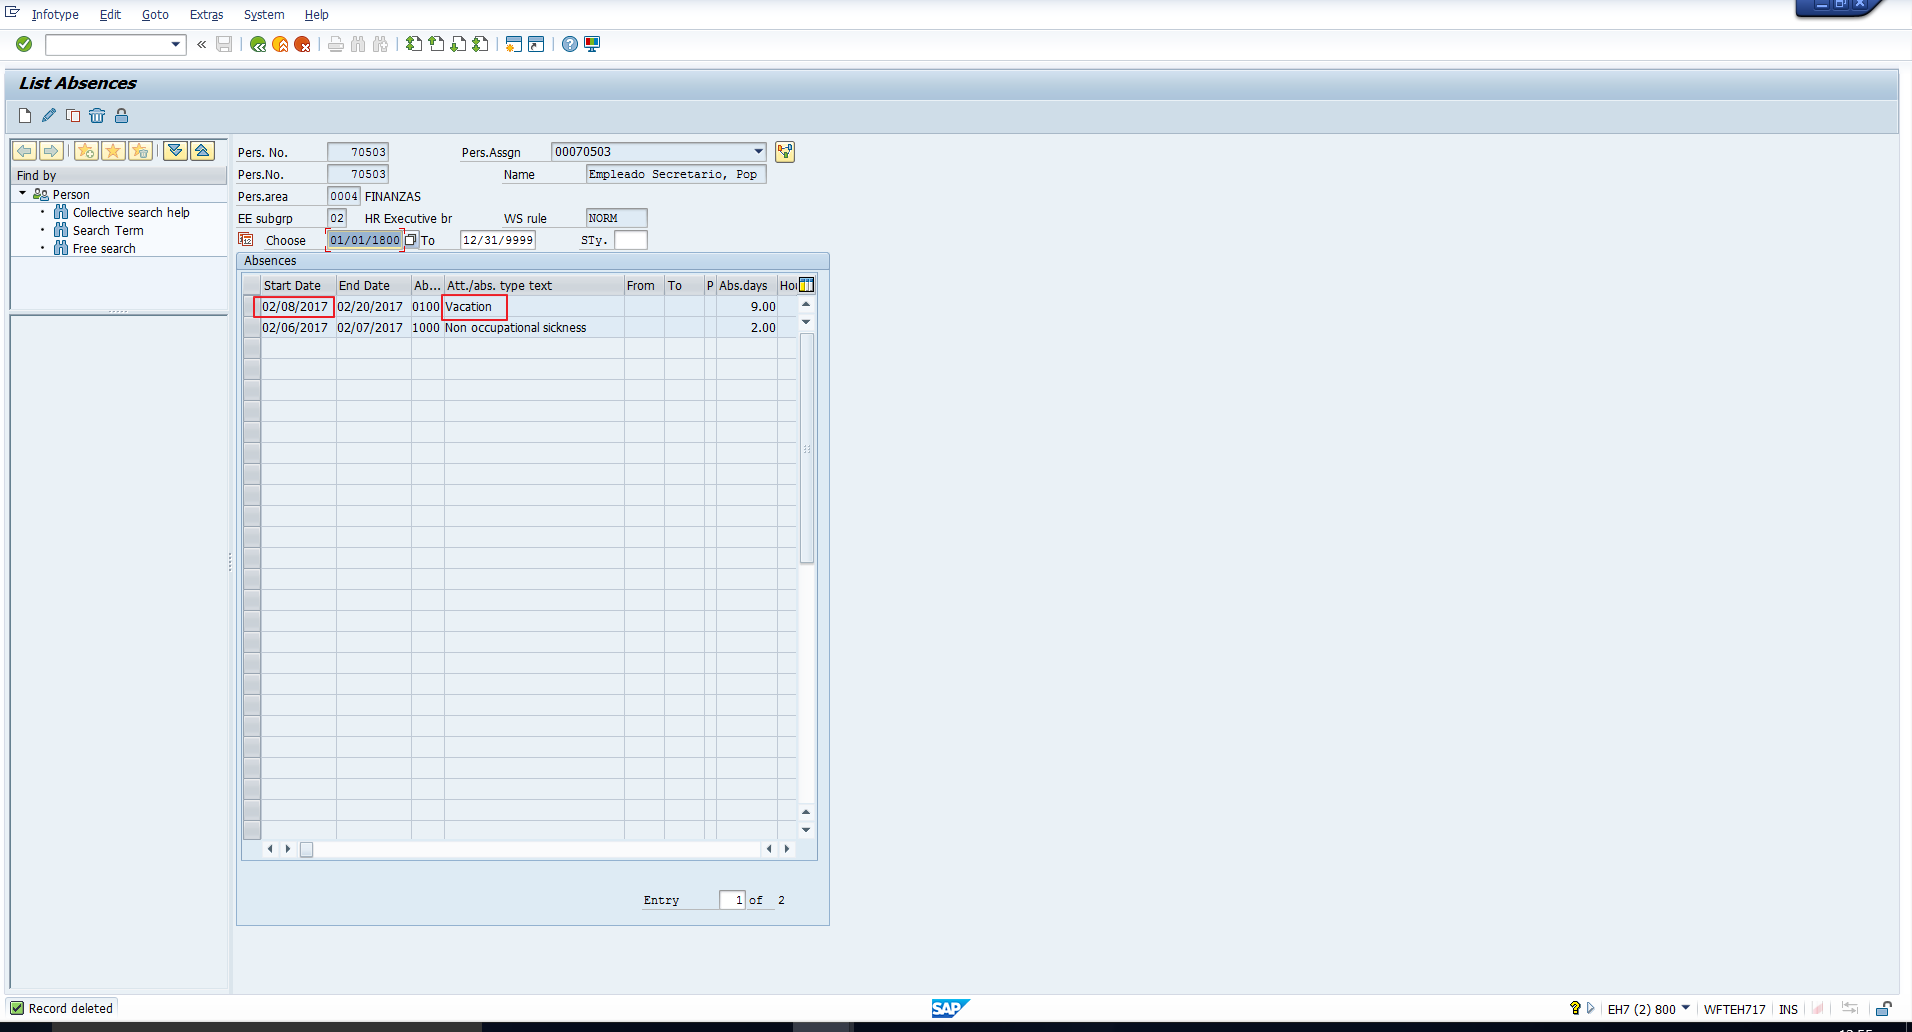
Let us demonstrate the above example in SAP. First, using transaction code PA30, we can see the existing “Vacation” record for an employee in the Absences infotype. This has been captured in Figure 1. You can see that the validity period of this record is from 6th February 2017 to 20th February 2017.

Next, let us attempt to create a record of the Absences infotype, subtype “Non occupational sickness” for the same employee for the period 6th February to 7th February 2017. You can refer to the screenshot in Figure 2.
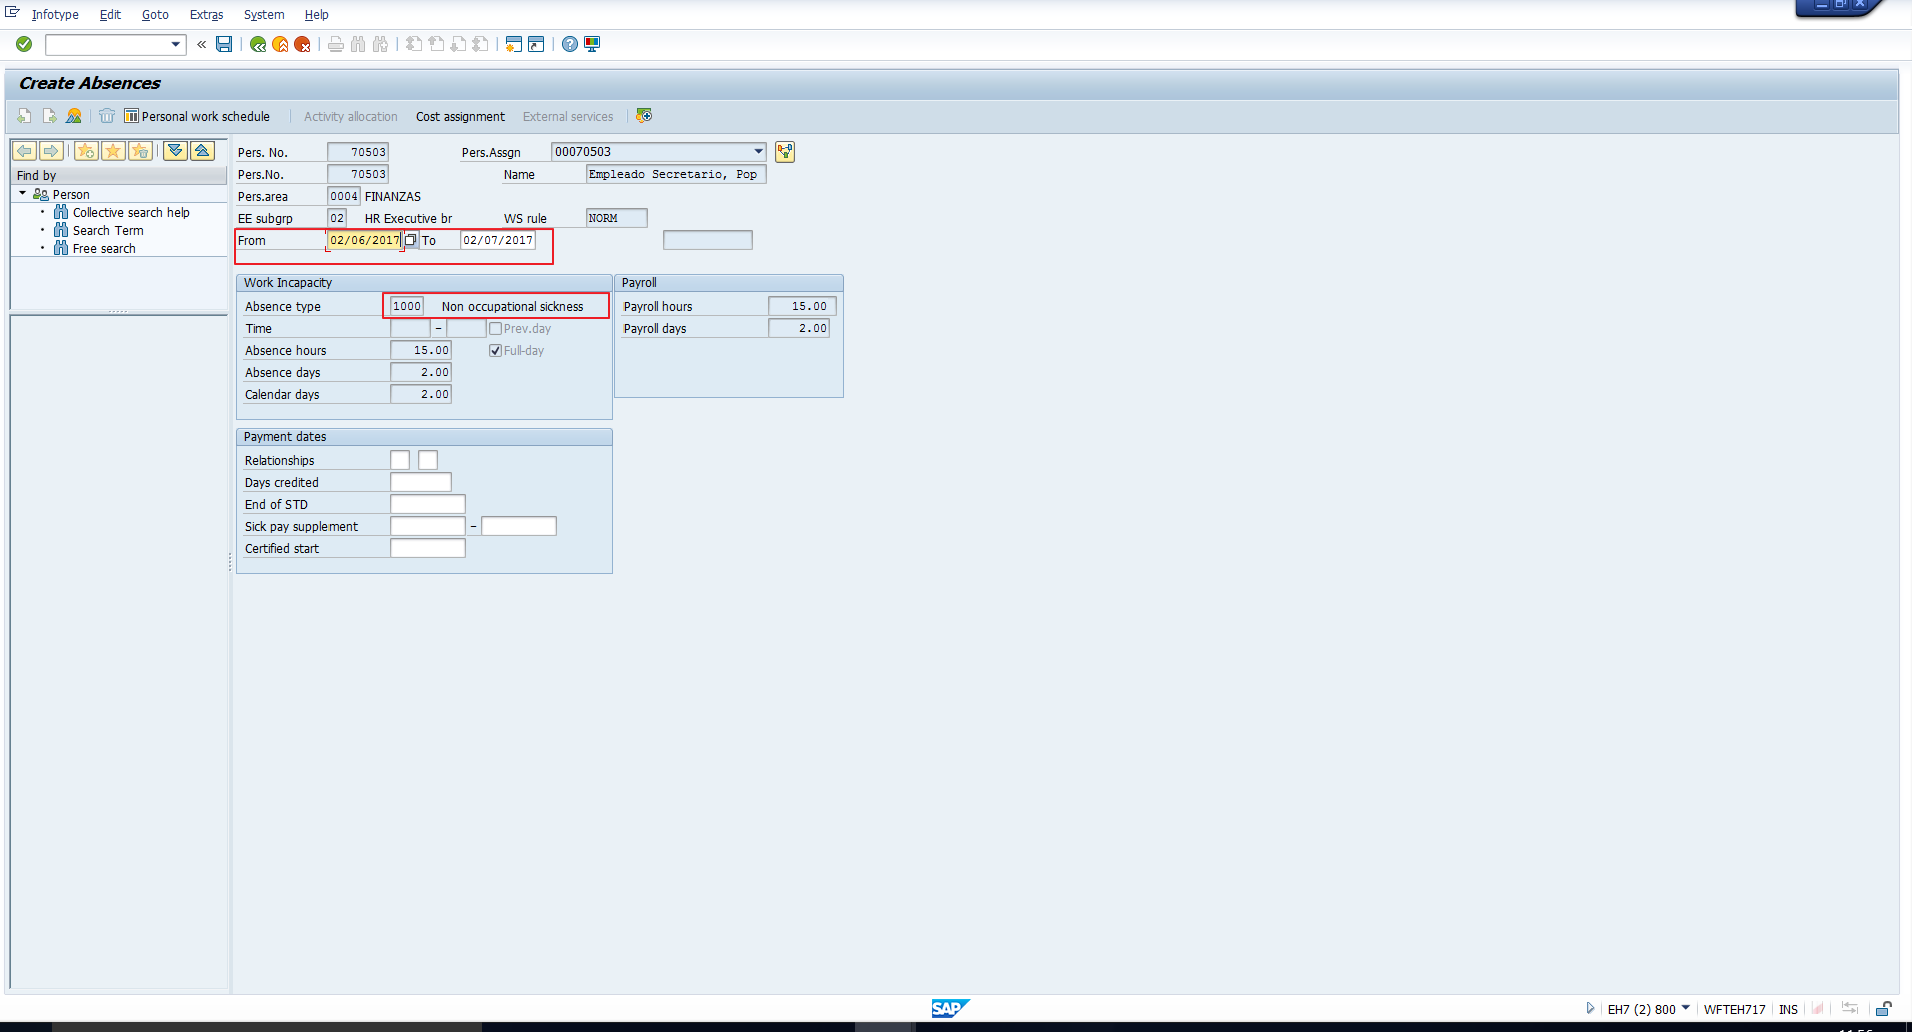
Note that there is an overlap between the new record and the already existing “Vacation” record. Let us see how the system reacts to this collision.
The pop-up screen depicted in Figure 3, “Collision of Time Infotypes” is thrown by the system.
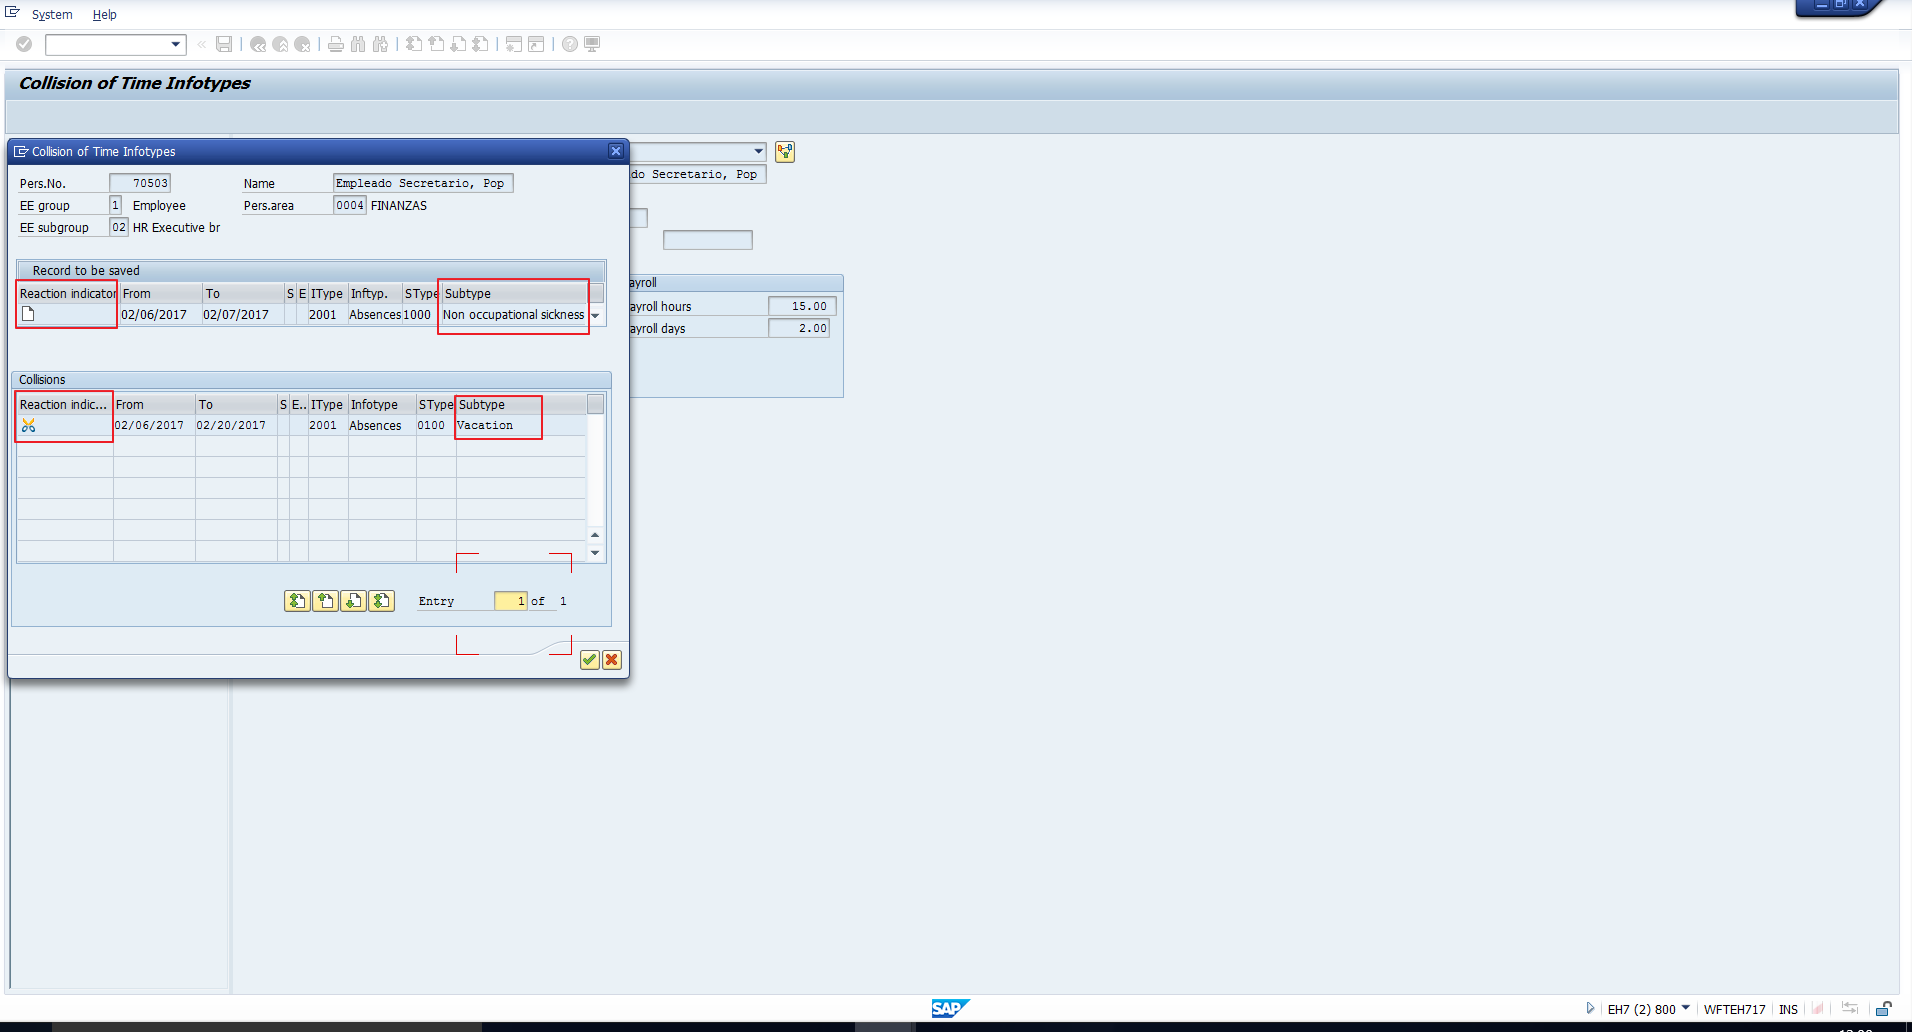
Let us analyze the contents of this screen. In the top section, Record to be saved, you can see the details of the “Non occupational sickness” record that we are attempting to save. In the lower Collisions section, you can see the details of the pre-existing time data, in this case the “Vacation” absence type. Now have a look at the first column, Reaction indicator, which is present in both sections.
The Reaction indicator specifies the System reaction to the collision. The ![]() symbol alongside the “Non occupational sickness” record, implies that the new record will get created.
symbol alongside the “Non occupational sickness” record, implies that the new record will get created.
On the other hand, the ![]() symbol adjacent to the “Vacation” record, implies that the existing “Vacation” record will get delimited.
symbol adjacent to the “Vacation” record, implies that the existing “Vacation” record will get delimited.
Note that this system behavior is in accordance with the Time Constraint classes assigned to the “Non occupational sickness” and the “Vacation” subtype of the Absences infotype. We will see this configuration in the next section of the tutorial.
Let us hit the Enter button to accept these changes. The system now throws a warning message, “Record valid from 02/06/2017 to 02/20/2017 delimited at start”, as illustrated in Figure 4.
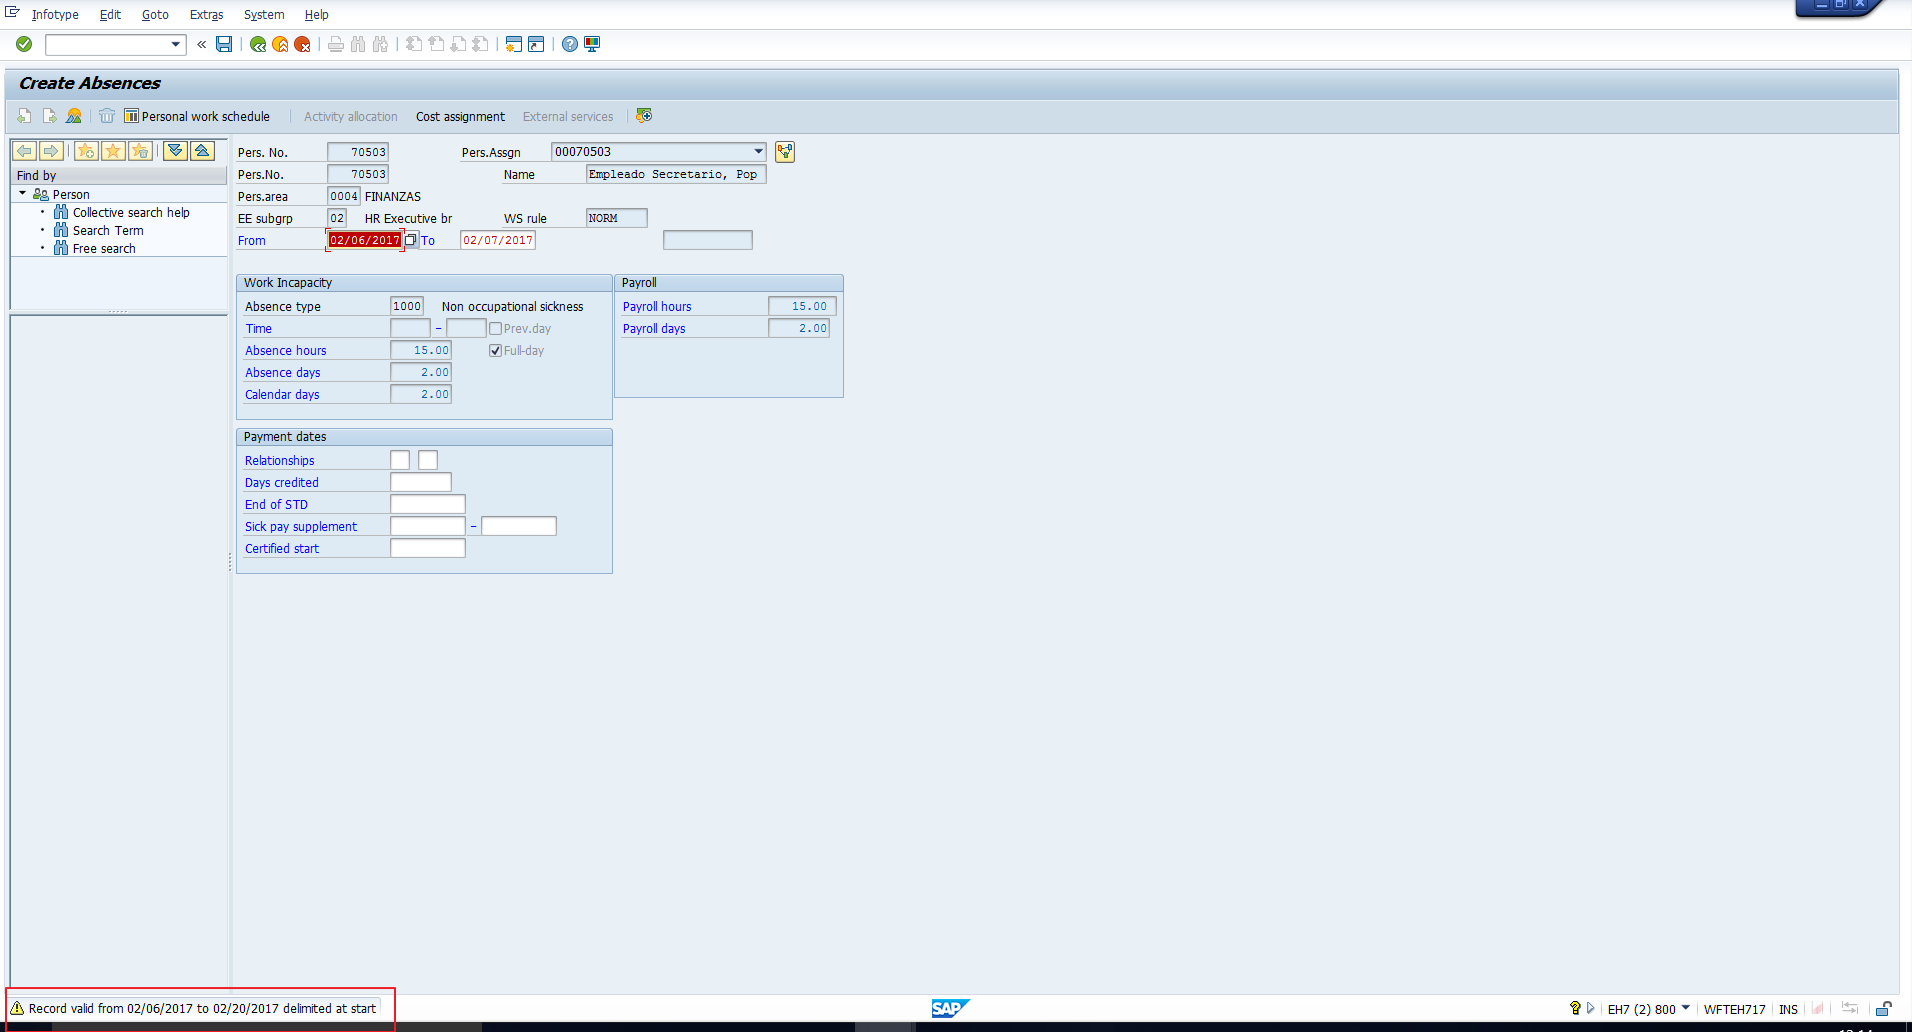
This warning message confirms the system reaction that we saw on the previous screen that the “Vacation” record will get delimited to accommodate the new “Non occupational sickness” record that we are creating.
Hit Enter to proceed, this takes you to the screen in Figure 5.
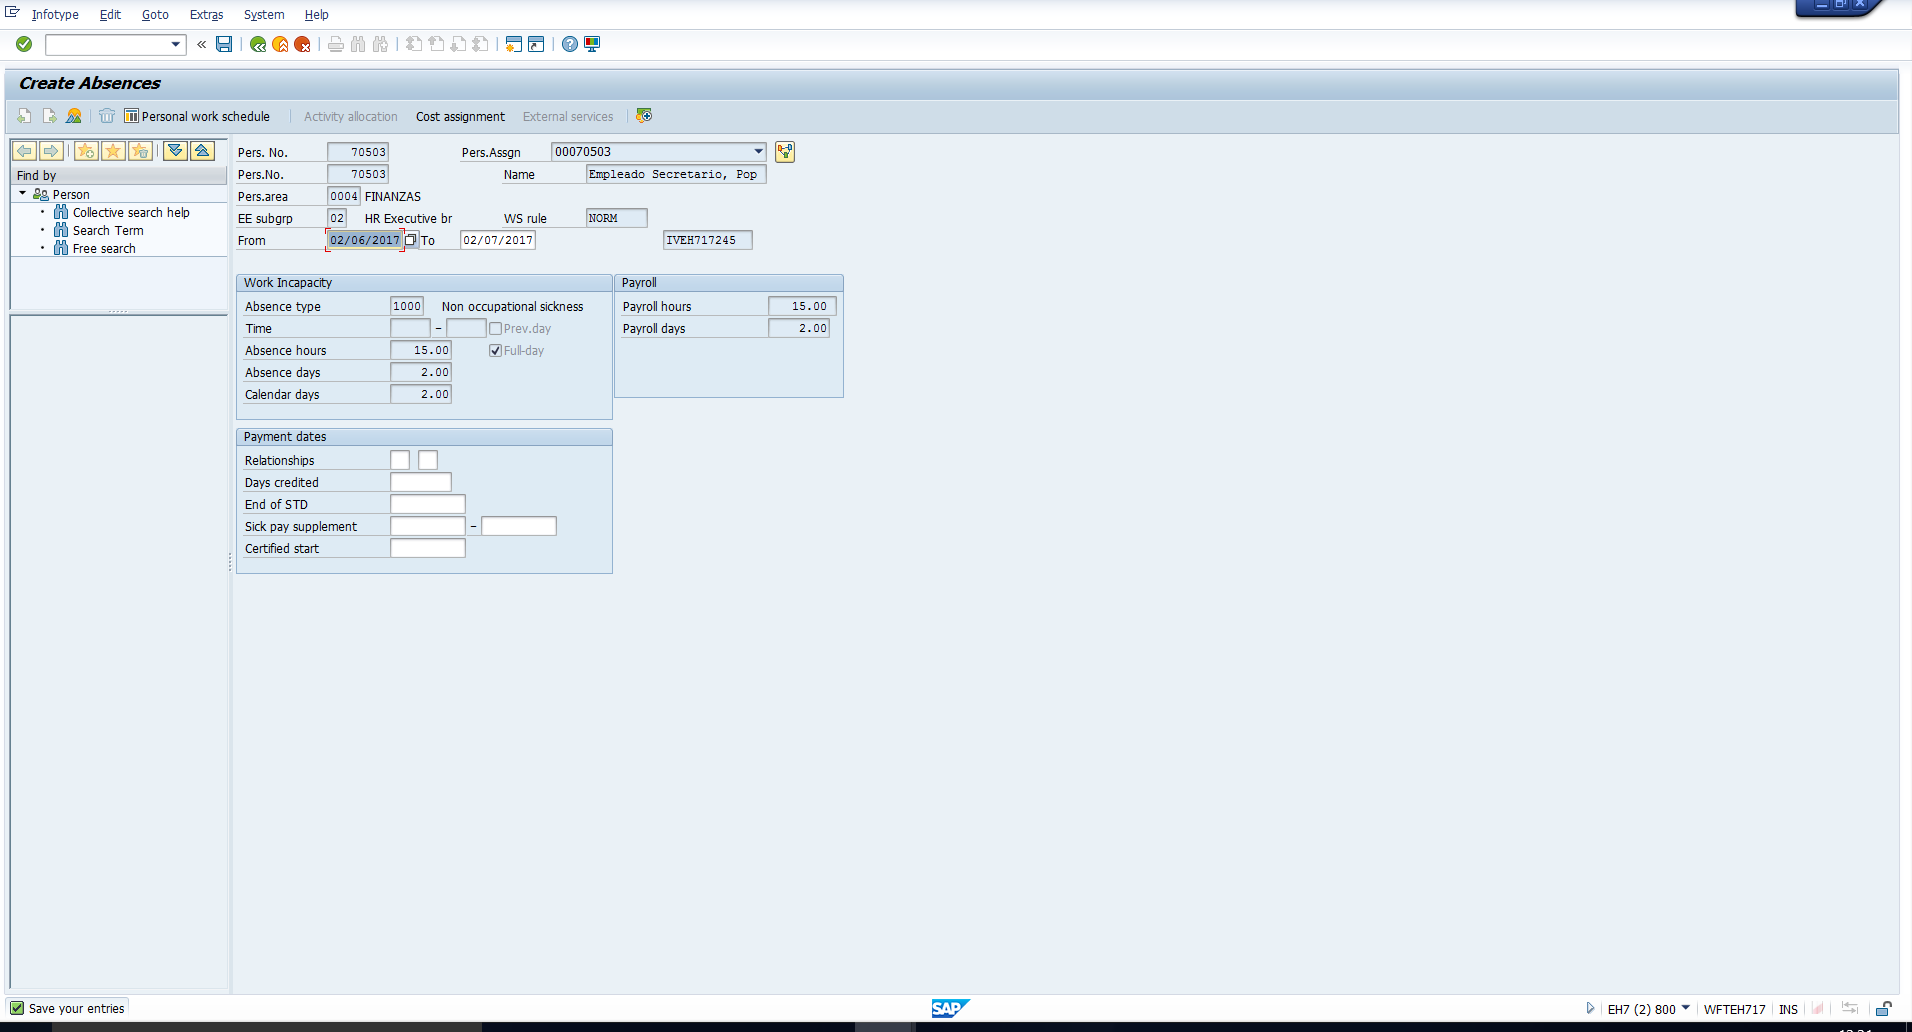
Click on the Save icon to save the changes.
We can now view the modified time data in Figure 6. As is evident from the screenshot, the start date of the “Vacation” absence record has been changed from 6th February 2017 to 8th February 2017, and the new “Non occupational sickness” absence has been created from 6th February to 7th February 2017.
Configuration of SAP Time Constraint Class
In this section, we will analyse the configuration that drives the above demonstrated system behaviour. The system reaction to collision between time data records is configured through two steps:
- Assign SAP Time Constraint class to Time infotypes and subtypes
- Specify the System Reaction to overlapping Time infotypes
We will explain these steps with reference to the example from the previous section.
Assign SAP Time Constraint Class to Absence Type
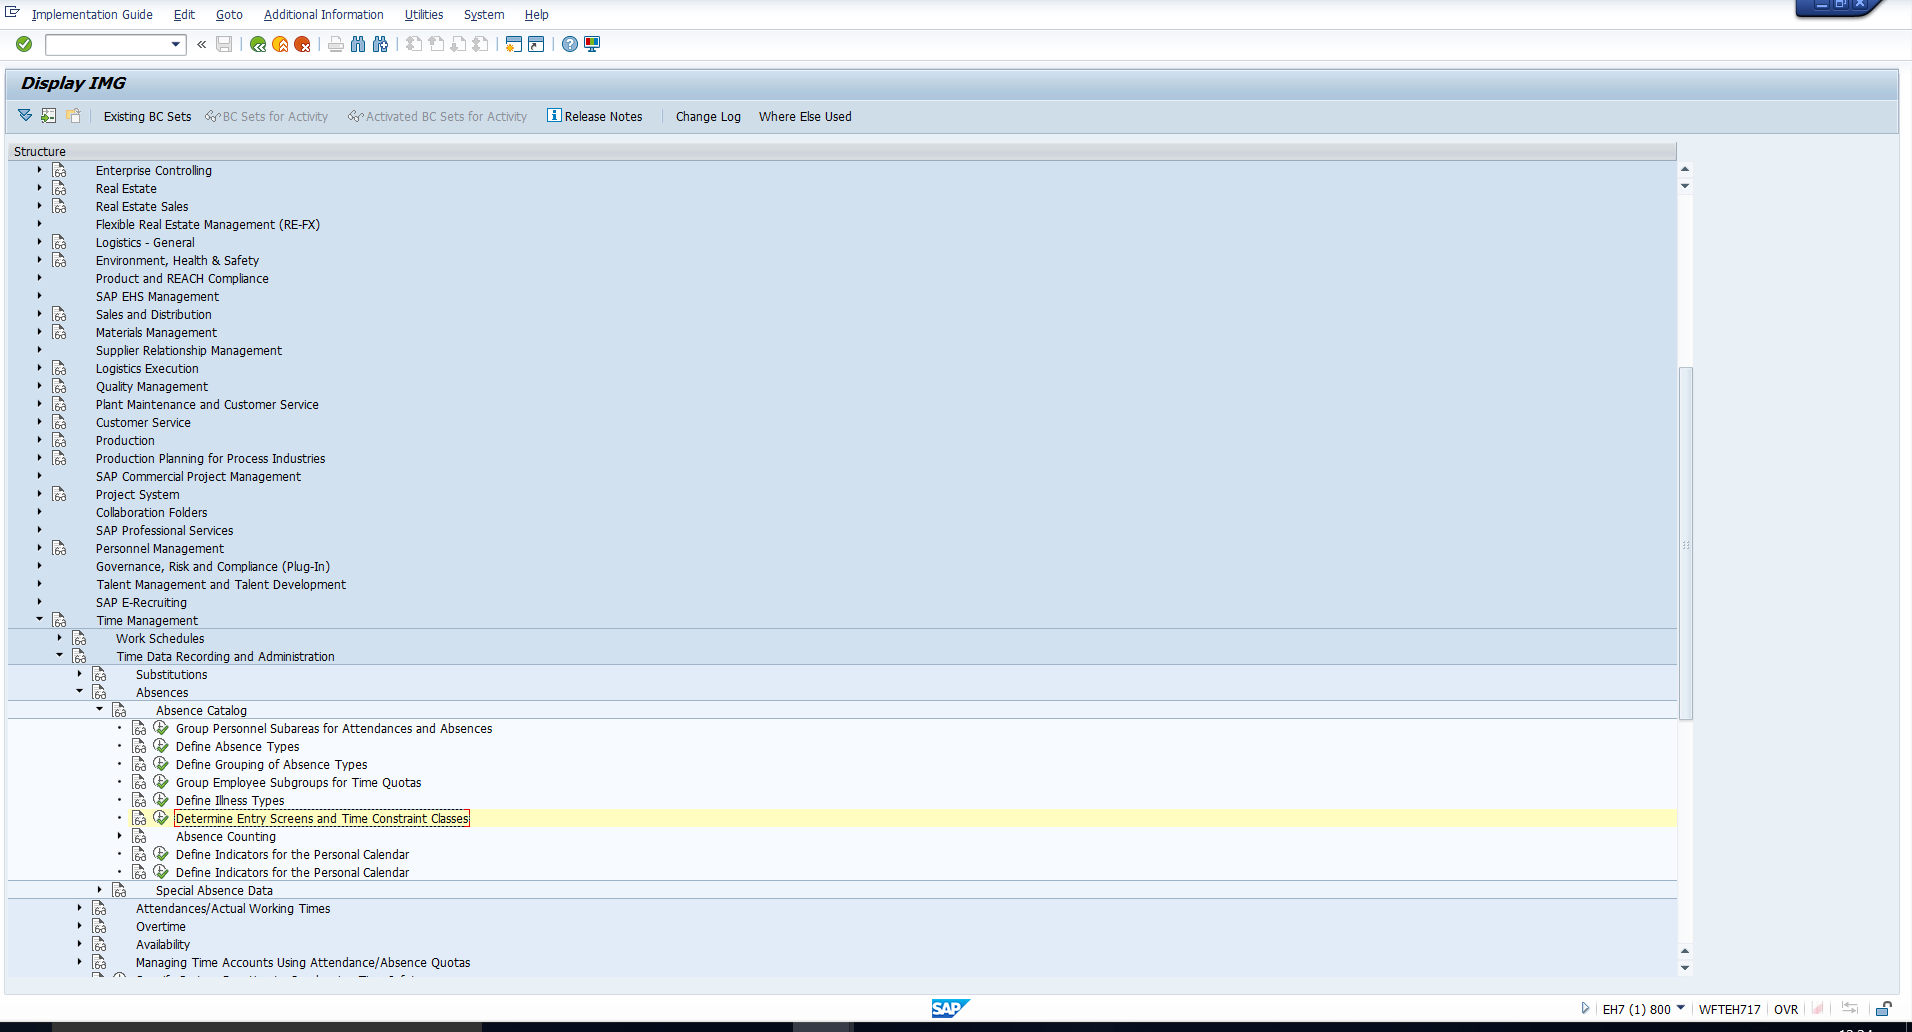
To assign SAP Time Constraint class to an Absence type, use transaction code SPRO and follow the path below:
Time Management – Time Data recording and Administration – Absences – Absence catalog – Determine Entry screens and Time Constraint classes
This path has been illustrated in Figure 7.
Executing this activity takes you to the table in Figure 8, where you can search for the desired Absence types and then select the corresponding rows. We have selected the two rows corresponding to the two absence types relevant to our example.
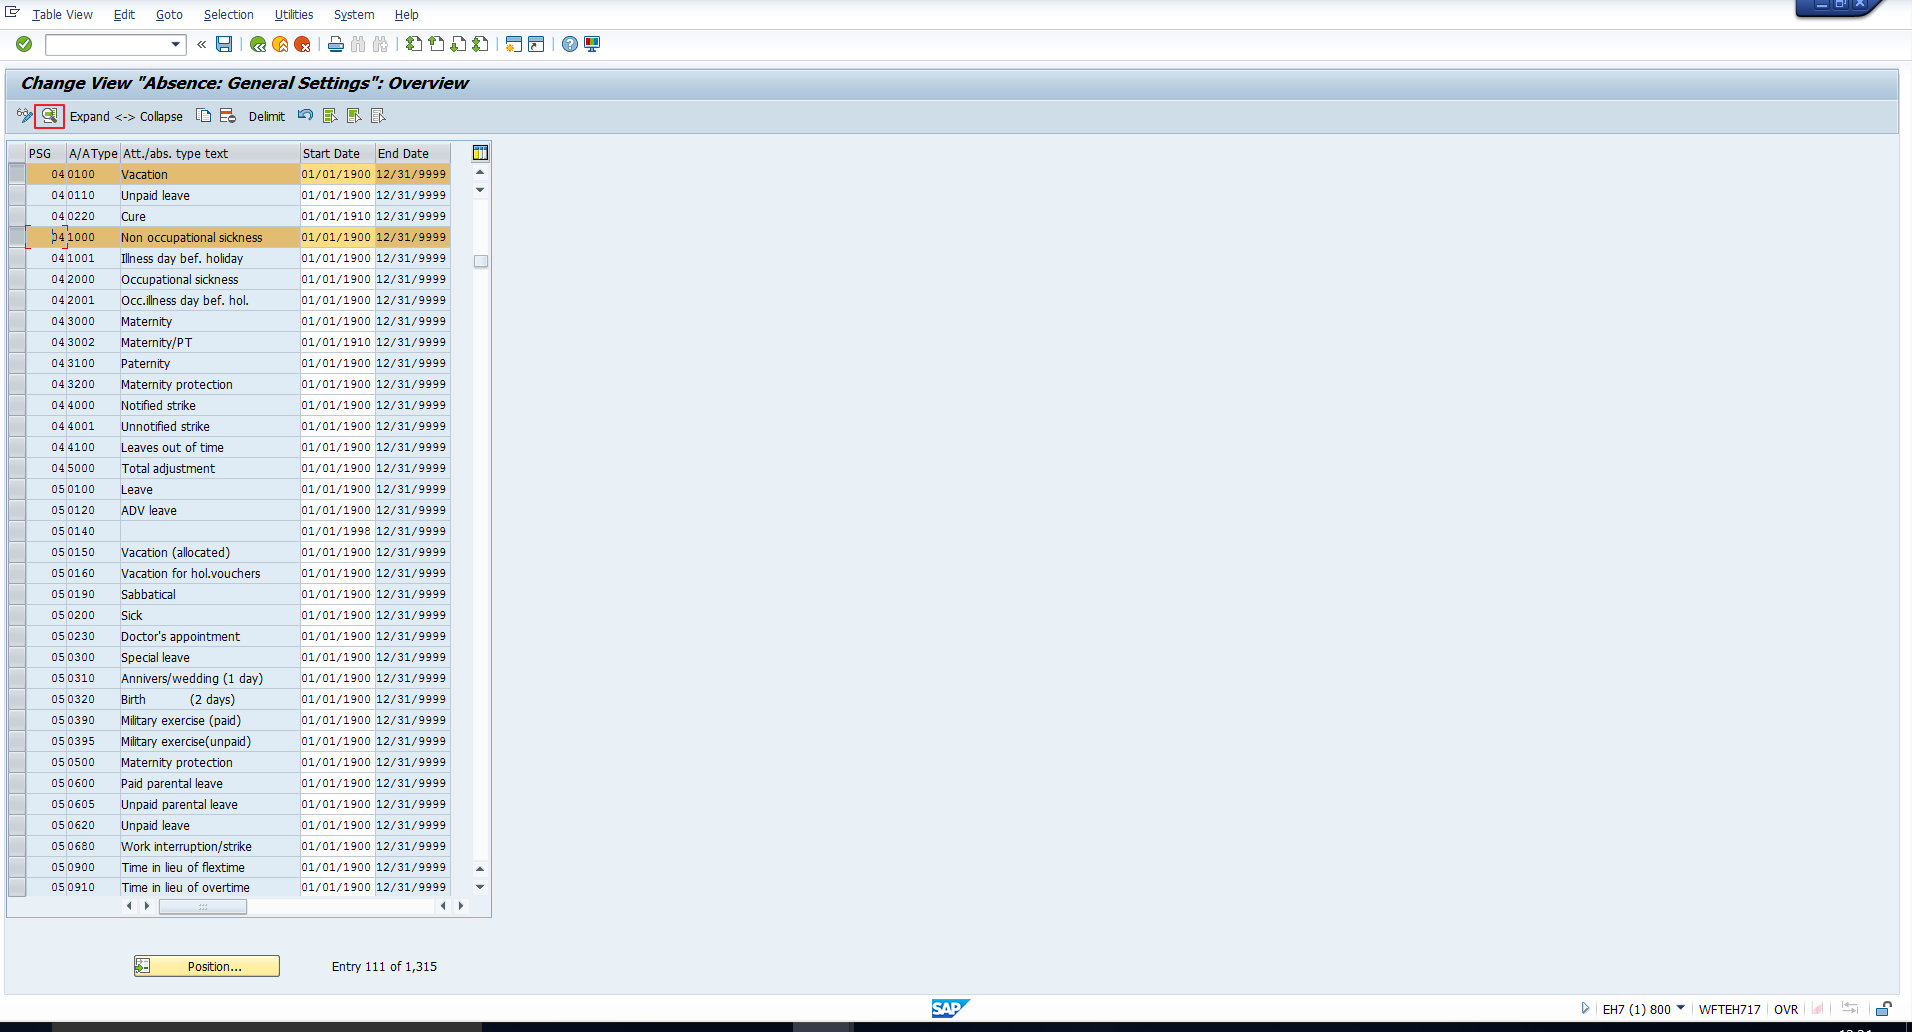
Then click on the Details icon that has been highlighted in the same screenshot. In the Details view, you can check SAP Time Constraint class that has been assigned to each Absence type.
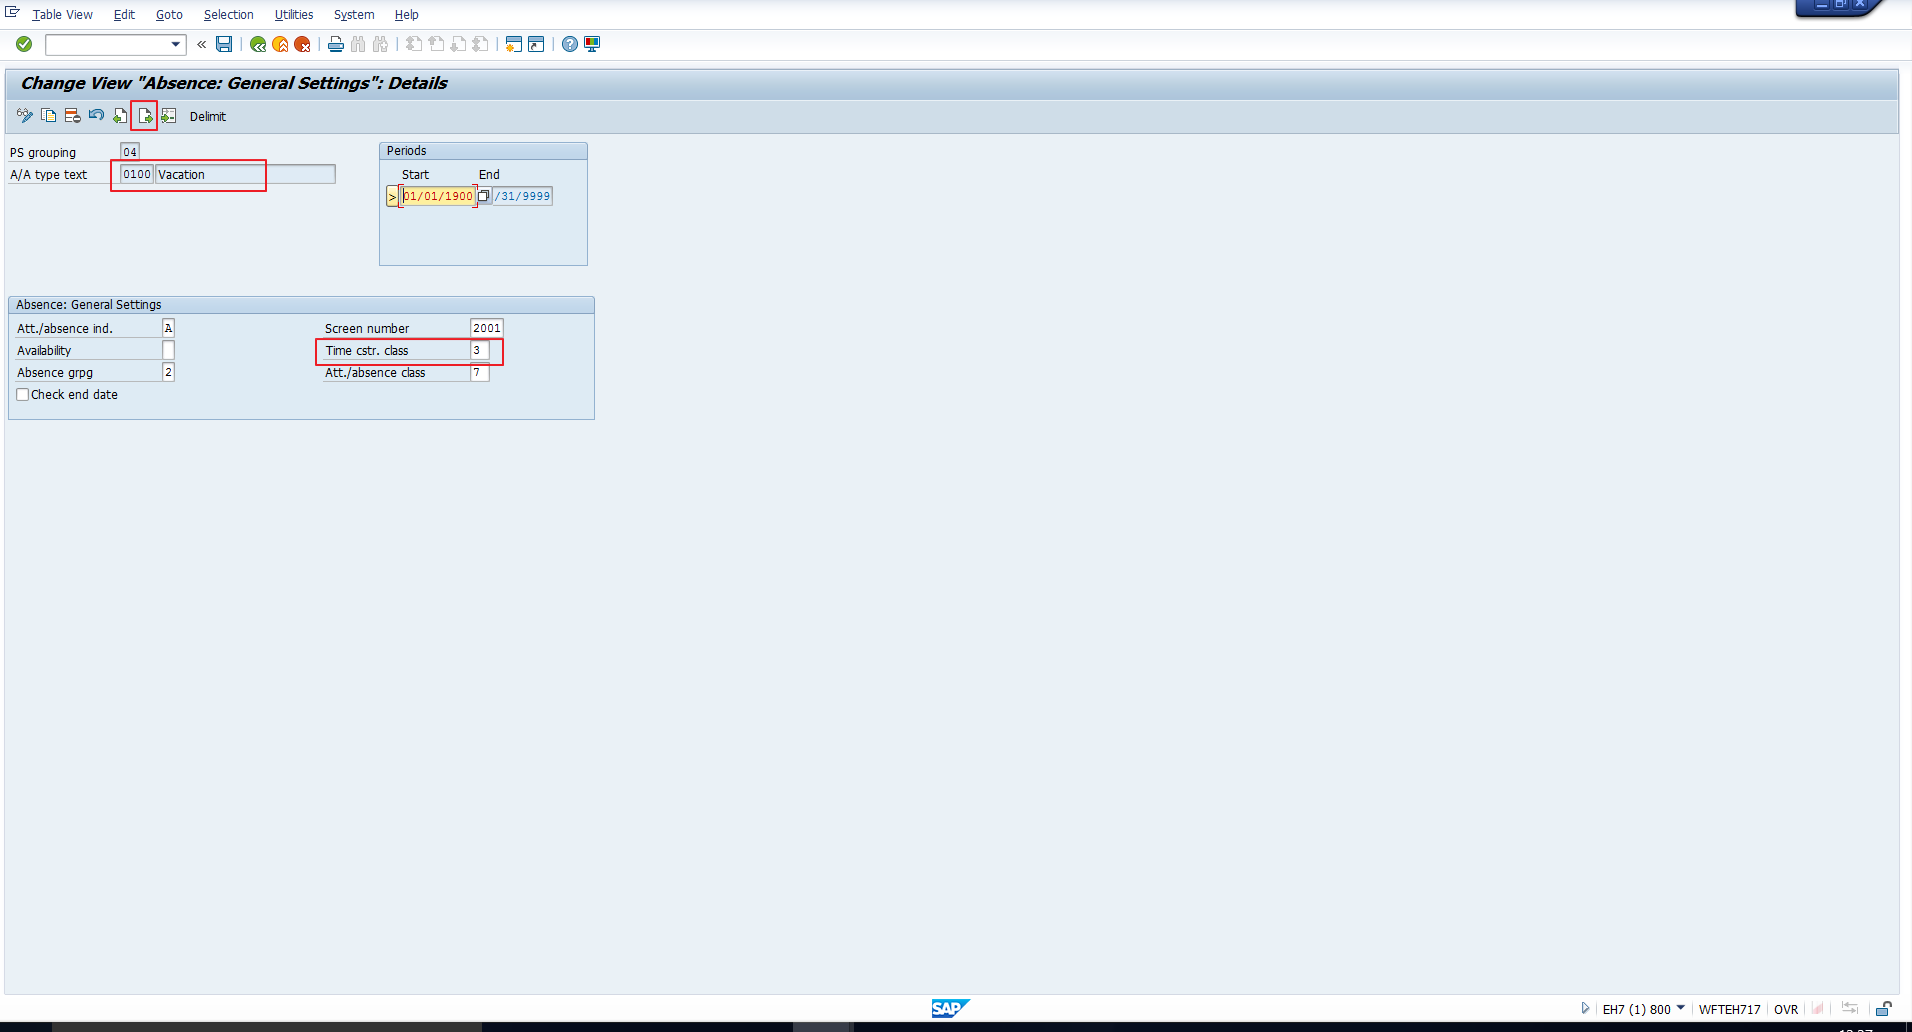
In Figure 9, you can see that SAP Time constraint class ‘3’ has been assigned to the “Vacation” absence type.
You can check the details of the next selected absence type by clicking on the Next entry icon that has been highlighted in Figure 9. This will take you to the screen captured in Figure 10. Here you can see that SAP Time constraint class ‘2’ has been assigned to the “Non occupational sickness” absence type.

Specify System Reaction to Overlapping Time Infotypes
The next step is to specify the system reaction based on SAP Time constraint classes. To carry out this configuration, follow the path below:
Time Management – Time Data recording and Administration – Specify System reaction to overlapping Time infotypes
This path has been illustrated in Figure 11.
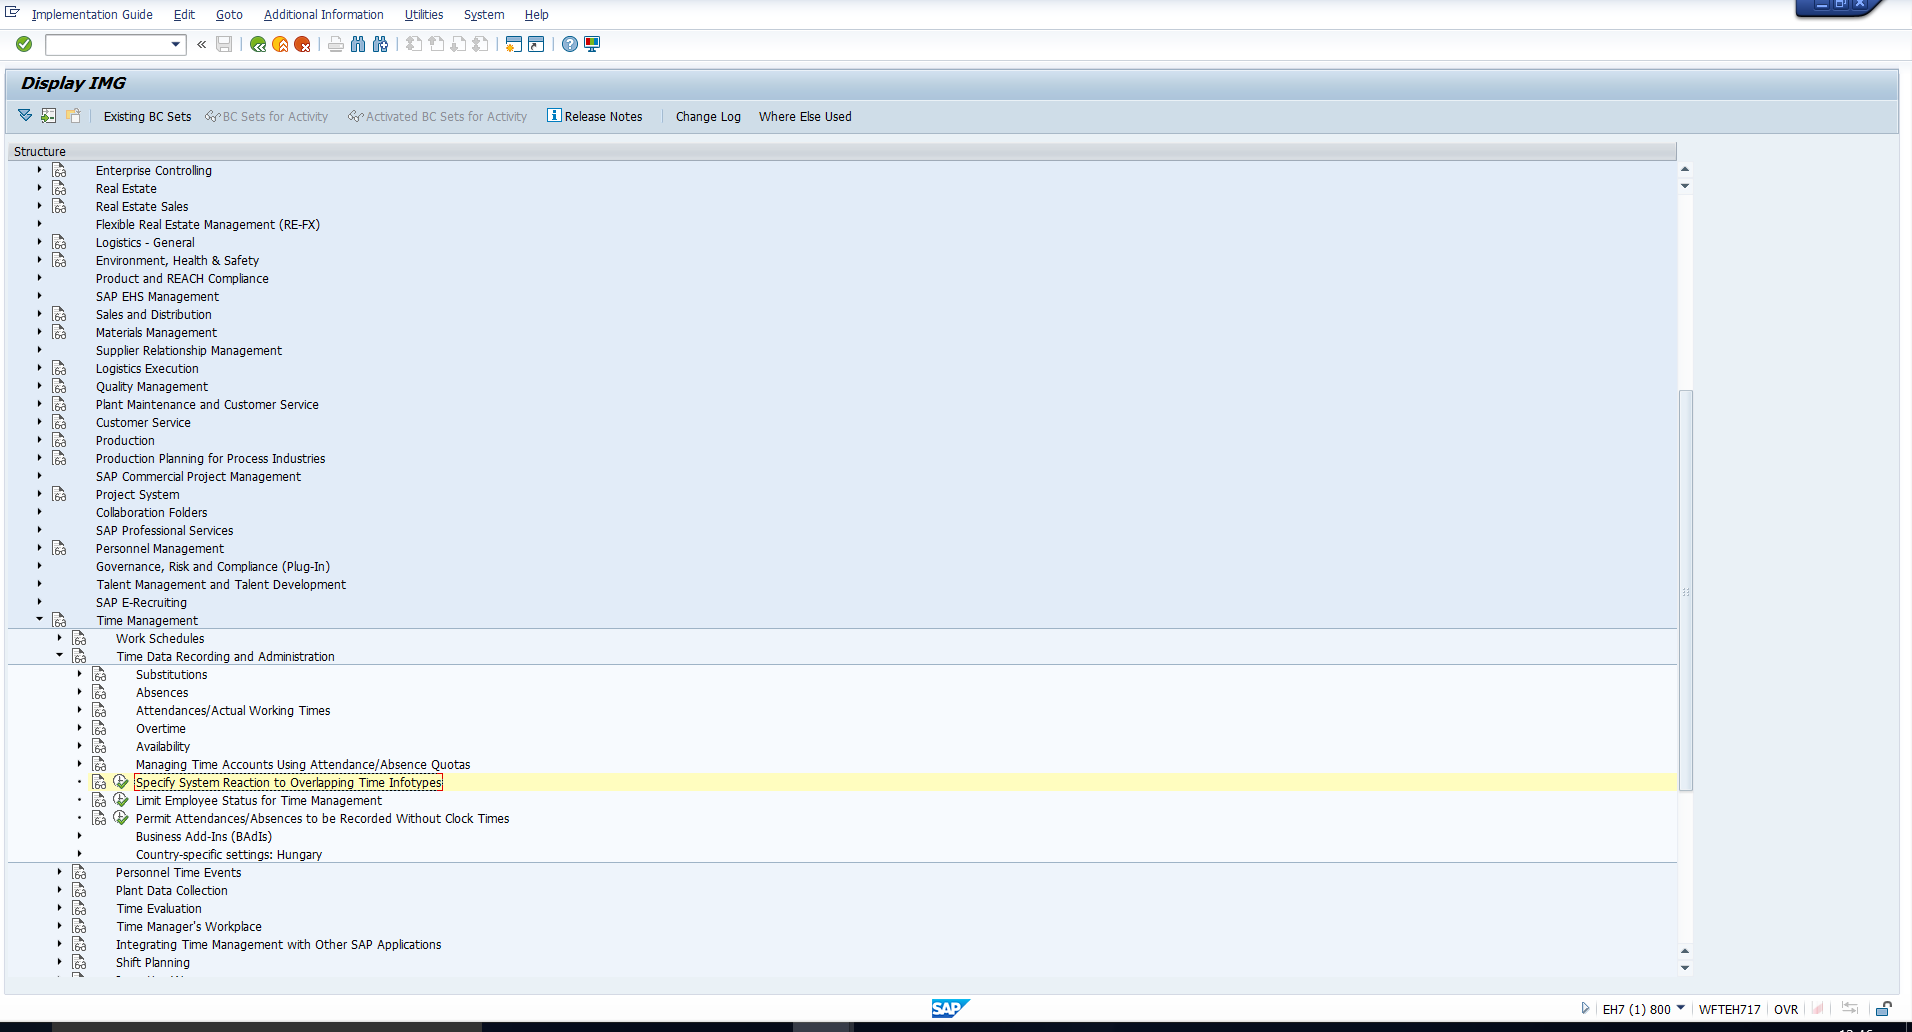
When you execute this activity, you will reach the screen in Figure 12.
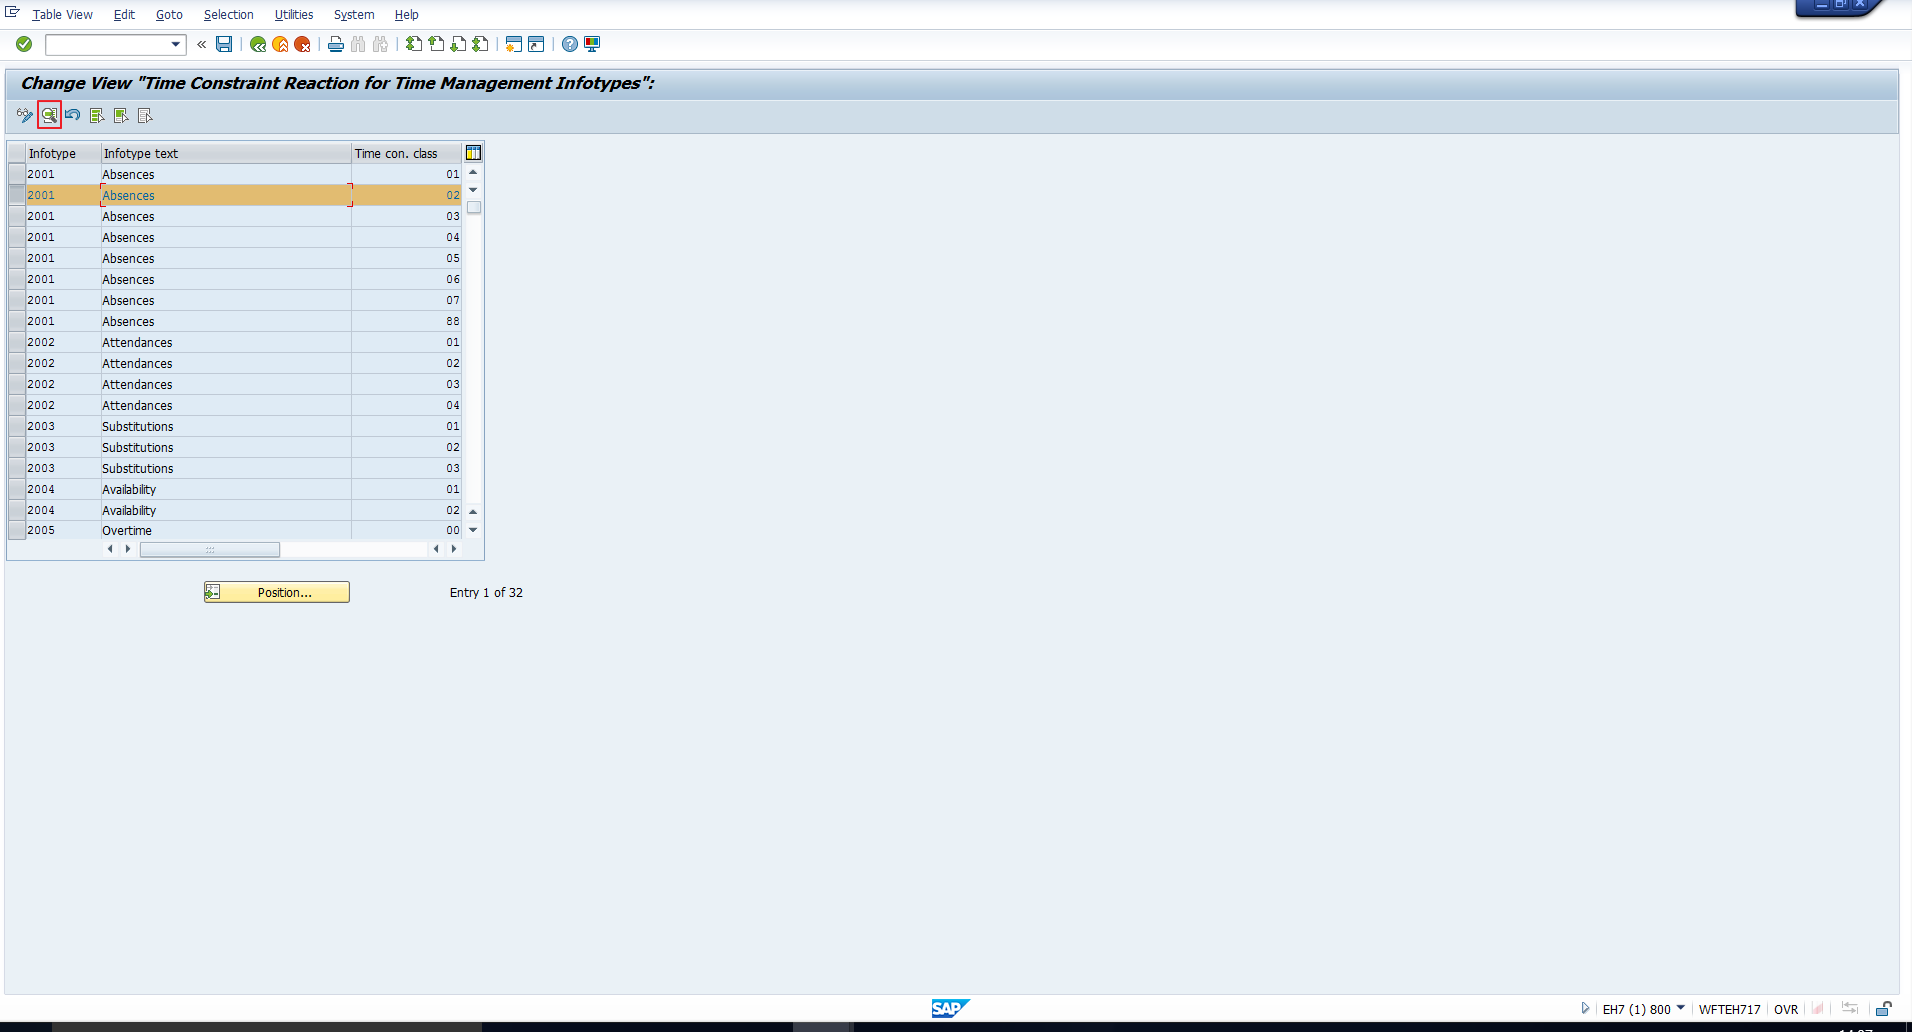
This view lists out every possible combination of Time management infotype and SAP Time constraint class of the record that is being newly created.
In our example, we are creating a record of the Absences infotype, “Non occupational sickness” absence type. We have seen in the previous configuration step that the “Non occupational sickness” absence type has been assigned Time constraint class ‘2’. Hence select the row with Infotype 2001 and Time Constraint class ‘02’. Click on the details icon that has been highlighted in Figure 12.
This takes you to the table in Figure 13.
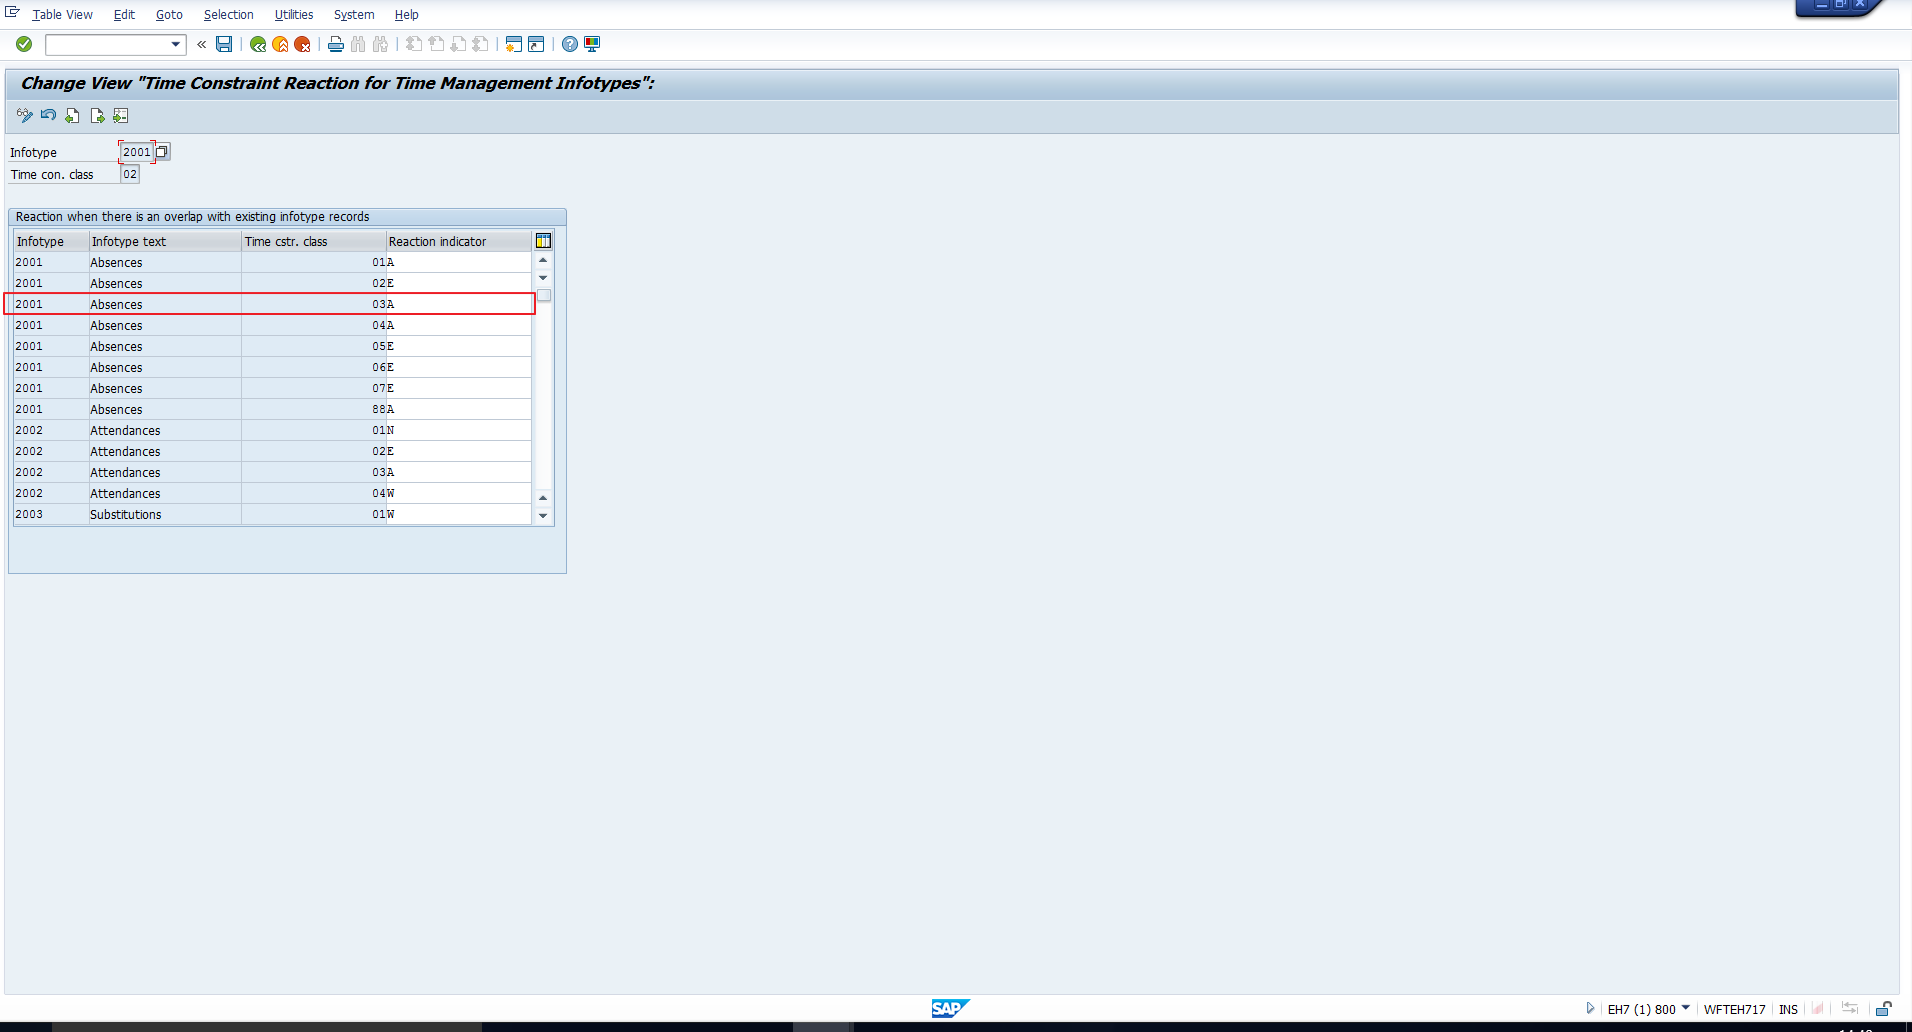
This view lists out every possible combination of Time management infotype and SAP Time constraint class of the already existing record. Each row also specifies a Reaction indicator. This indicator controls how the system reacts when you create new infotype records which overlap with existing ones.
The specifications are as follows:
- A – The old record is delimited, all collisions are displayed.
- E – The system does not allow you to create the new record, and displays all collisions.
- W – You can create the new record, but the old record remains unchanged. All collisions are displayed.
- N – Same as W, but collisions are not displayed.
So, in our example, the existing infotype record is an Absence record, with Absence type “Vacation”. We saw in the previous step that “Vacation” has been assigned SAP Time Constraint Class ‘3’. Hence the Reaction indicator which determines the system reaction in our example is ‘A’. The relevant row has been highlighted for your reference in Figure 13.
We can verify that the system behavior demonstrated in the previous section is in accordance with the definition of the Reaction indicator ‘A’, that is the old record was delimited and all collisions were displayed.
—
Did you like this tutorial? Have any questions or comments? We would love to hear your feedback in the comments section below. It’d be a big help for us, and hopefully it’s something we can address for you in improvement of our free SAP HR tutorials.
Navigation Links
Go to next lesson: SAP Absence Types Configuration
Go to previous lesson: SAP Absence Quotas
Go to overview of the course: SAP HR Training