
 Welcome to our tutorial on SAP organization and staffing configuration. In this tutorial, we explain the organization and staffing interface and show you how to configure it to meet your organization’s requirements. This tutorial is part of our free SAP HR training.
SAP Organization and Staffing Interface
Let us first revisit the four areas of the organization and staffing interface:
- Search Area
- Selection Area
- Overview Area
- Detail Area.
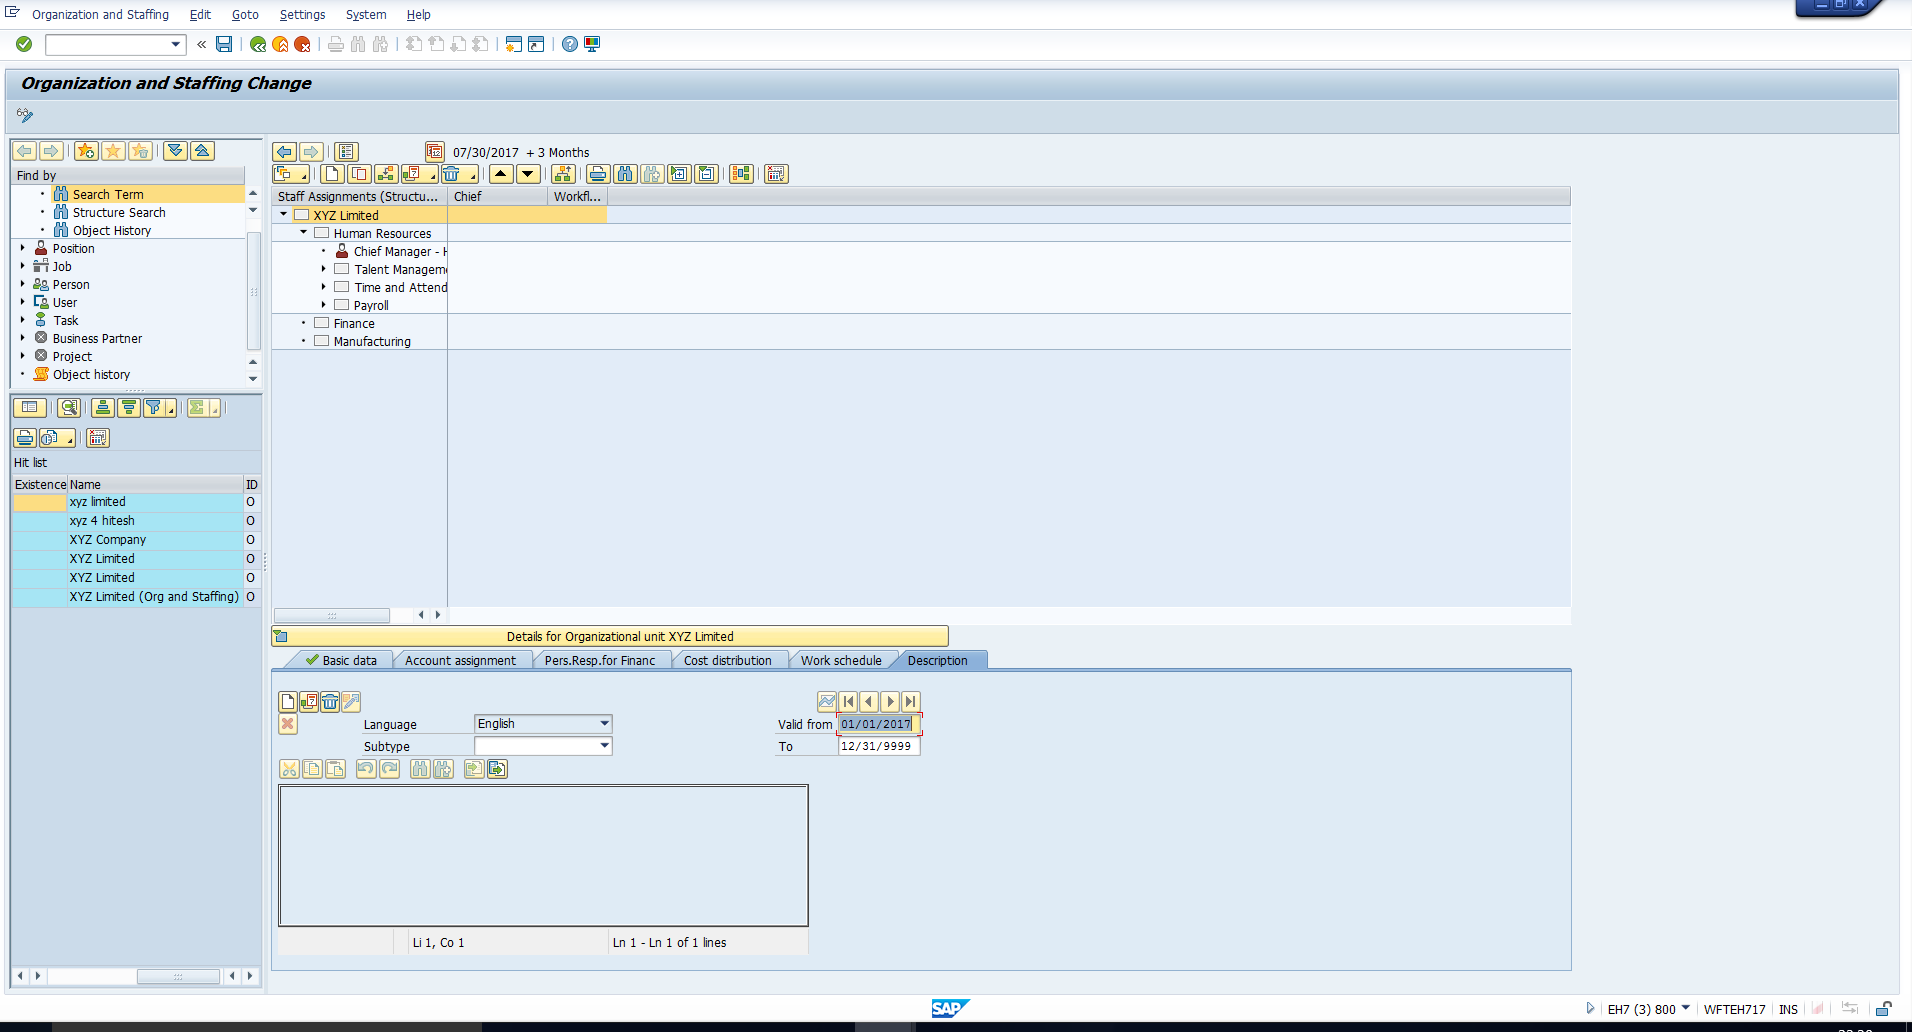
Execute transaction code PPOME to see pull up the organization and staffing interface.
Search Area
In this area of the interface screen you can search for objects by first selecting the relevant object type as highlighted below:
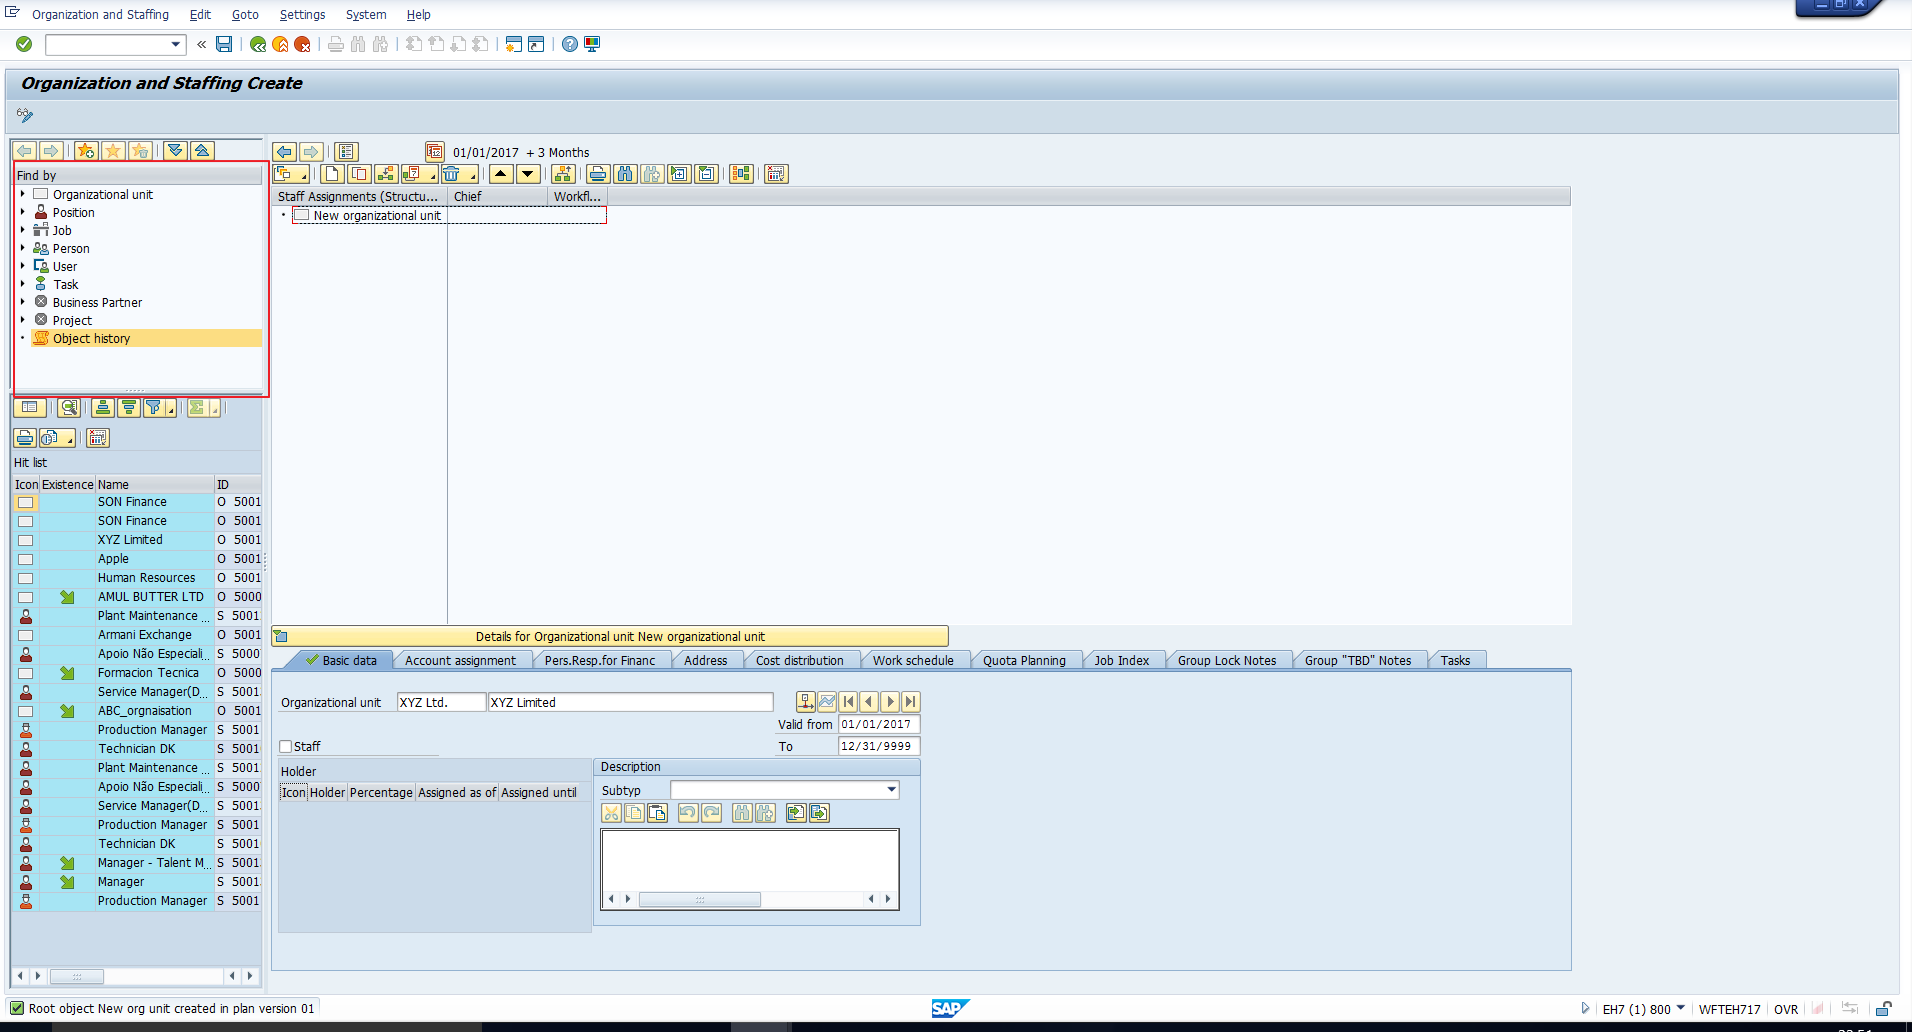
Selection Area
The objects that result from the search in the search area are then displayed in the selection area. You can double-click on the object that you want to process further to pull it up in the overview area. The selection area is highlighted below:
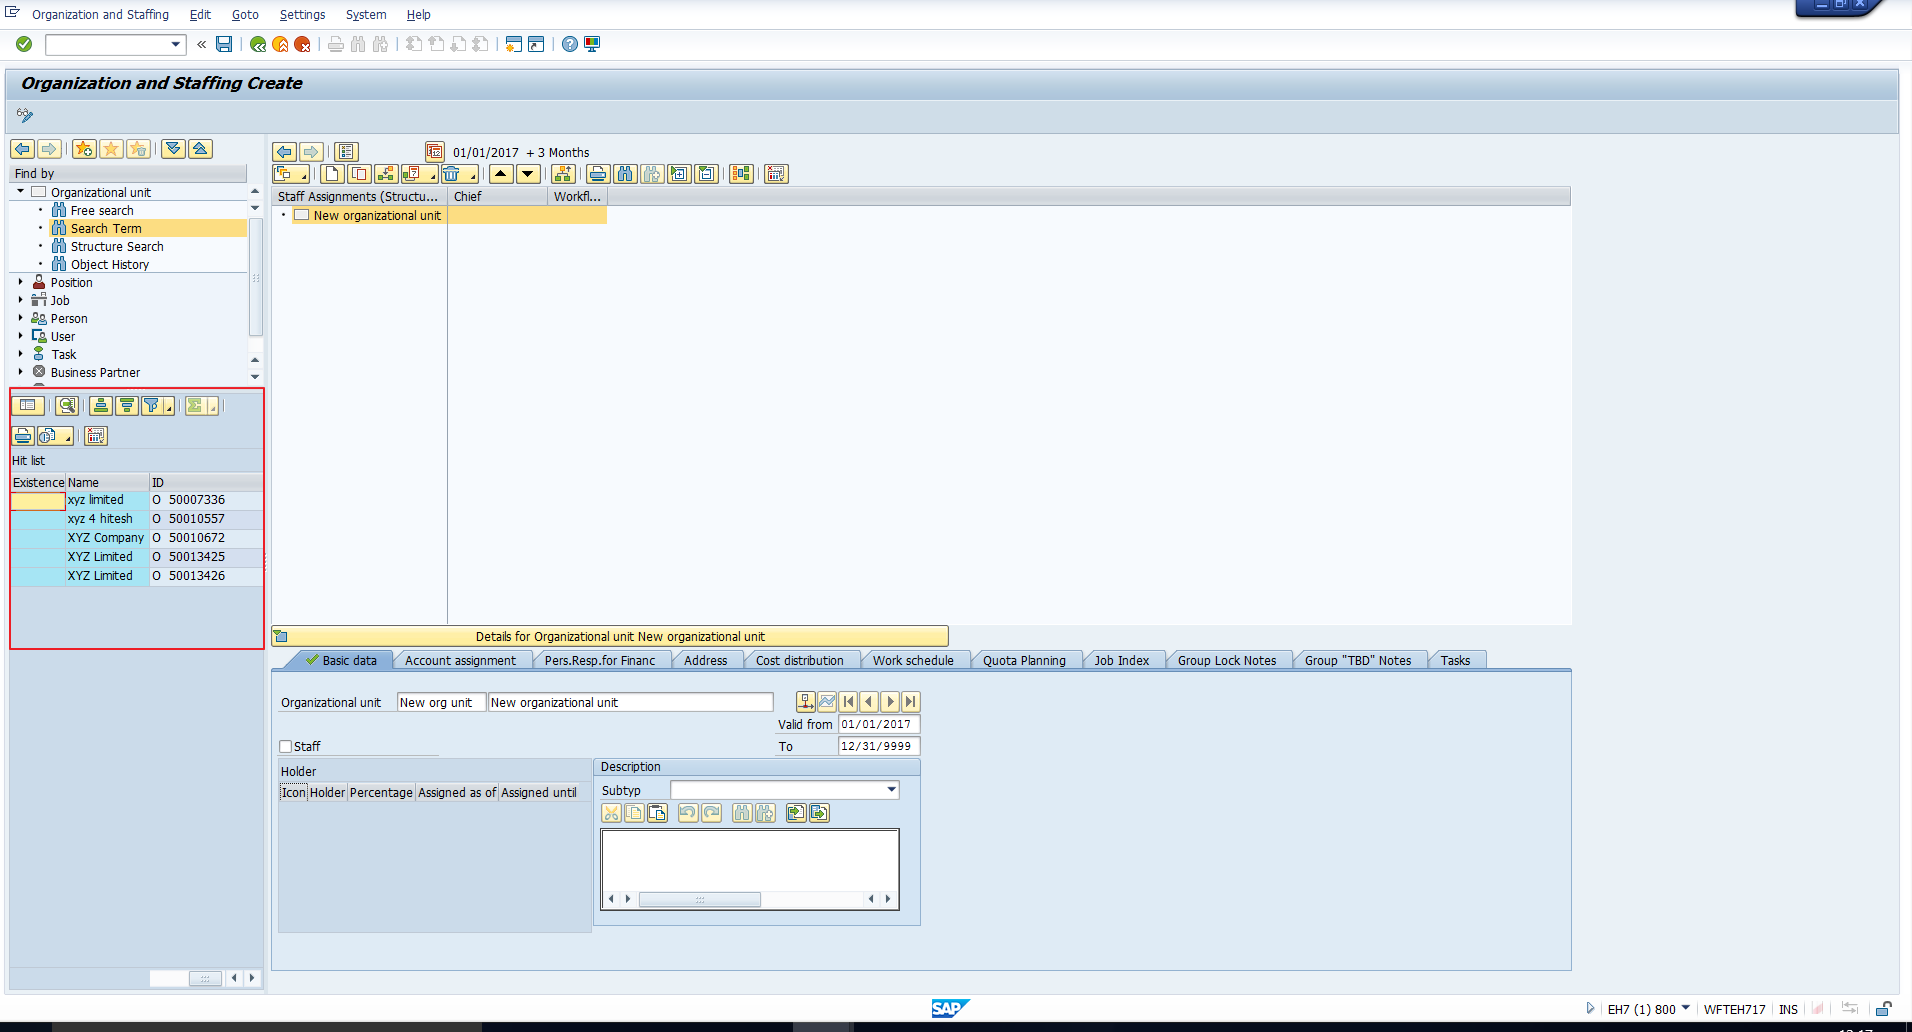
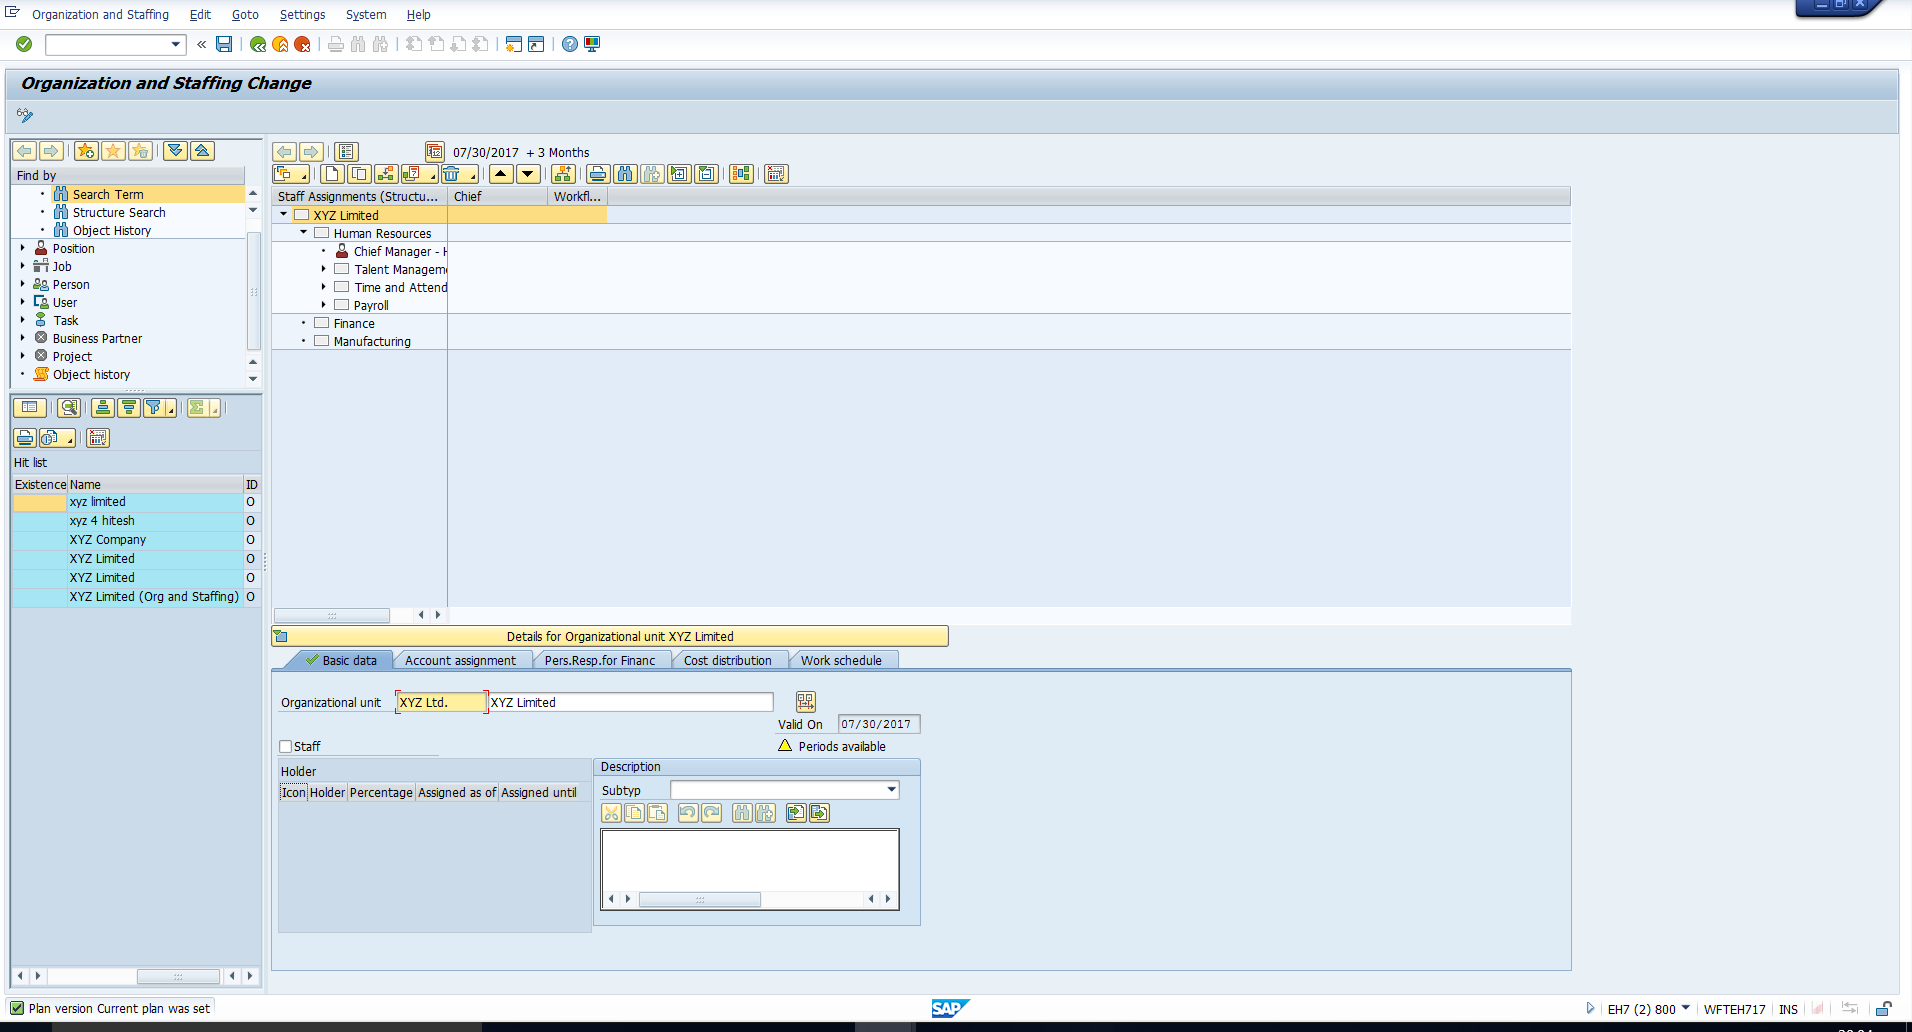
Overview Area
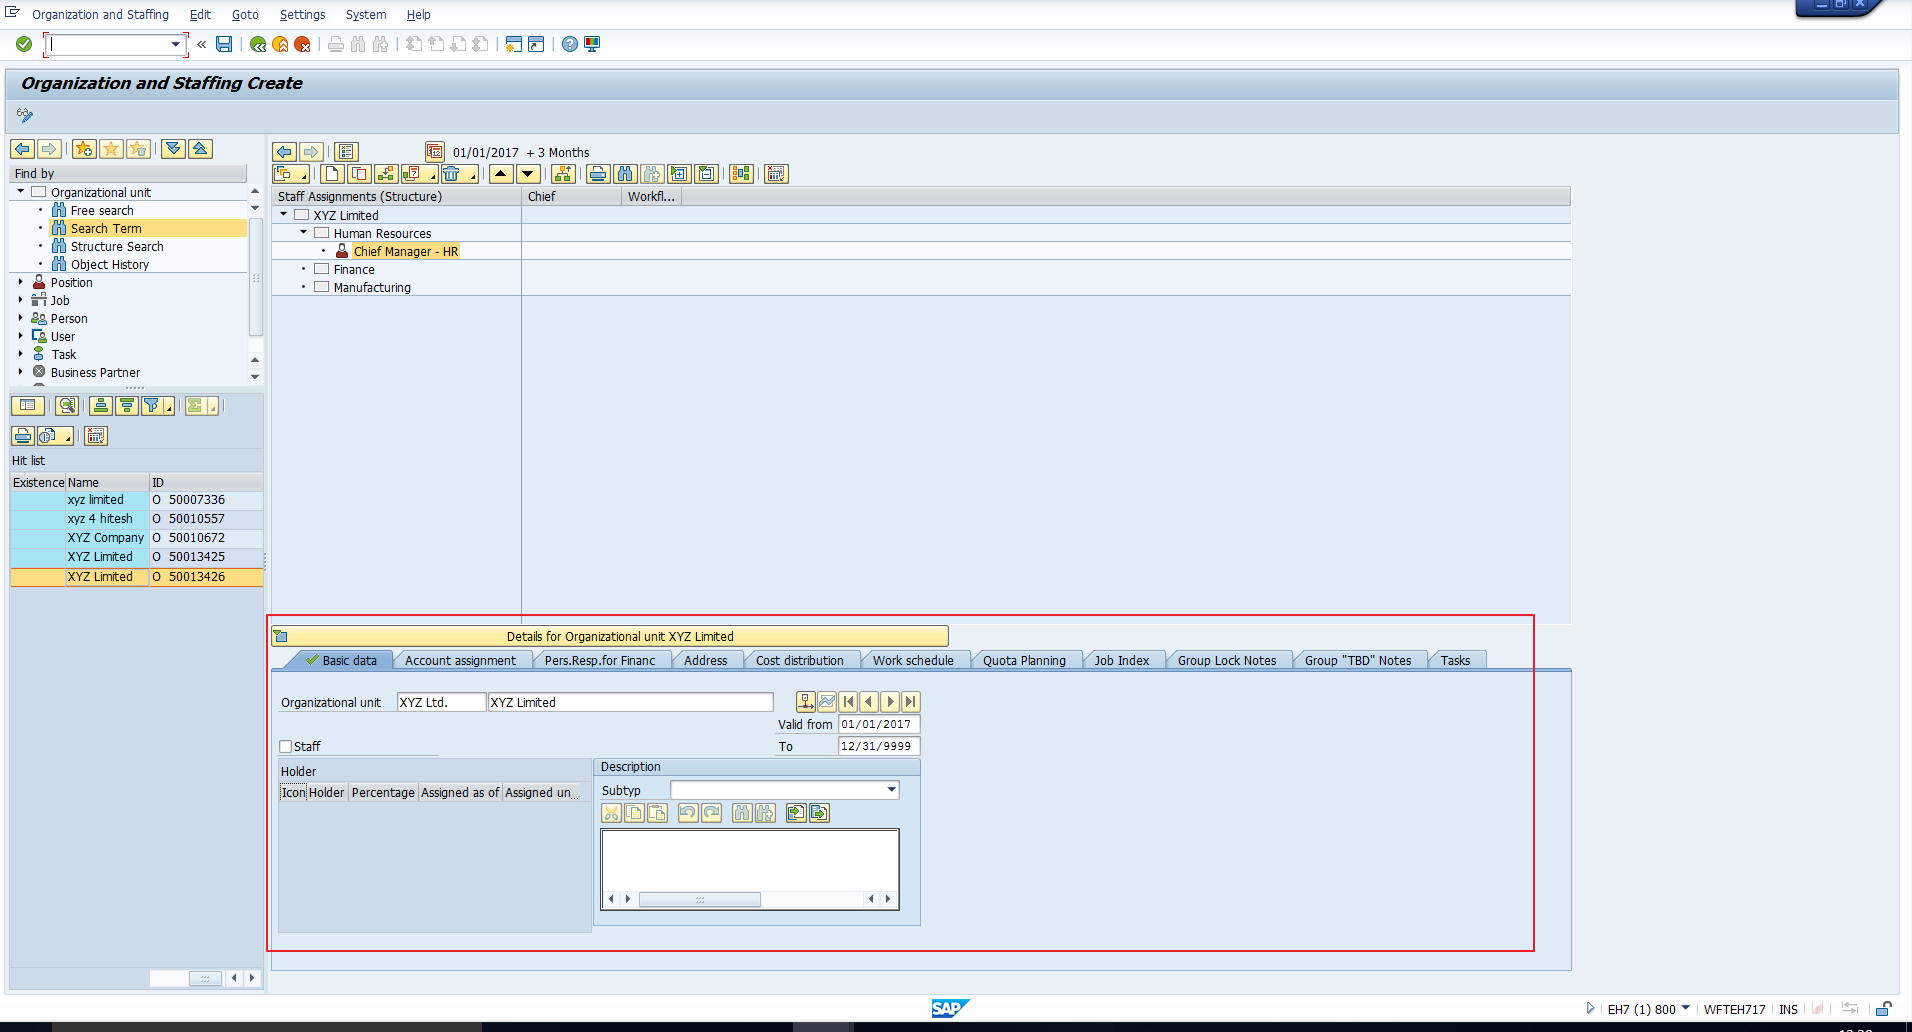
When you select an object from the selection area, the object and all of its underlying structure is then displayed in the overview area. For example, in the below highlighted section, the selected organizational unit XYZ Limited and all of it’s structure is pulled up in the overview area.
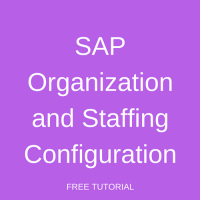
Detail Area
The detailed characteristics of the object are displayed as tab pages in the detail area. These tab pages can be customized if needed. It is this SAP organization and staffing configuration which we will explain in the next section of this tutorial.
SAP Organization and Staffing Configuration
This section will focus on the customization of the tab pages in the detail area of the organization and staffing interface. We will explain the SAP organization and staffing configuration with respect to the below requirements:
- Hide Tab Page
- Add New Tab Page
- Change Sequence of Tab Pages
Hide Tab Page
Let’s look at the detail area depicted below. We can see six tab pages for the organizational unit. Assume that we want to hide the tab page Address.
To add or delete a tab page use the customizing menu path below in transaction code SPRO:
Personnel Management – Organizational Management – Hierarchy Framework – Integrate New Infotype – Add Infotype as Tab Page in Detail Area
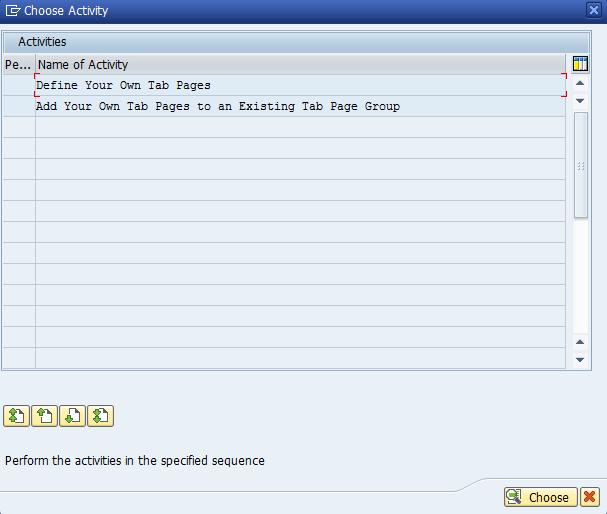
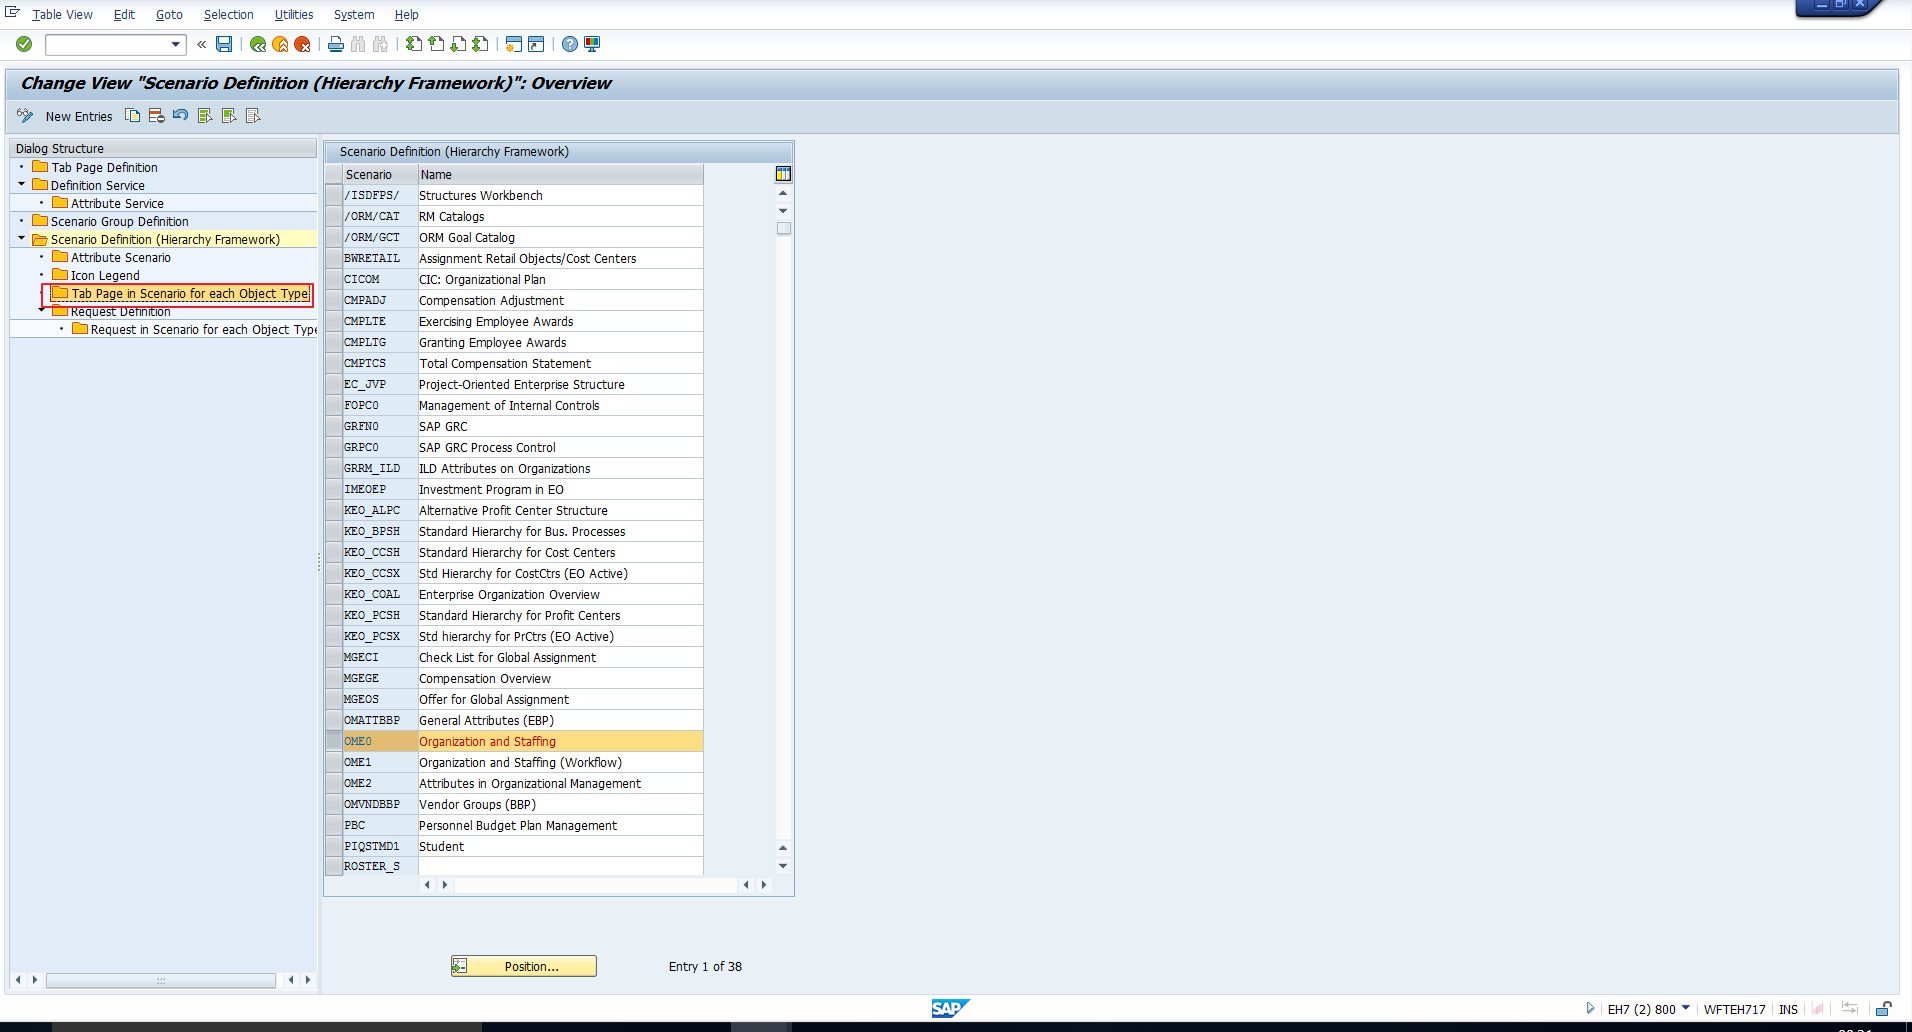
Select the Define Your Own Tab Pages activity from the activity list as shown below:
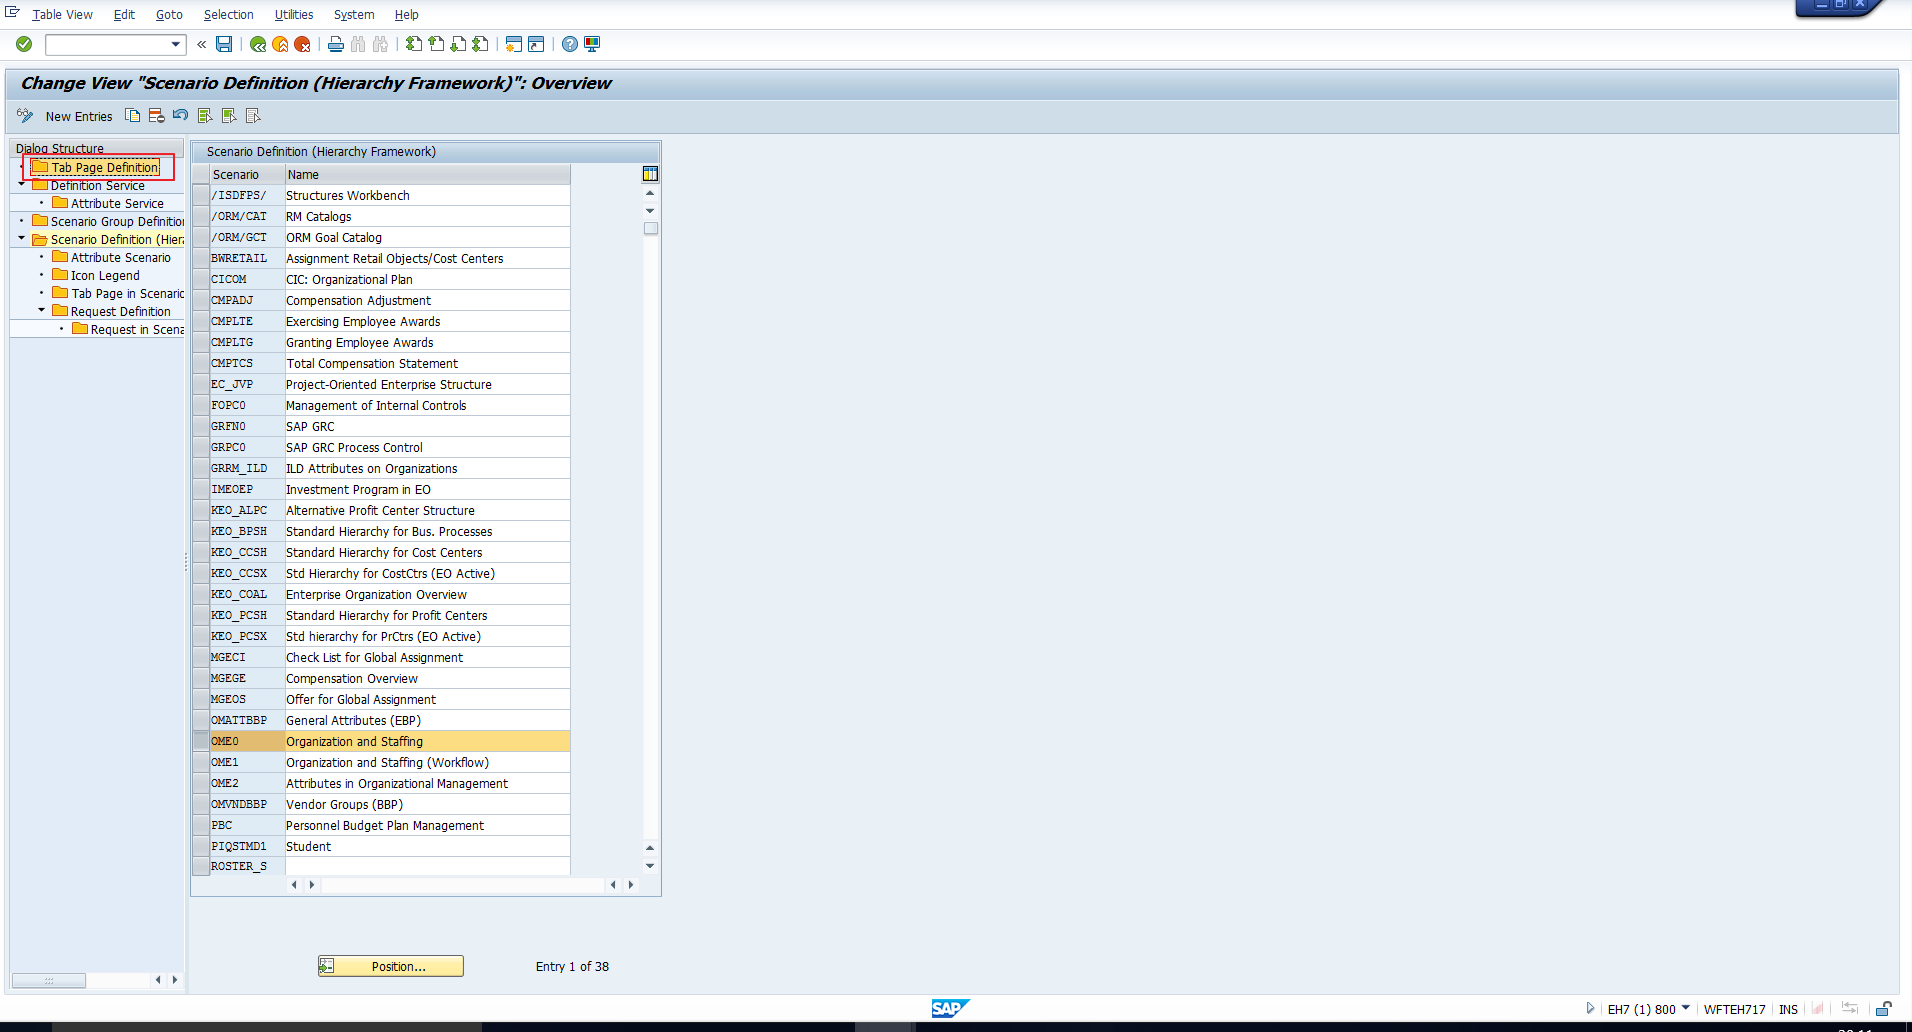
Now you will see a list of scenarios. Select the scenario OME0 as shown below. This is the scenario applicable to the organization and staffing interface:
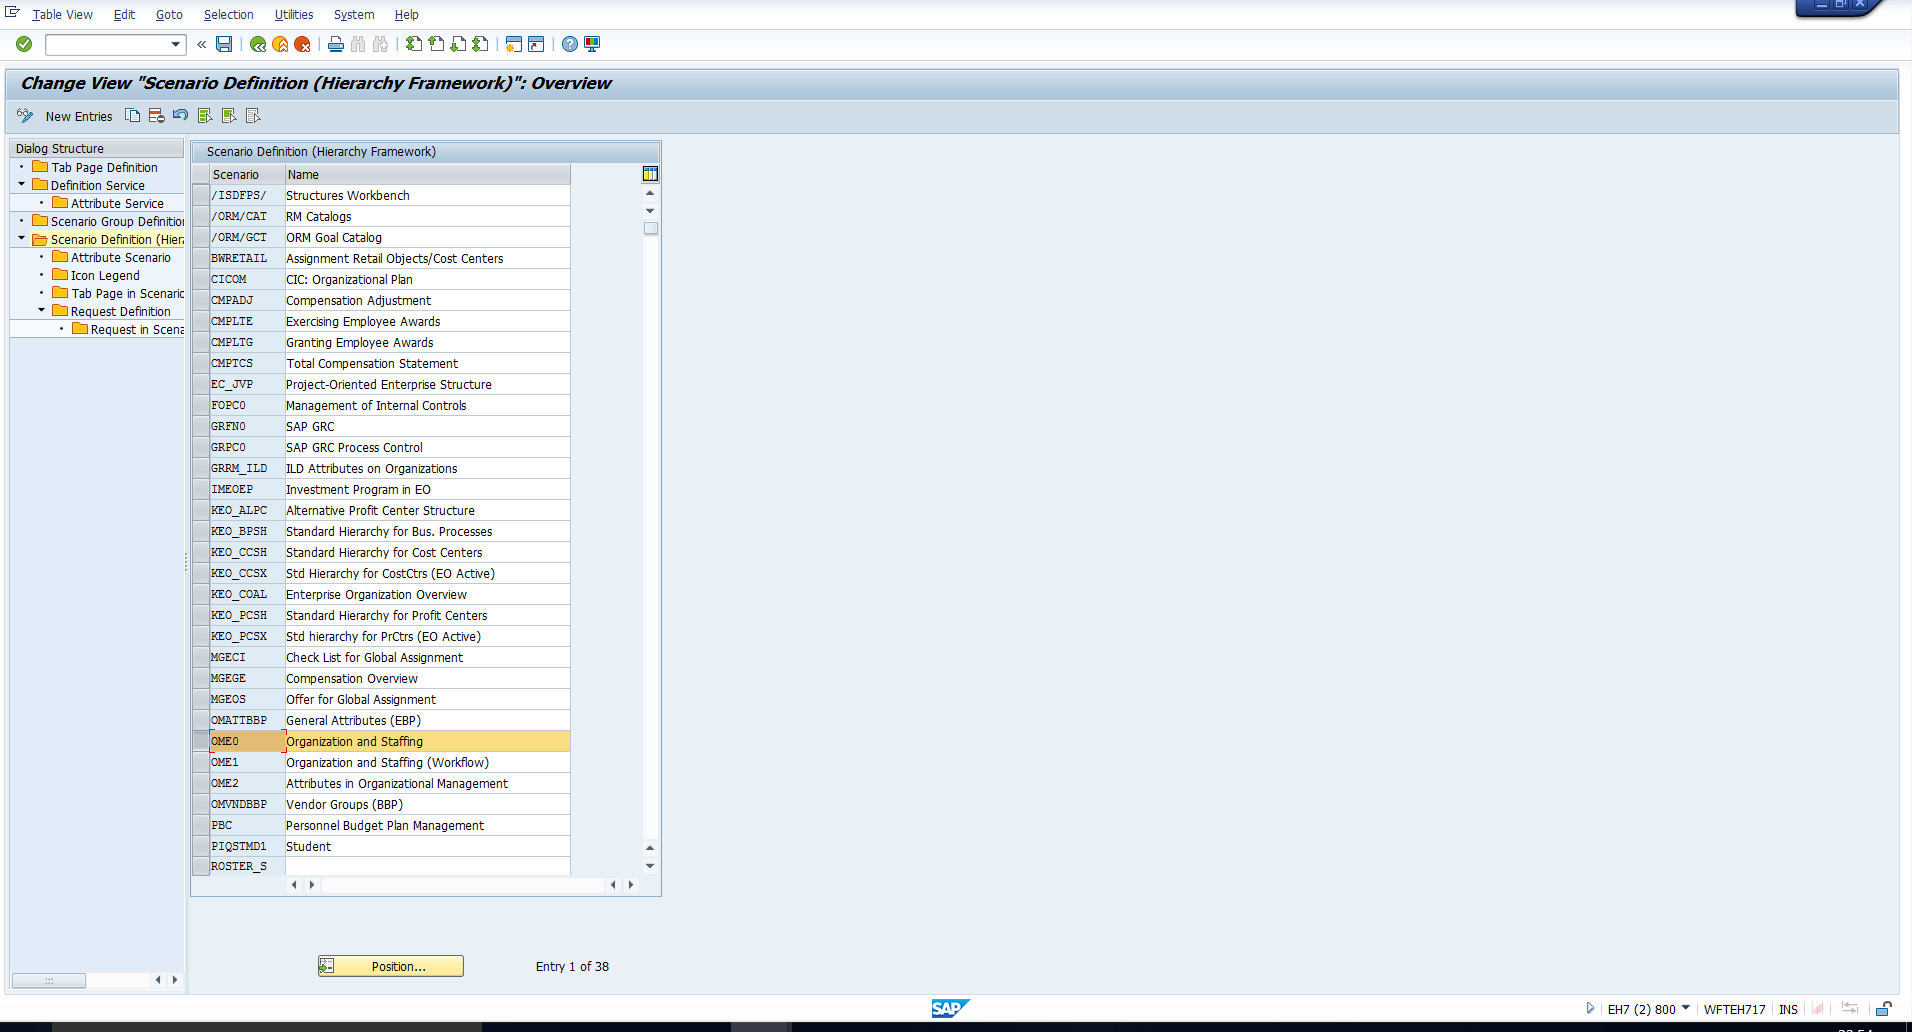
On the left pane, you can see a structure comprising various folders. Select the folder Tab Page in Scenario for each Object Type, as highlighted below:
You will see the list of tab pages associated with the scenario denoted in the first column. In this case, the scenario is OME0 for all entries, as we had selected this in the previous step. The second column specifies the object type. Since we want to alter the tab pages for the Organizational Unit object type, we should look at all entries with O in the Object type column.
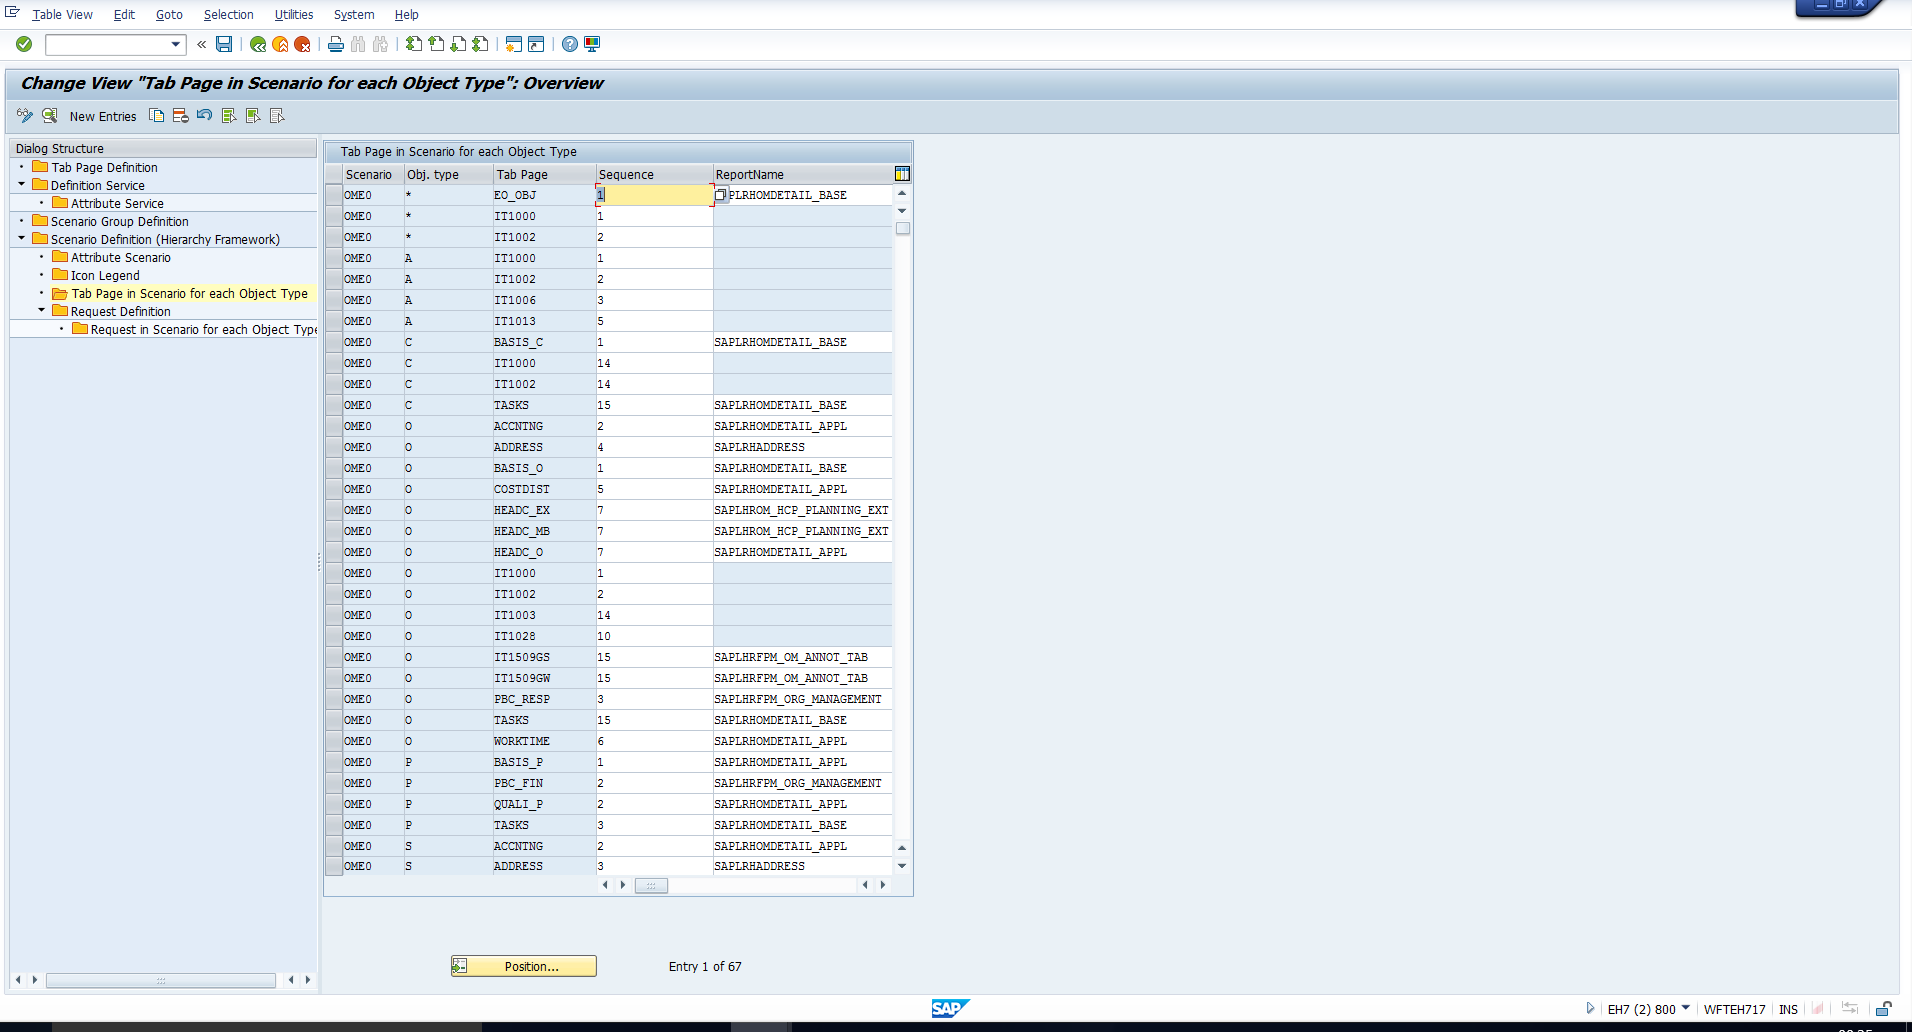
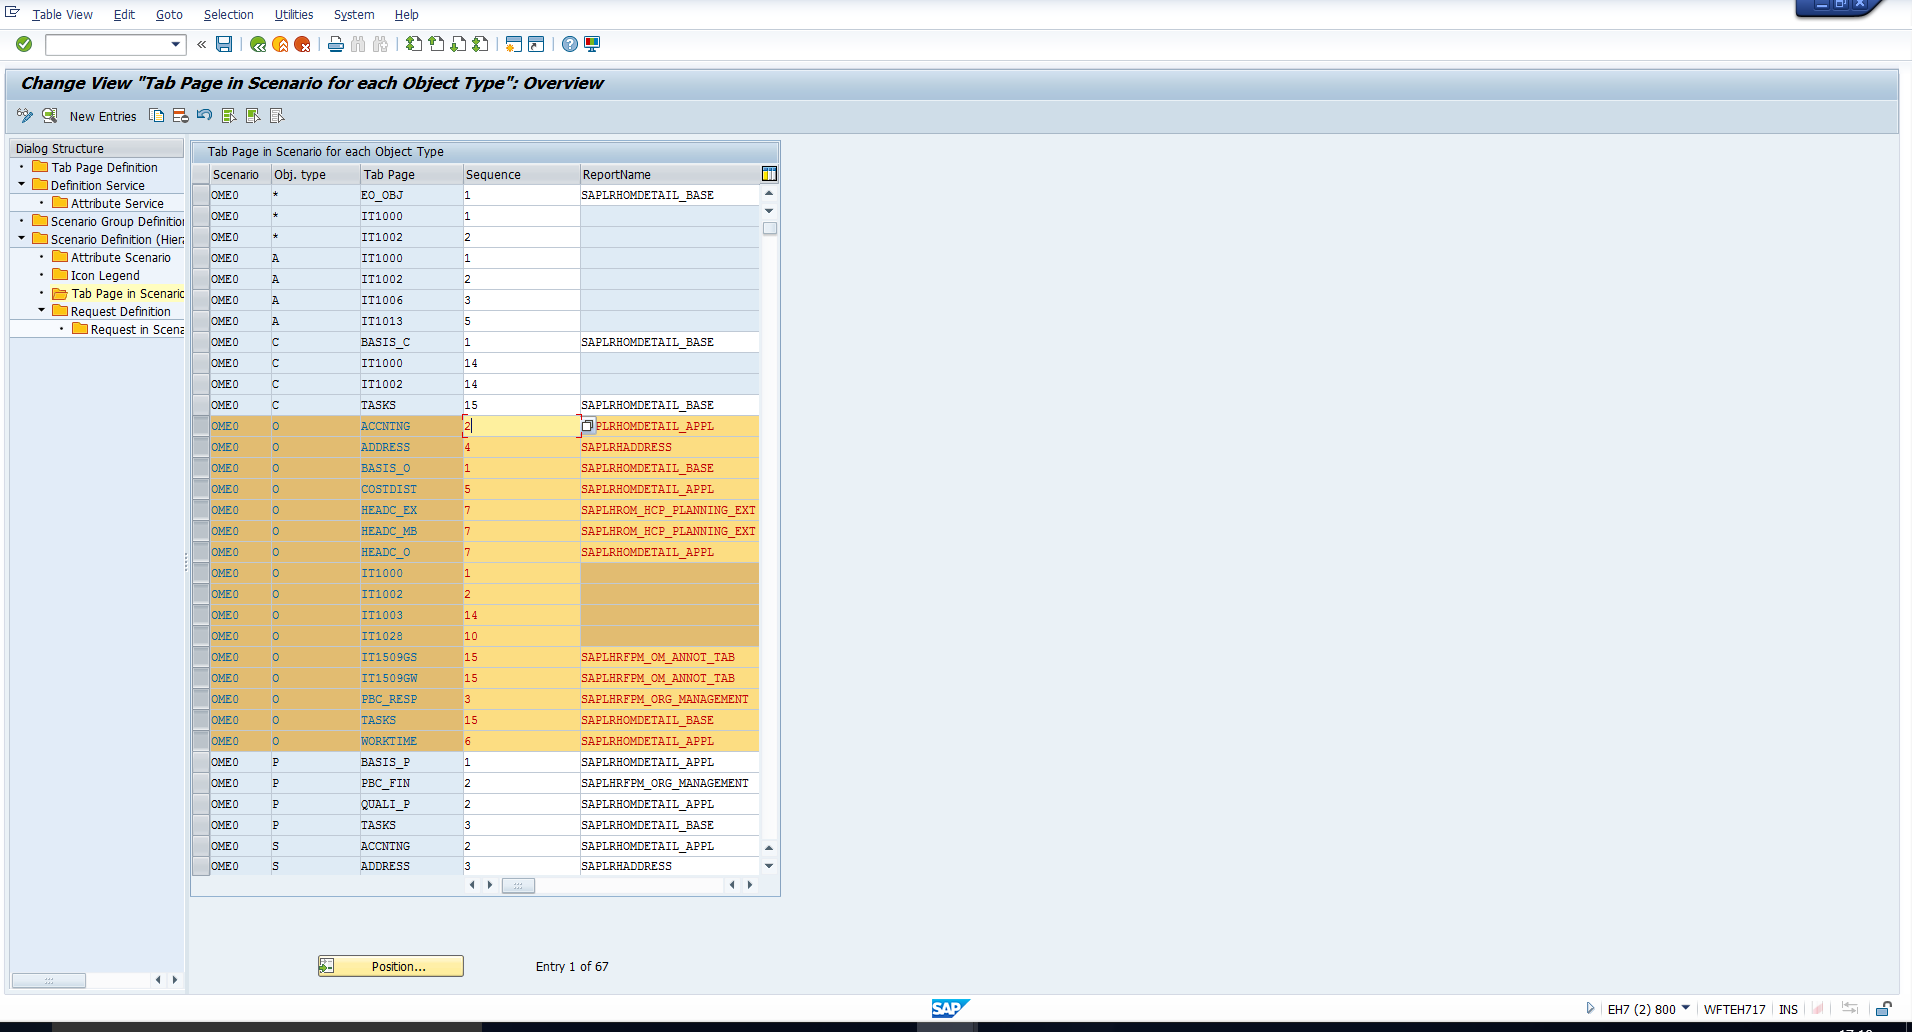
You can see from the image below that there are sixteen rows for the object type Organizational Unit. Since each row corresponds to a tab page, this means there are sixteen tab pages configured for organizational units. Recall from the previous section that we can see just six tab pages. Read on to understand why.
Scroll to the right using the scroll bar at the bottom of the SAP organization and staffing configuration screen. You will see the last column titled Do Not Display as shown below:
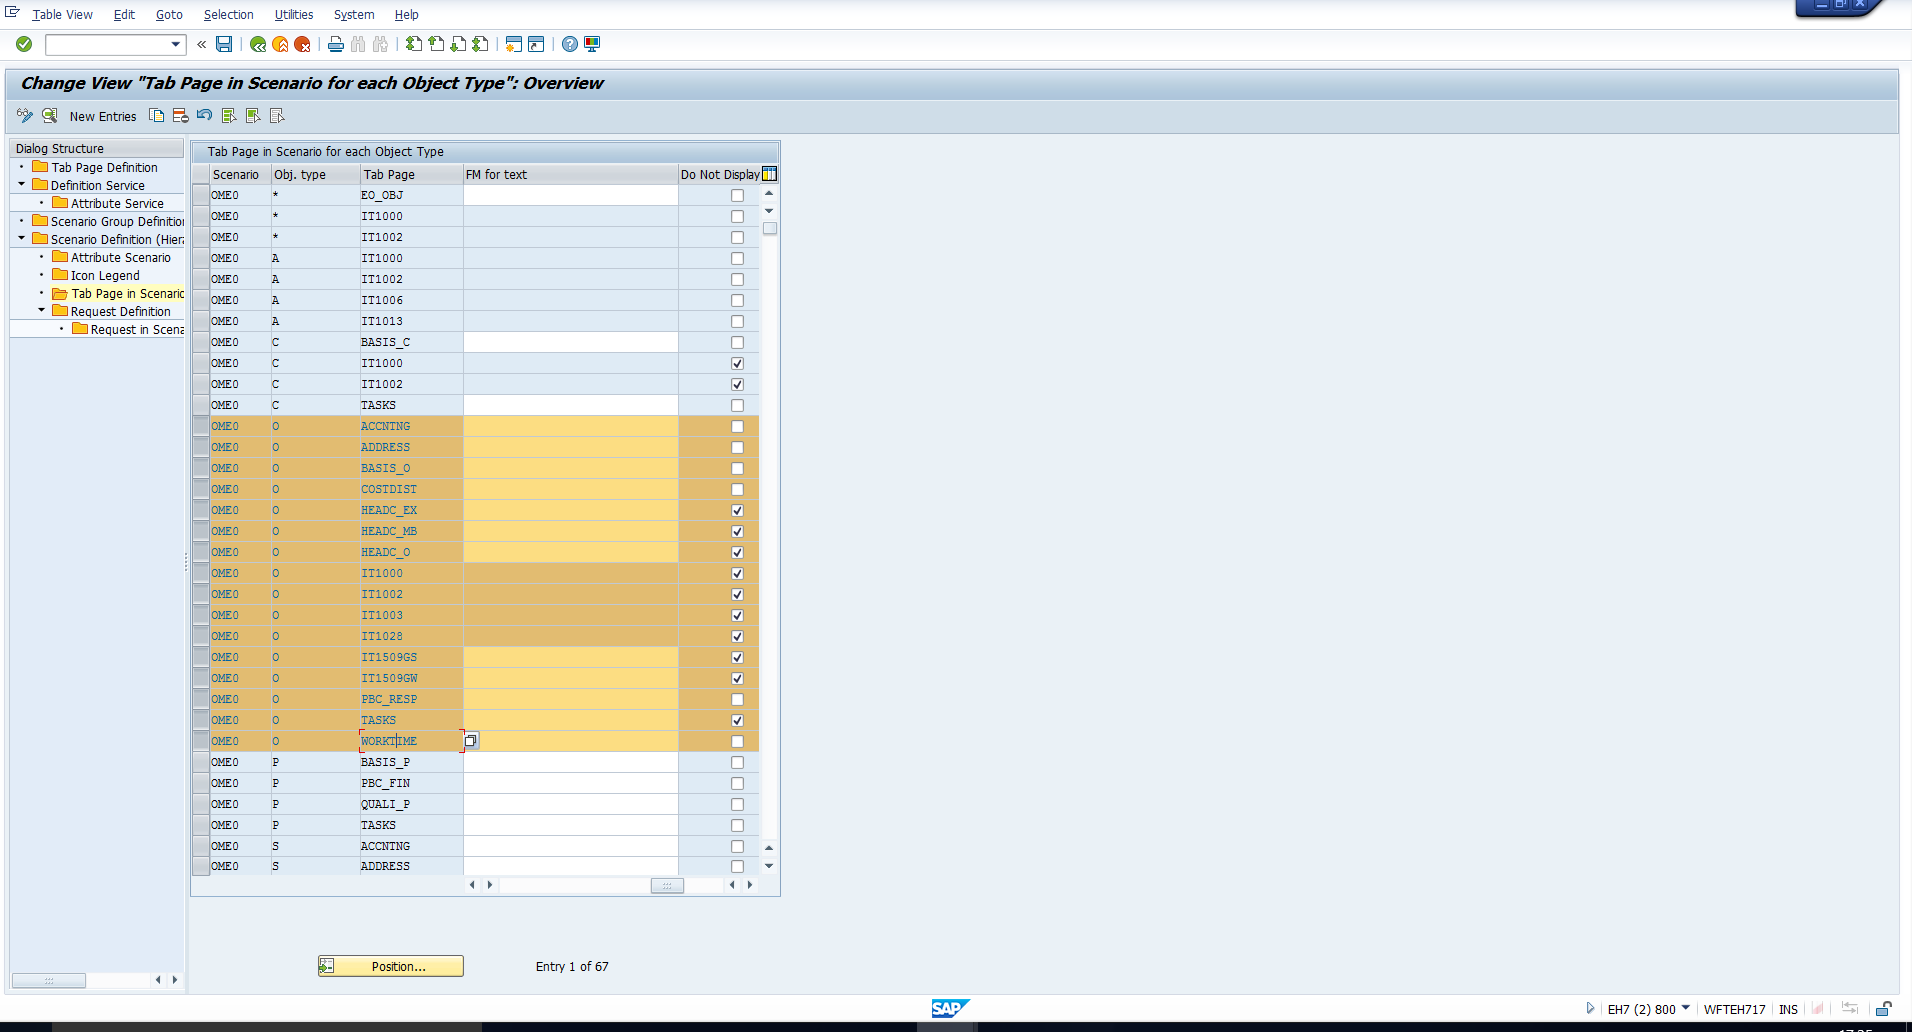
This column allows you to hide configured tab pages that should not be displayed in the organization and staffing interface. To hide any tab page, select the Do Not Display tickbox. In the image above, you can see that this tickbox is not selected for six of the sixteen entries, implying that only these six are displayed in the organization and staffing interface.
Now, to hide the Address tab page, select the Do Not Display tickbox for the corresponding tab page entry as shown below:
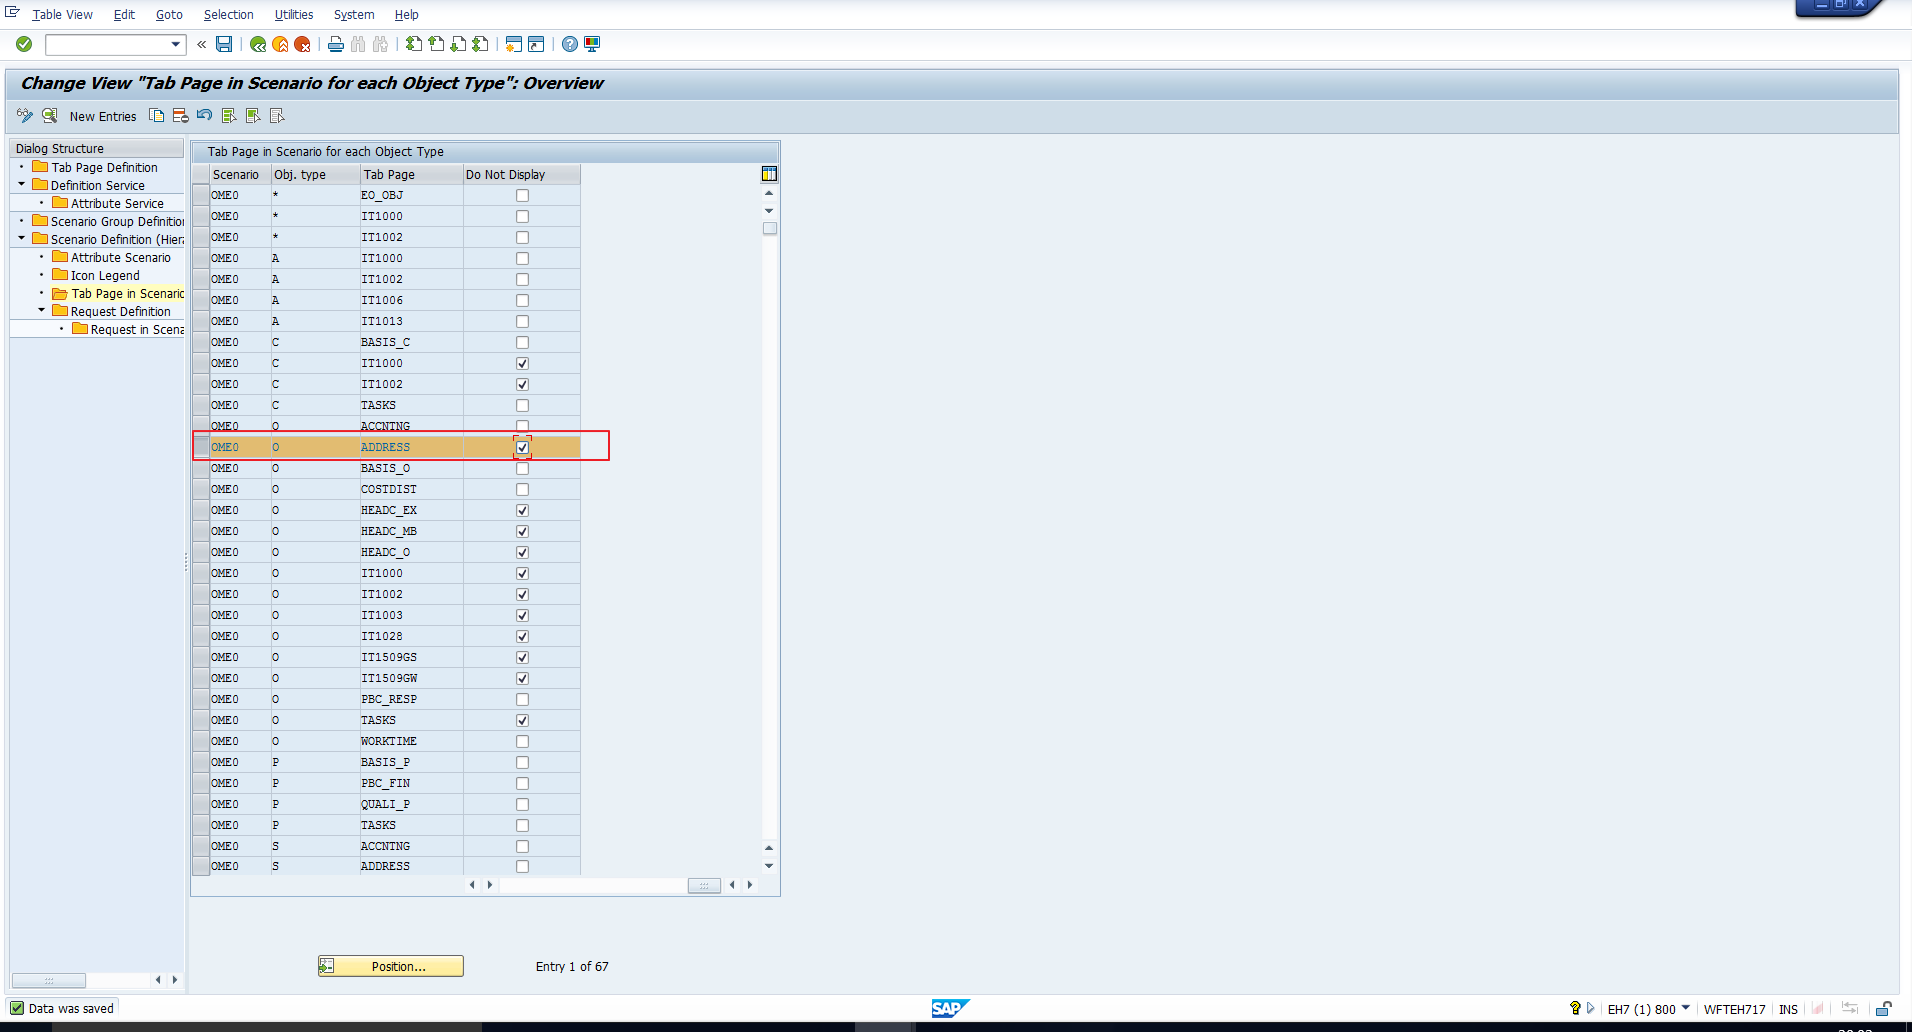
Hit Enter then Save ![]() .
.
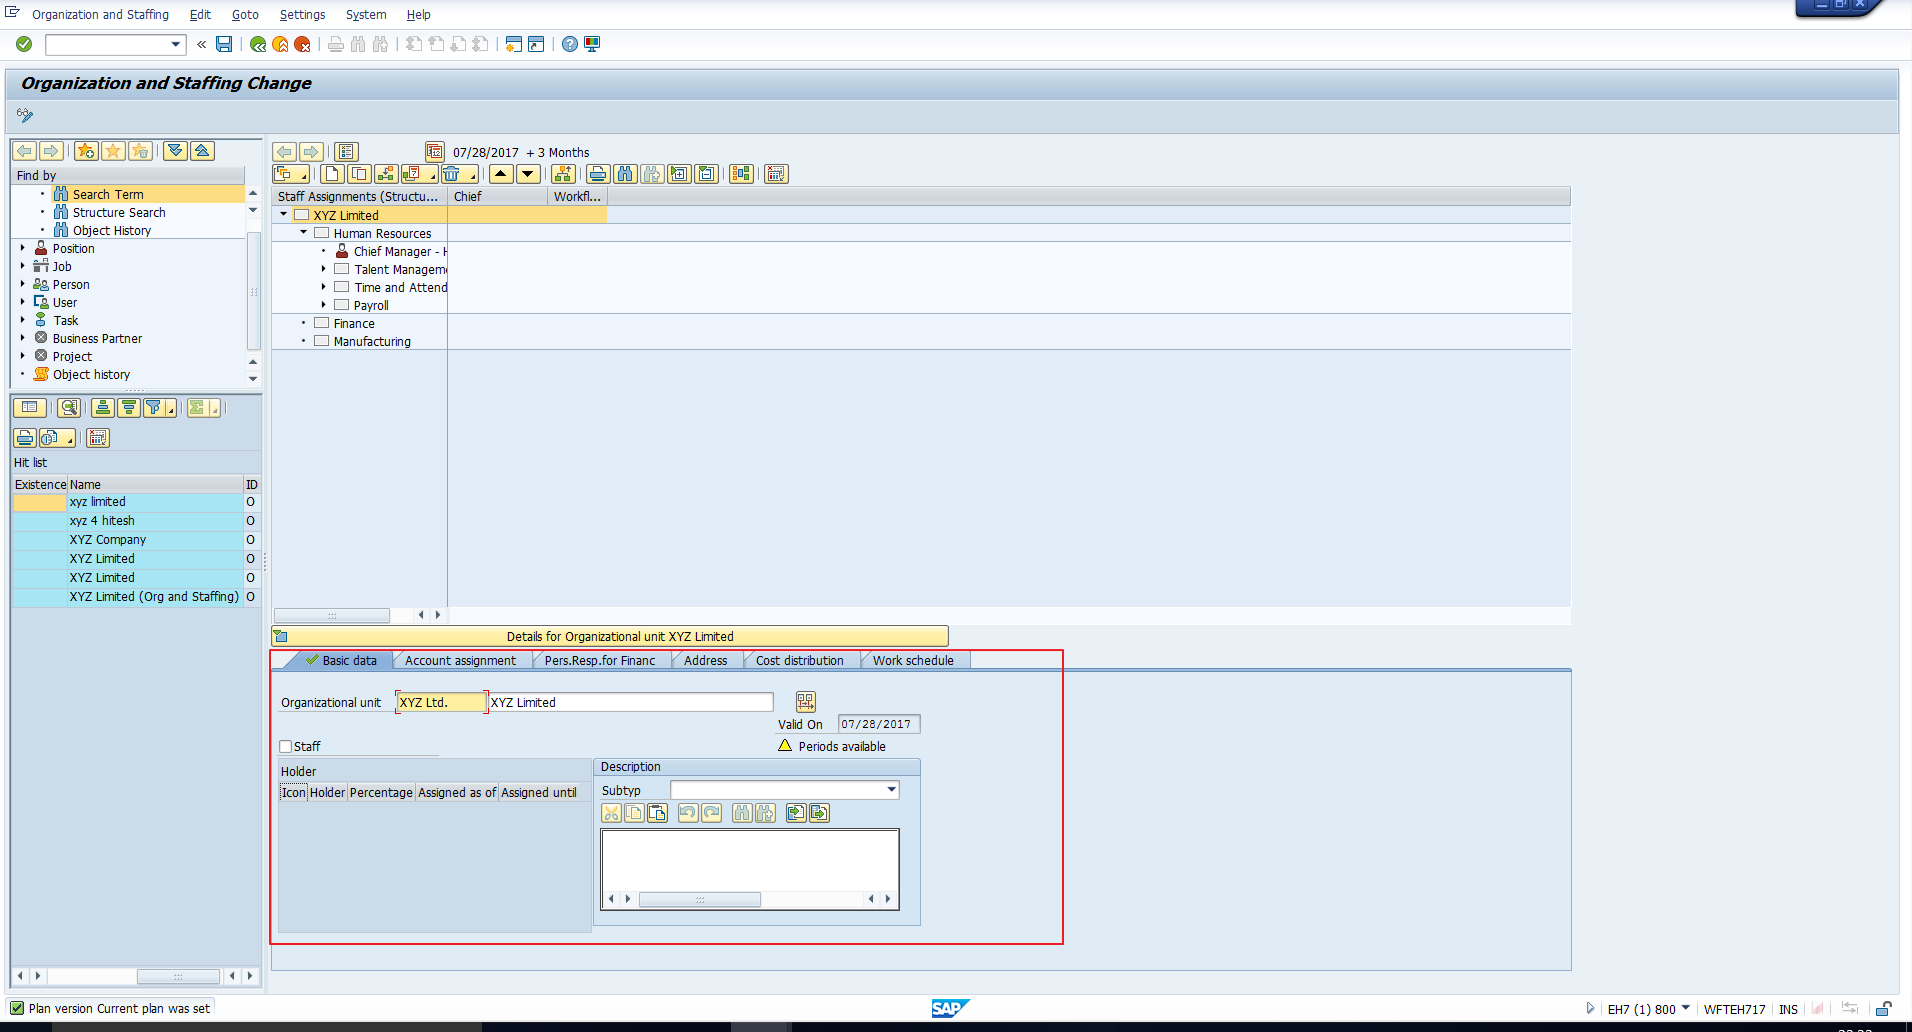
Let’s check the organization and staffing interface in transaction code PPOME to see if our changes have taken effect. As shown below, the Address tab page is no longer present:
Add New Tab Page
Now, let’s assume that we want to update SAP organization and staffing configuration to integrate the infotype 1002 – Description as a new tab page. First you must define the new tab page, then you should integrate the tab page into the organization and staffing interface.
Define New Tab Page
To define the new tab page, use the same customizing menu path we previously used to hide a tab page. In transaction code SPRO:
Personnel Management – Organizational Management – Hierarchy Framework – Integrate New Infotype – Add Infotype as Tab Page in Detail Area
Select the Define Your Own Tab Pages activity.
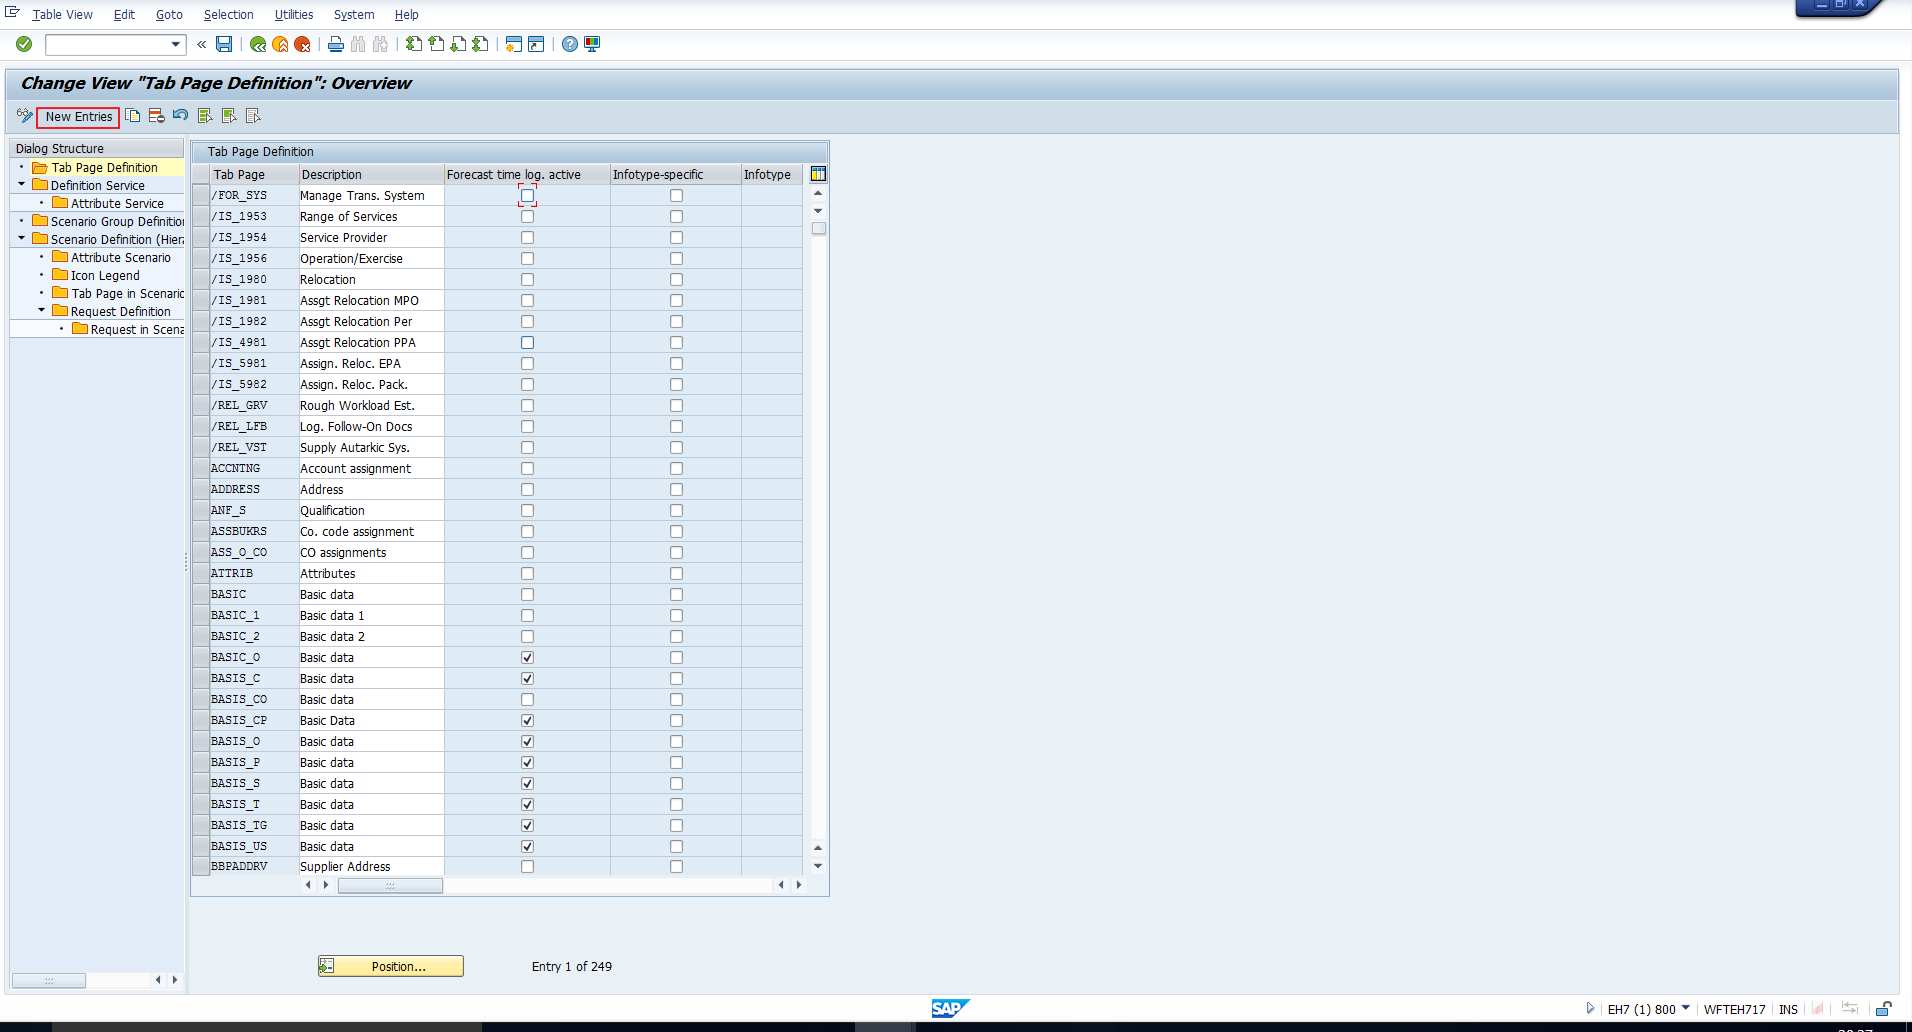
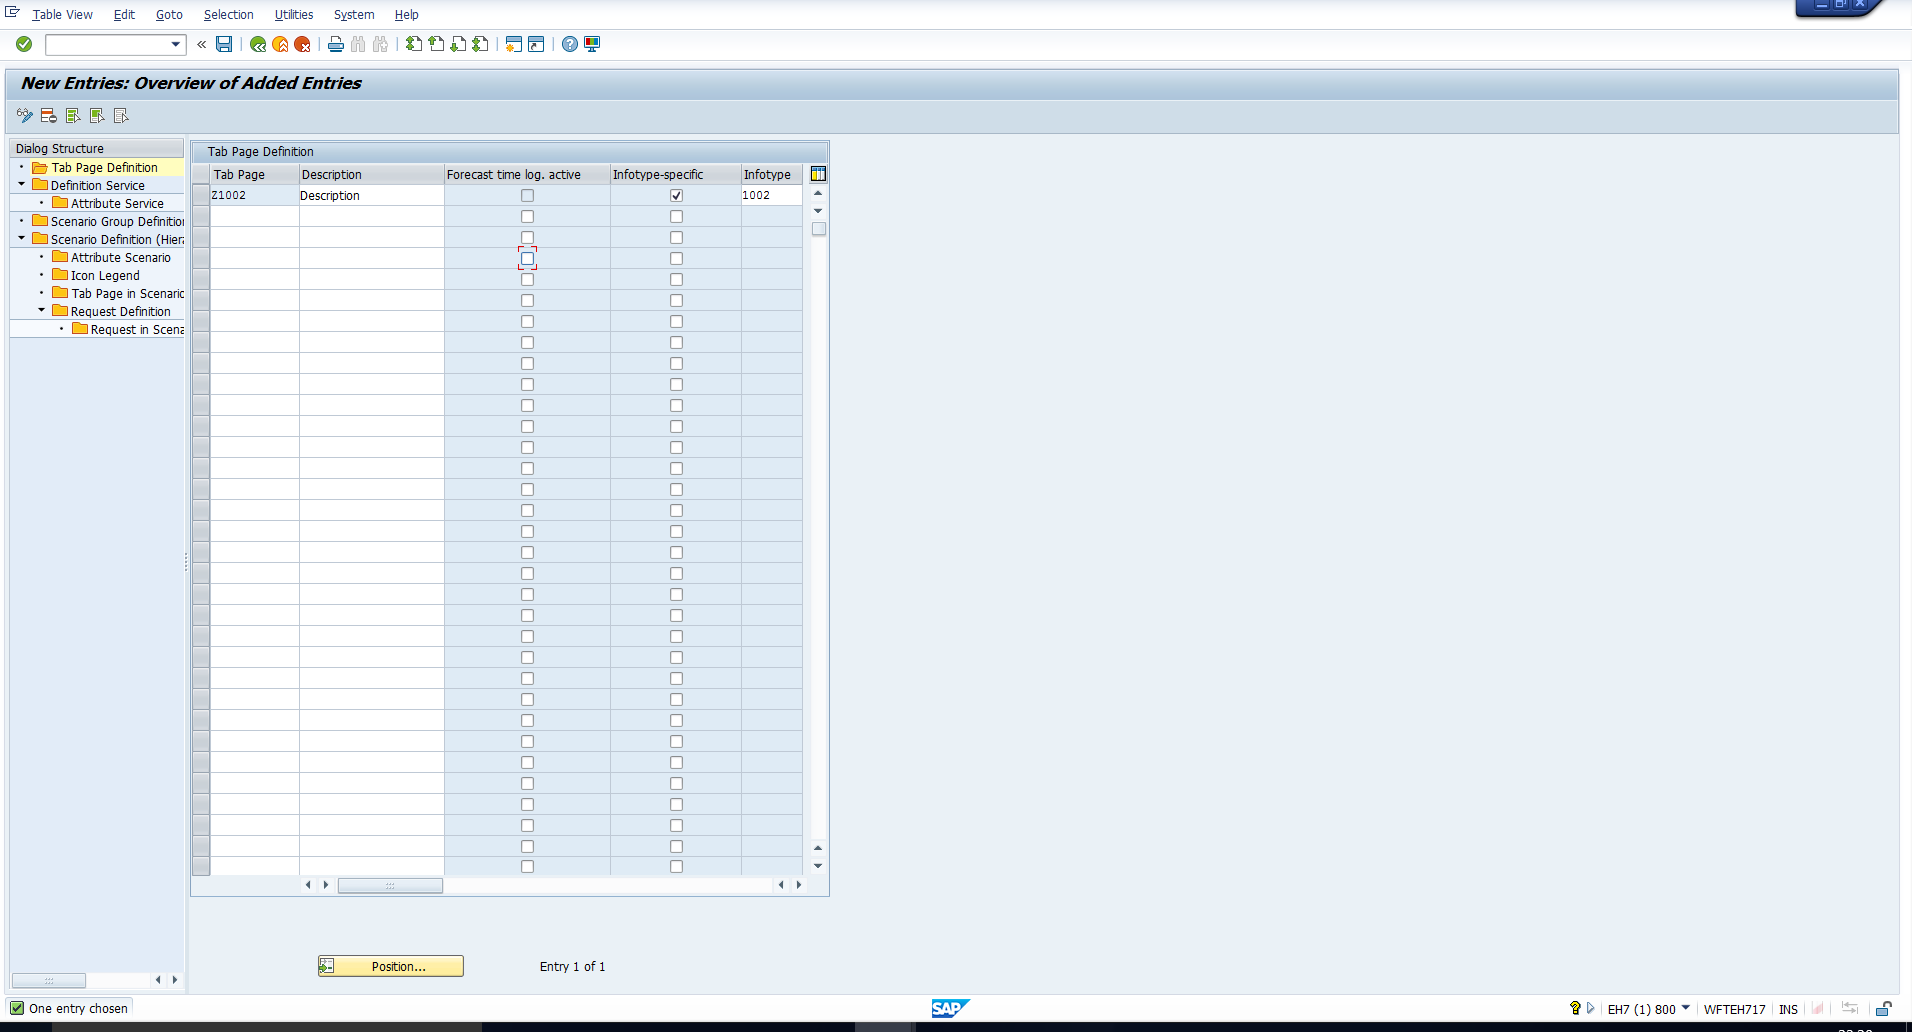
Again, select the OME0 scenario. Choose the Tab Page Definition structure folder as shown below:
In the tab page definition overview screen, click on the New Entries button as highlighted below:
Enter the following information:
- In the Tab Page column, define a tab page key starting with the letter Y or Z, as this is the customer namespace.
- In the Name column, enter the tab page title which should be displayed in the detail area.
- Select the Infotype-specific checkbox.
- In the Infotype column, enter the number of the infotype that should be integrated.
In our case, we enter values as shown below:
Hit Enter then Save ![]() .
.
Integrate New Tab Page
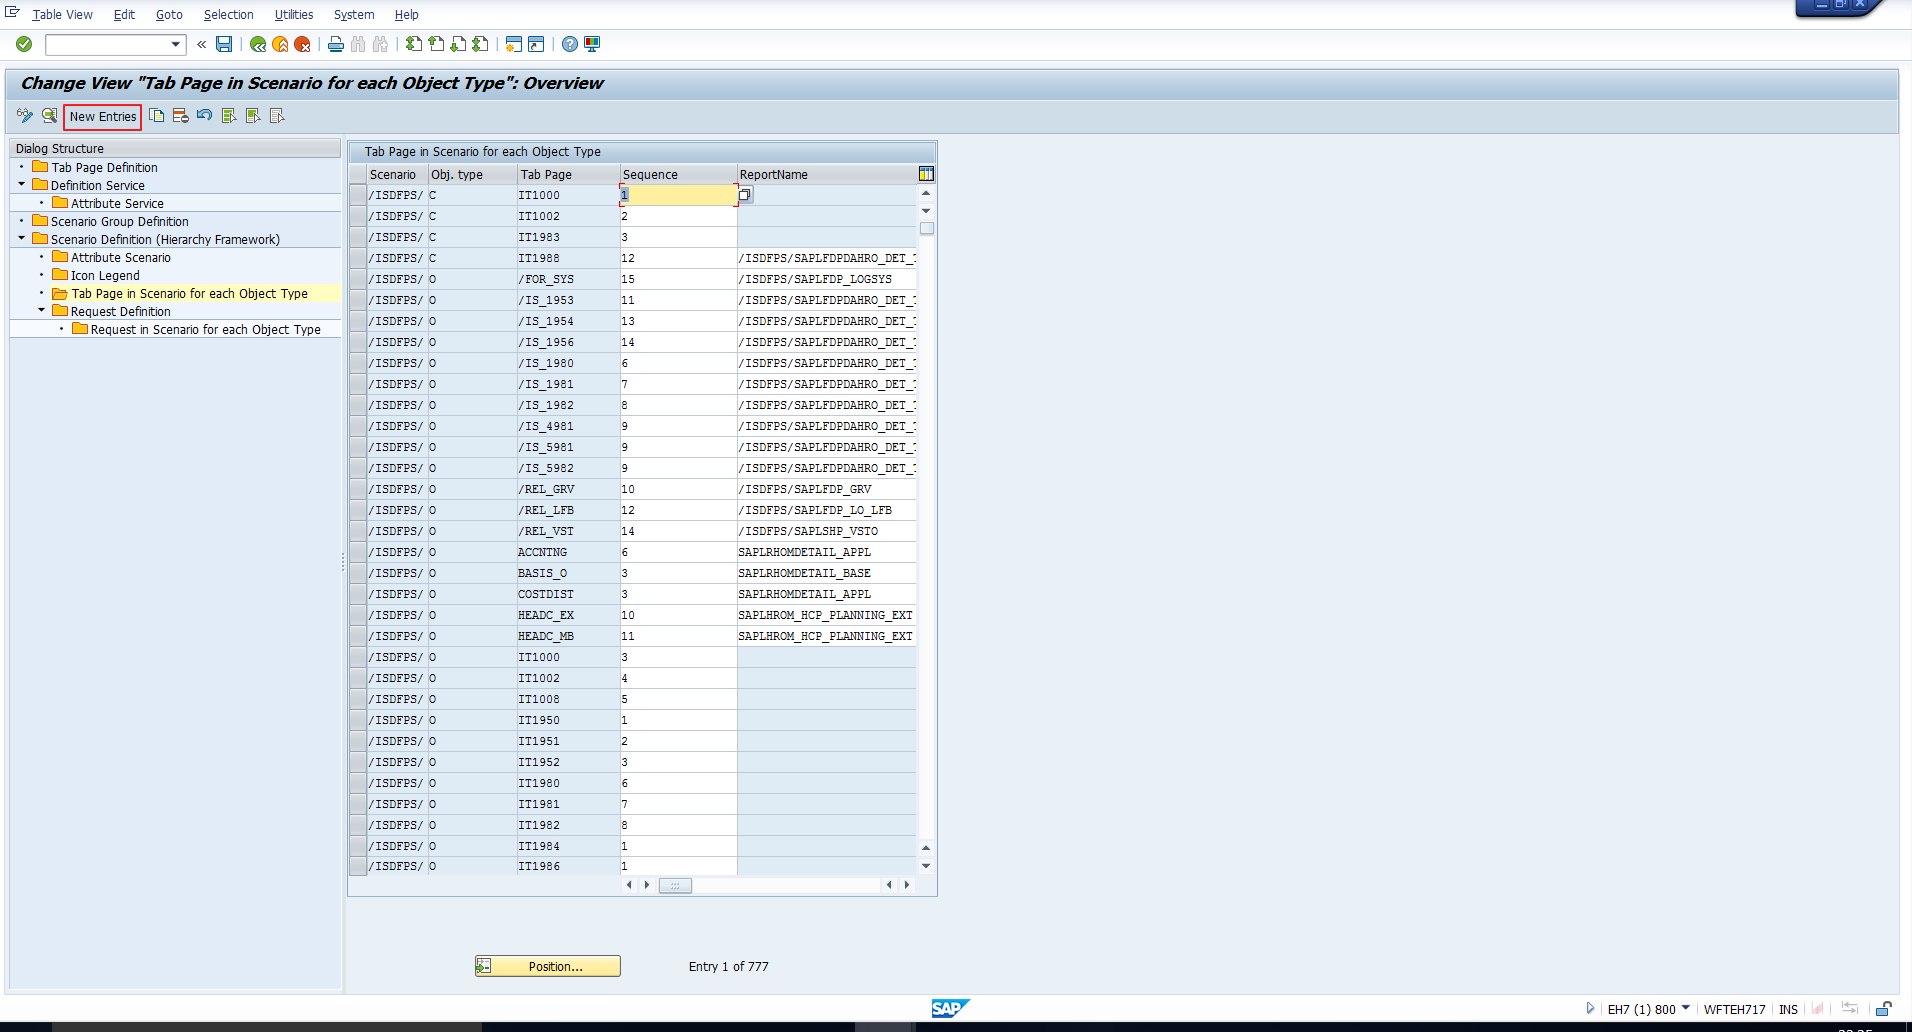
To integrate the newly created tab page to the organization and staffing interface, select the folder Tab Page in Scenario for each Object Type and click the New Entries button, as highlighted below:
Enter the following information:
- In the Scenario column, enter the hierarchy framework scenario OME0, representing the organization and staffing interface.
- For the Object Type column, enter the object type for which the tab page has to be displayed in this scenario.
- Enter the newly crate tab page key in the Tab Page field.
- In the Sequence field, enter the required position of the tab page amongst the other tabs.
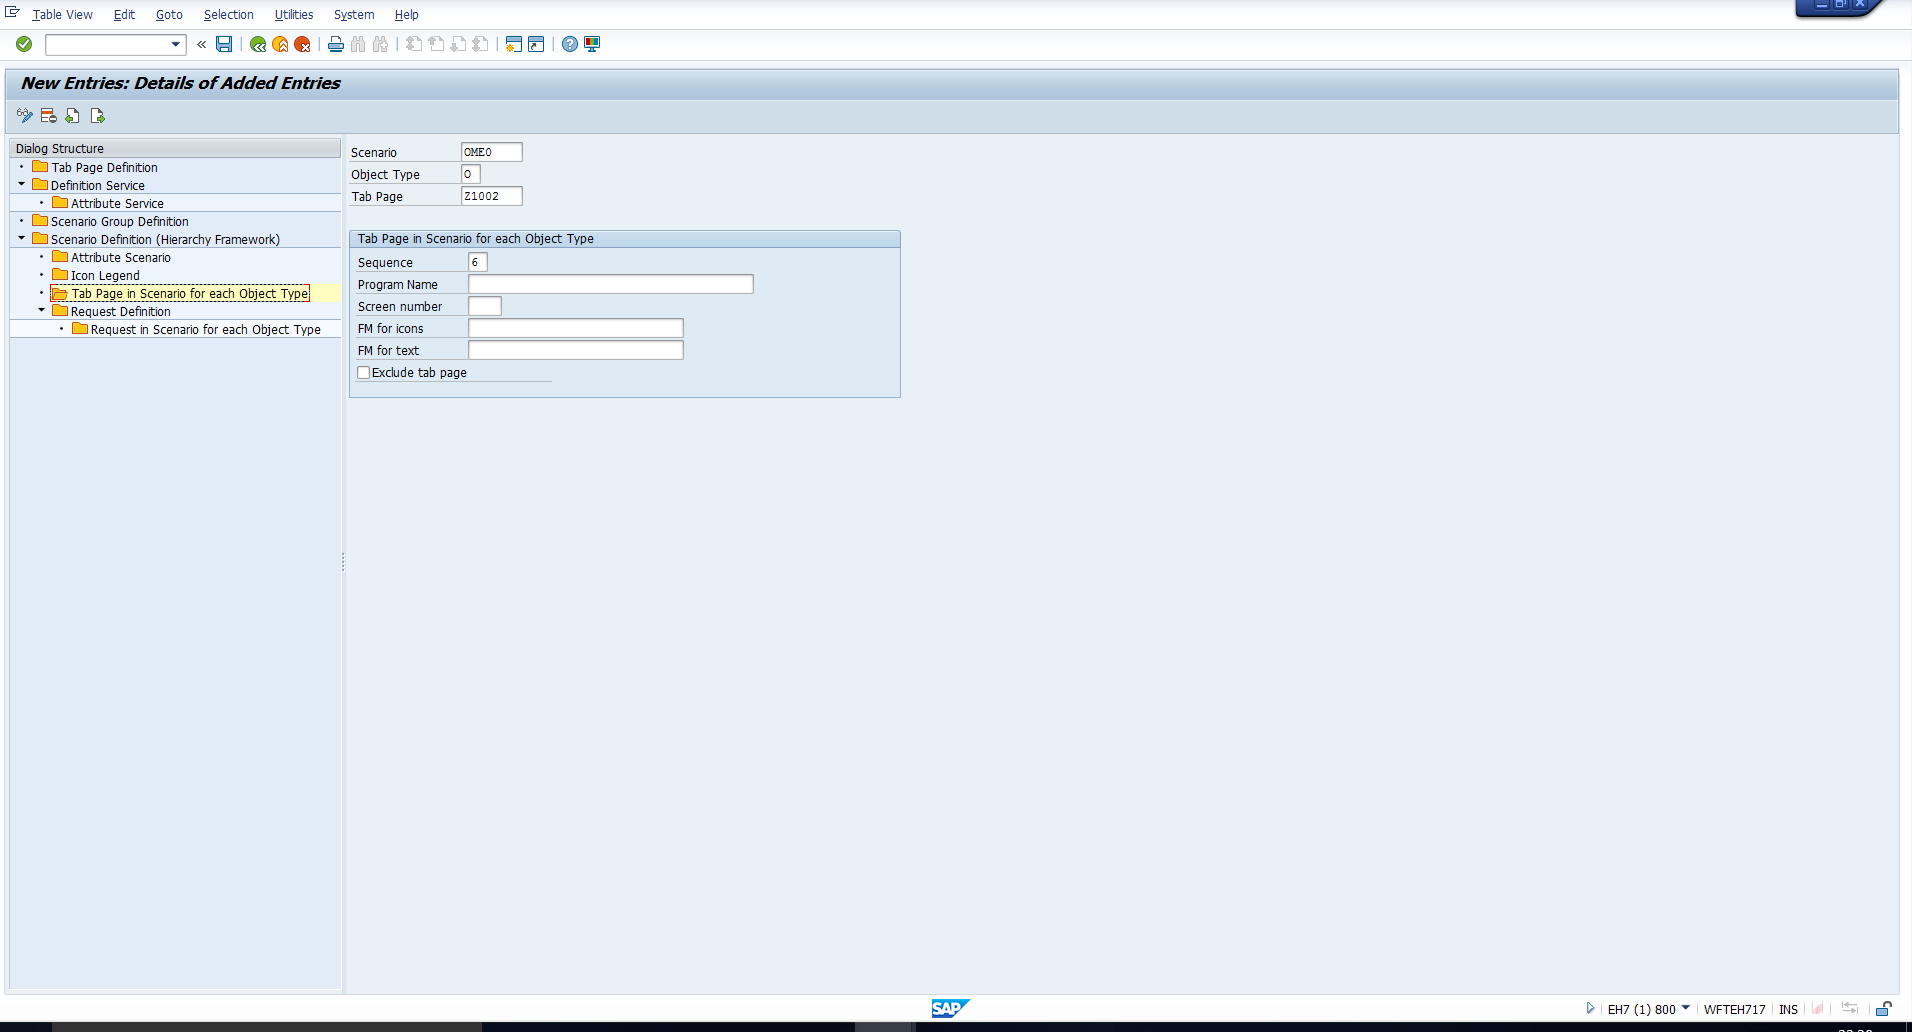
In our case, we enter values as shown below:
Hit Enter then Save ![]() .
.
Let’s check the organization and staffing interface in transaction code PPOME to see if the new tab page is visible. The Description tab page has been successfully added with infotype 1002 attributes, as shown below:
Change Sequence of Tab Pages
Assume that we would like to shift the newly created Description tab page to come before the Cost distribution tab page. To change the sequence of tab pages in SAP organization and staffing configuration, use the same customizing menu path we previously used to hide and add a tab page. In transaction code SPRO:
Personnel Management – Organizational Management – Hierarchy Framework – Integrate New Infotype – Add Infotype as Tab Page in Detail Area
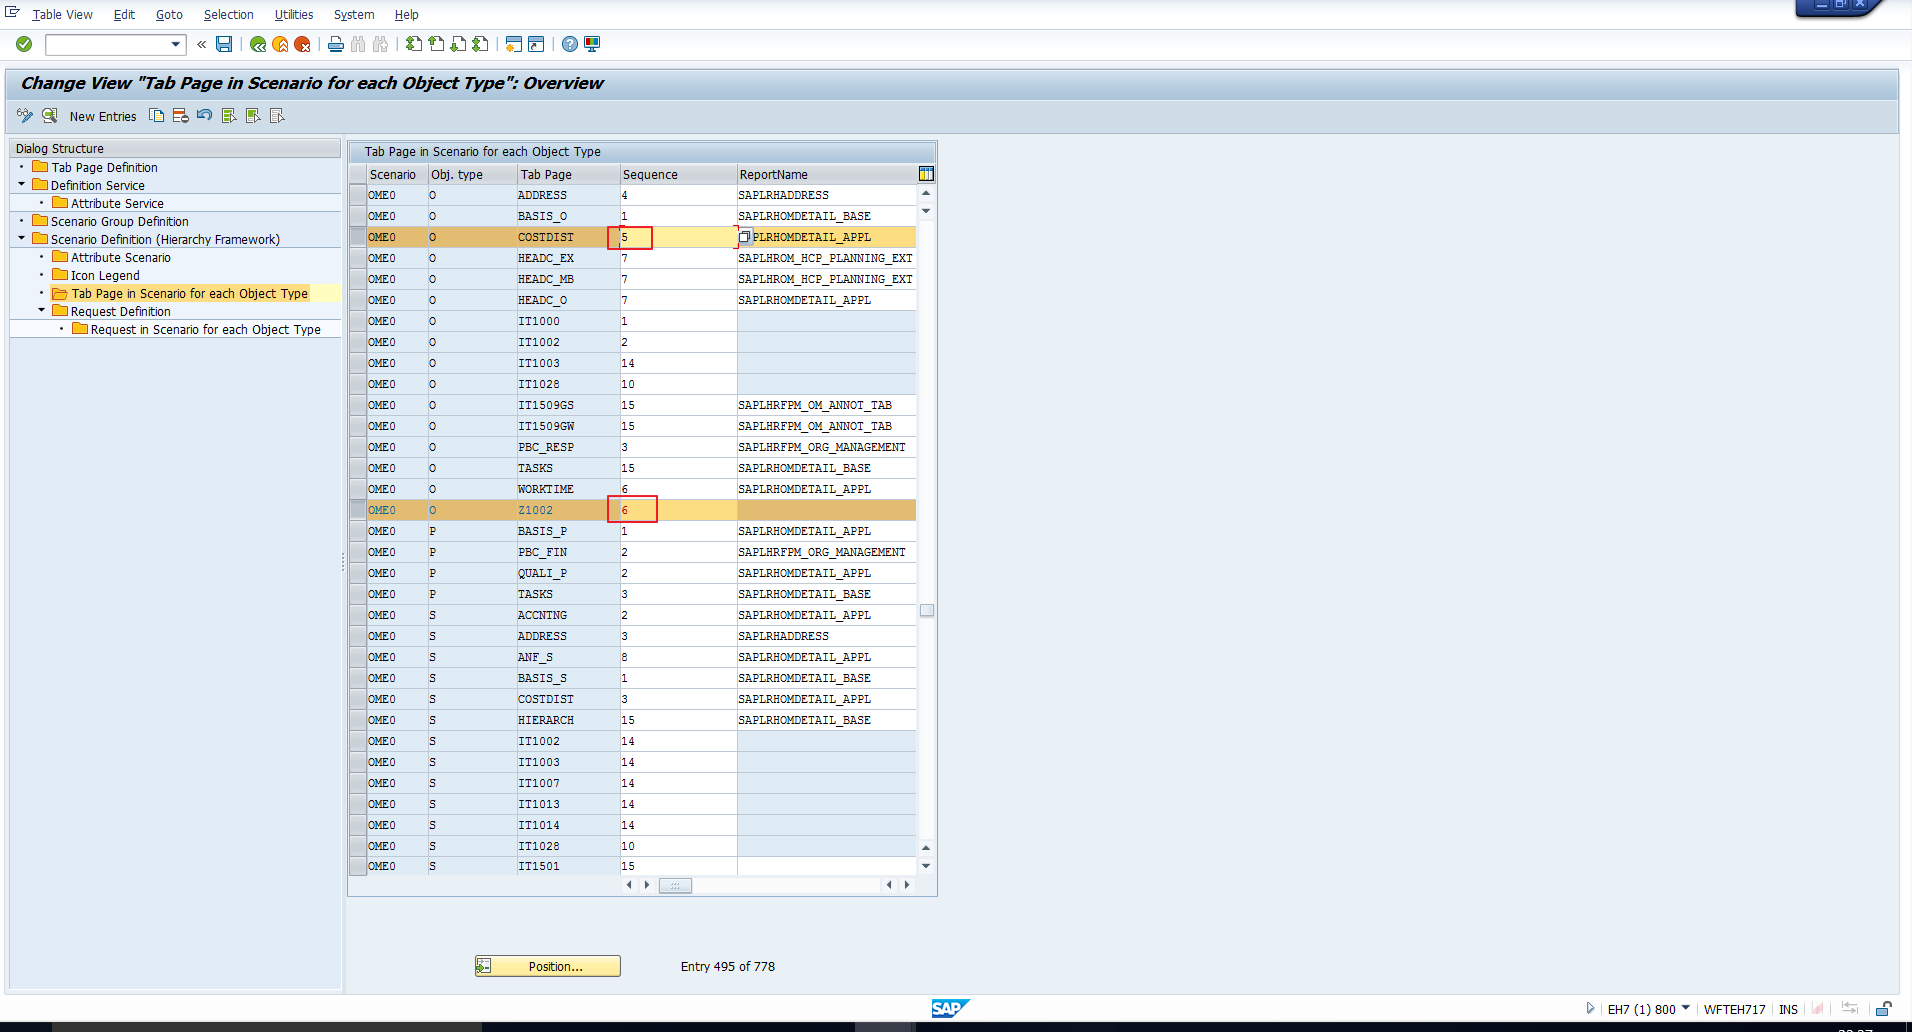
Again, select the OME0 scenario and choose the folder Tab Page in Scenario for each Object Type. First, check the sequence numbers of both these tab pages. We can see below that COSTDIST has the sequence number 5 and Z1002 has the sequence number 6.
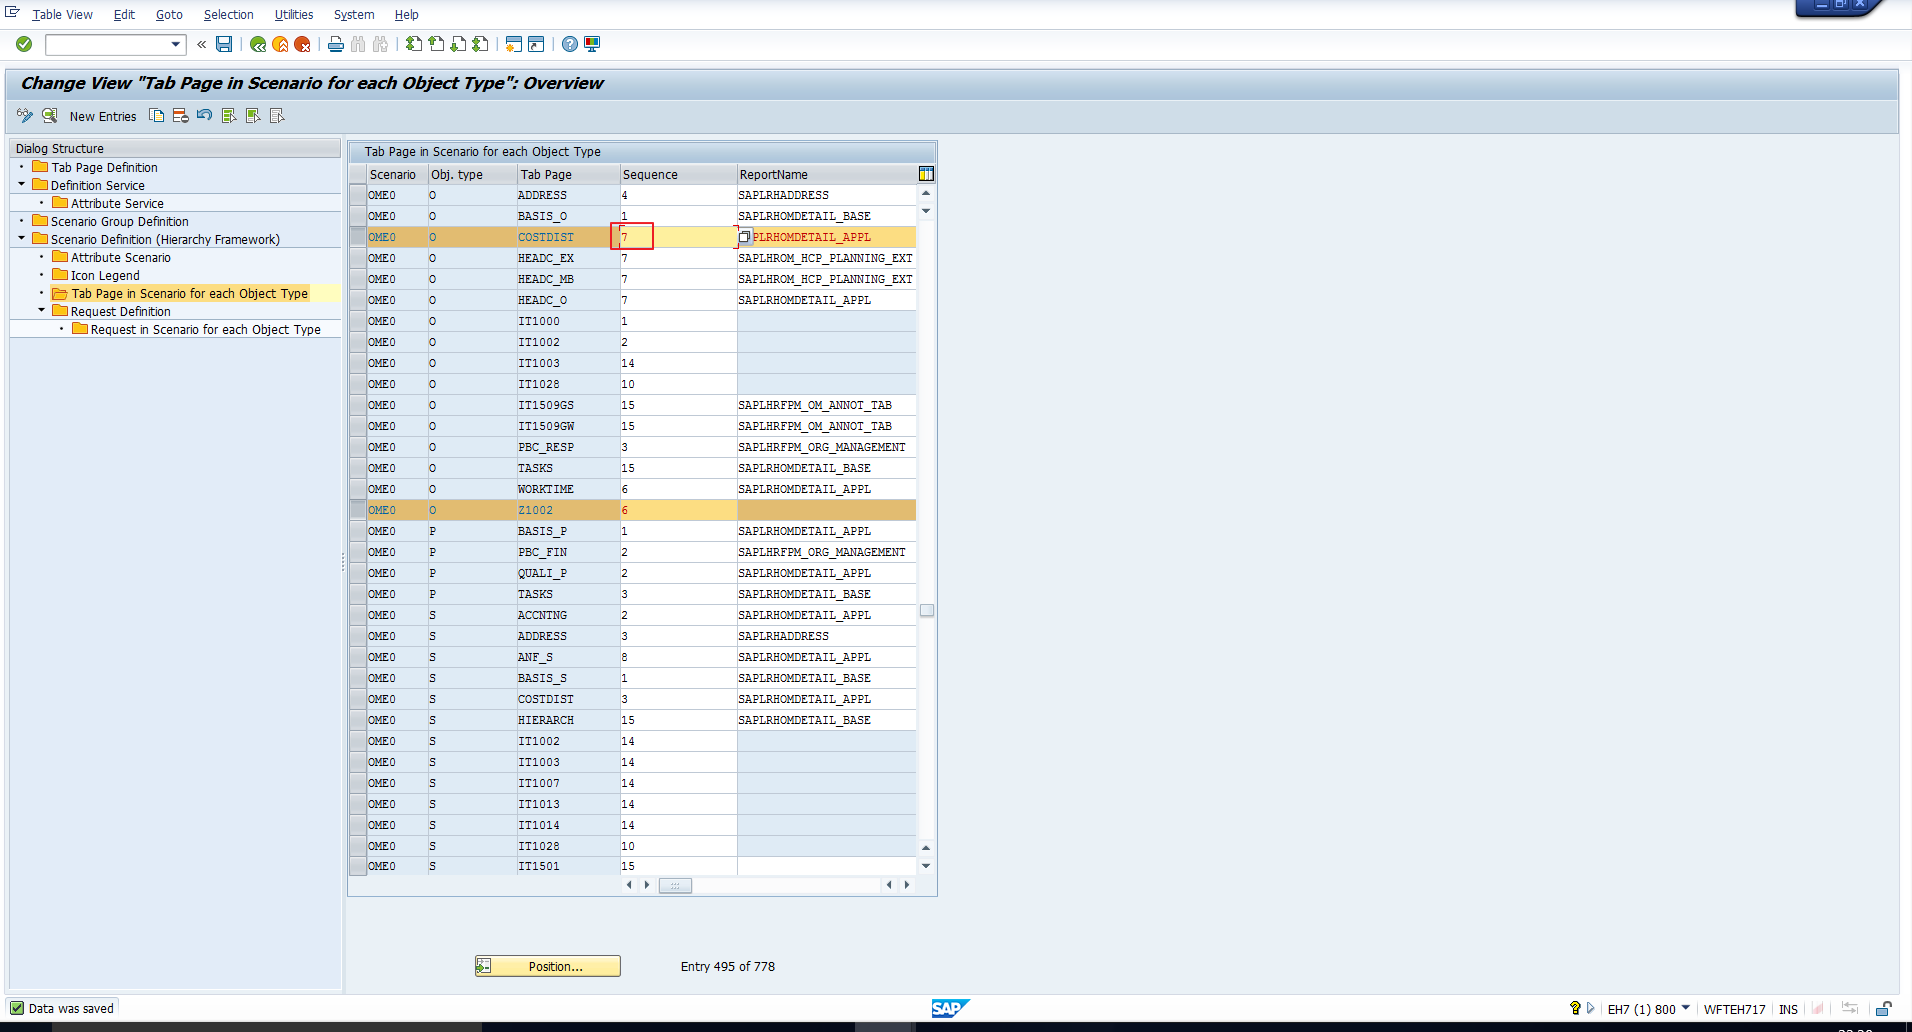
To shift the Cost distribution tab page after the Description tab page, change the sequence number of the COSTDIST entry from 5 to 7. This will effectively move the tab page to the end, leaving space for other tab pages to be activated in between. Hit Enter then Save ![]() .
.
Let’s check the organization and staffing interface in transaction code PPOME to see if the sequence of the tab pages have been updated as desired. The Description tab page now falls before the Cost distribution tab page as shown below:

—
Did you like this tutorial? Have any questions or comments? We would love to hear your feedback in the comments section below. It’d be a big help for us, and hopefully it’s something we can address for you in improvement of our free SAP HR tutorials.
Navigation Links
Go to next lesson: SAP Evaluation Paths
Go to previous lesson: SAP Organizational Management Reports
Go to overview of the course: SAP HR Training
It`s great – I love it. Thanks a lot – I need to know as many details as I could and your tutorials are fantastic.
Hi Experts,
I am trying to configure number ranges for OM Object (01O, 01C and 01S). Though I have set the subgroups and maintained the number ranges, the system picks the $$$$ number range that is setup already in the system. Please suggest what am I missing here.
Regards
Waheed