
 Welcome to the tutorial on SAP Infotype Menus in Personnel Administration. An infotype menu is a list of frequently used infotypes grouped together by subject matter. Upon completion of this tutorial, you will learn how to use and configure new SAP menus. This tutorial is part of our free SAP HCM course.
Use of SAP Infotype Menus
1. Infotype menus help to structure the HR master data view by grouping together infotypes by subject matter.
2. The infotype menus can be configured differently for different user groups, hence improving the relevance of the HR master data view. This user-group dependency is two-dimensional:
- It means that an end-user can see only those infotype menus relevant to his/her role or nature of work.
- It also means that within the same infotype menu, different end users can see different infotypes required for their area of responsibility.
Calling SAP Infotype Menus
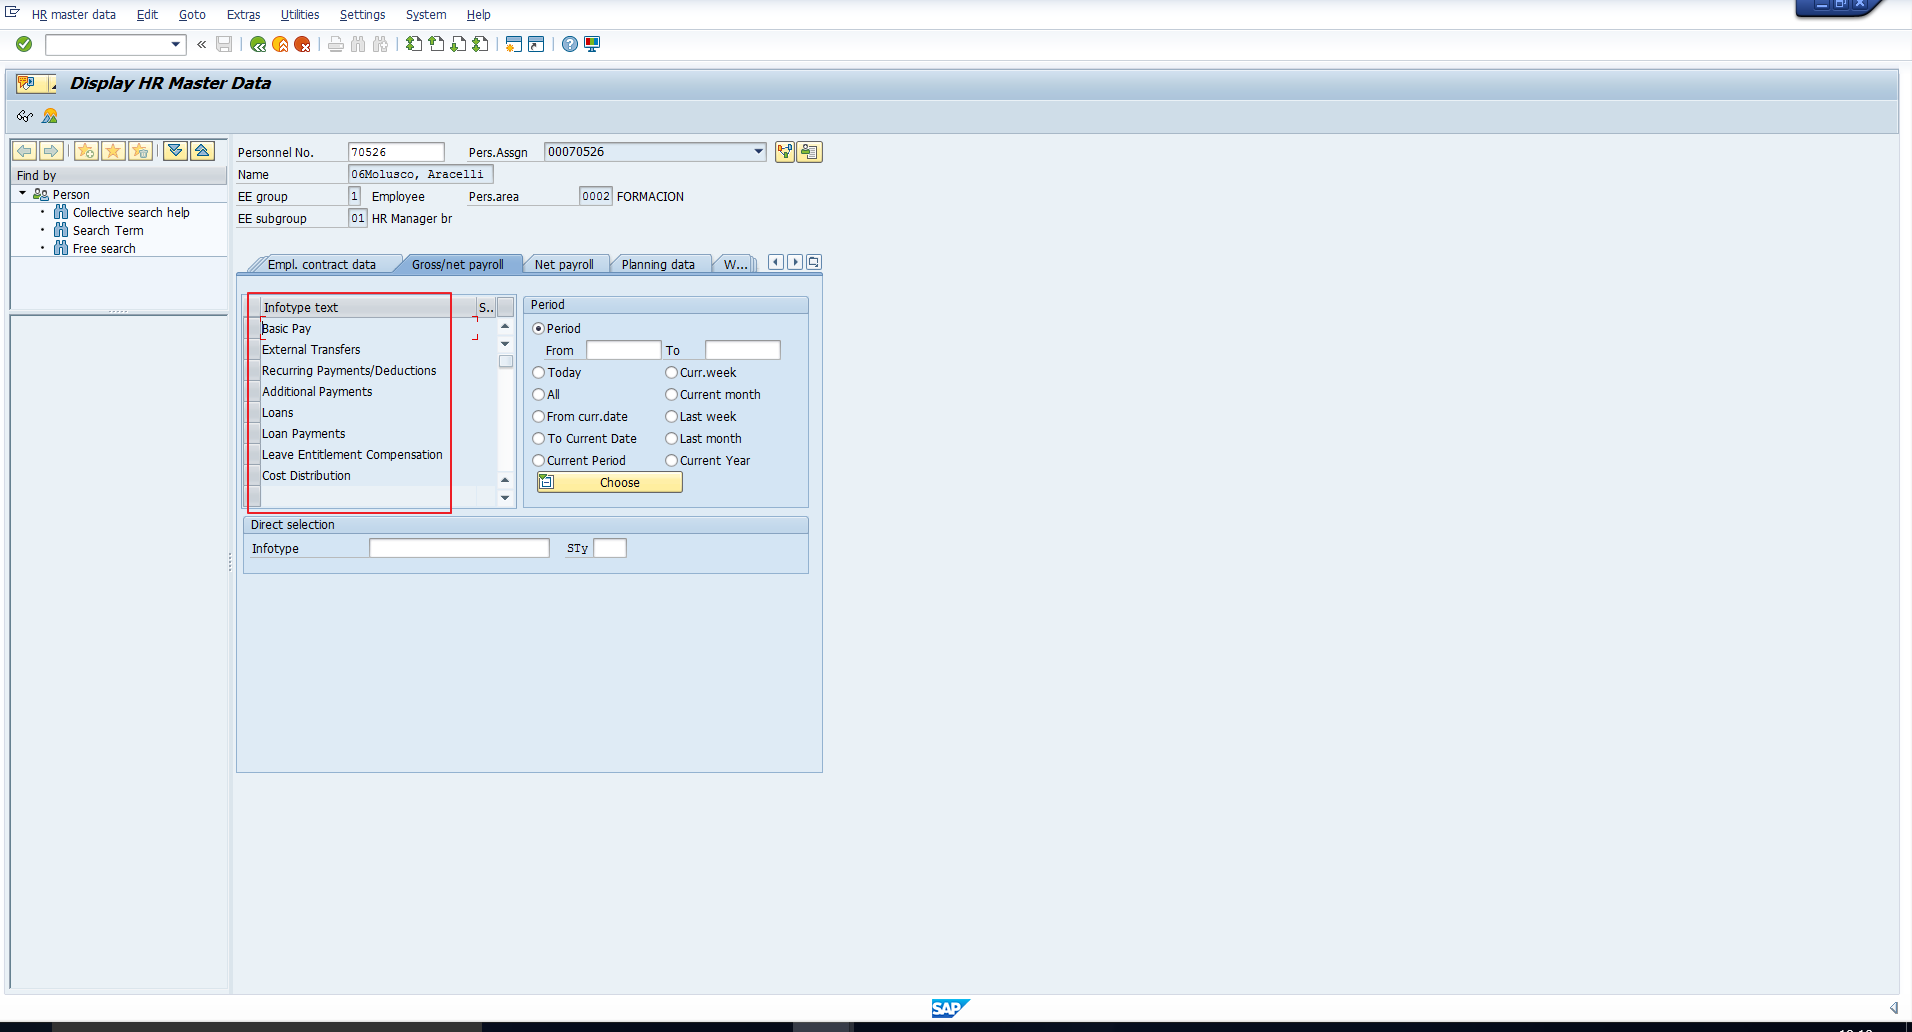
When HR master data is displayed via transaction code PA20 or maintained via transaction code PA30, the menus are called as shown in the picture below.
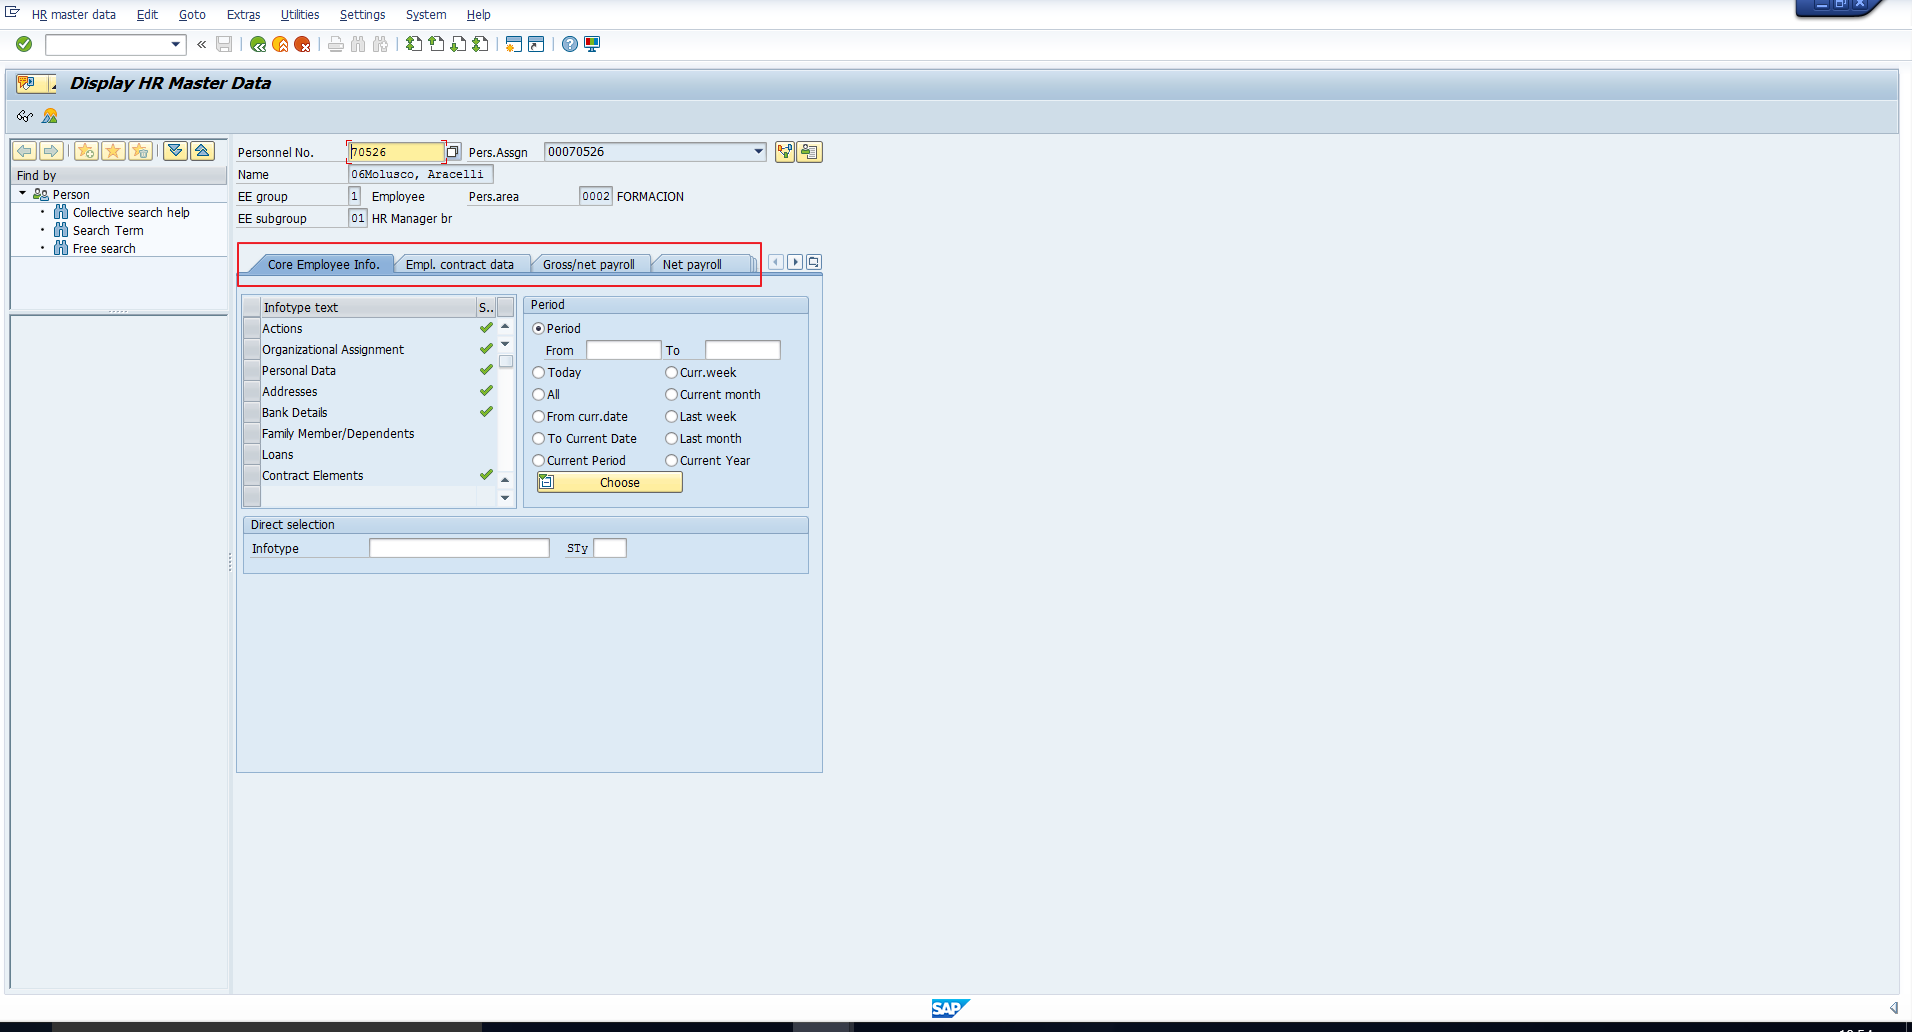
Each of the tabs highlighted in the figure represents an infotype menu. The following infotype menus are visible:
- Core Employee Info.
- Empl. Contract data
- Gross/net payroll
- Net payroll
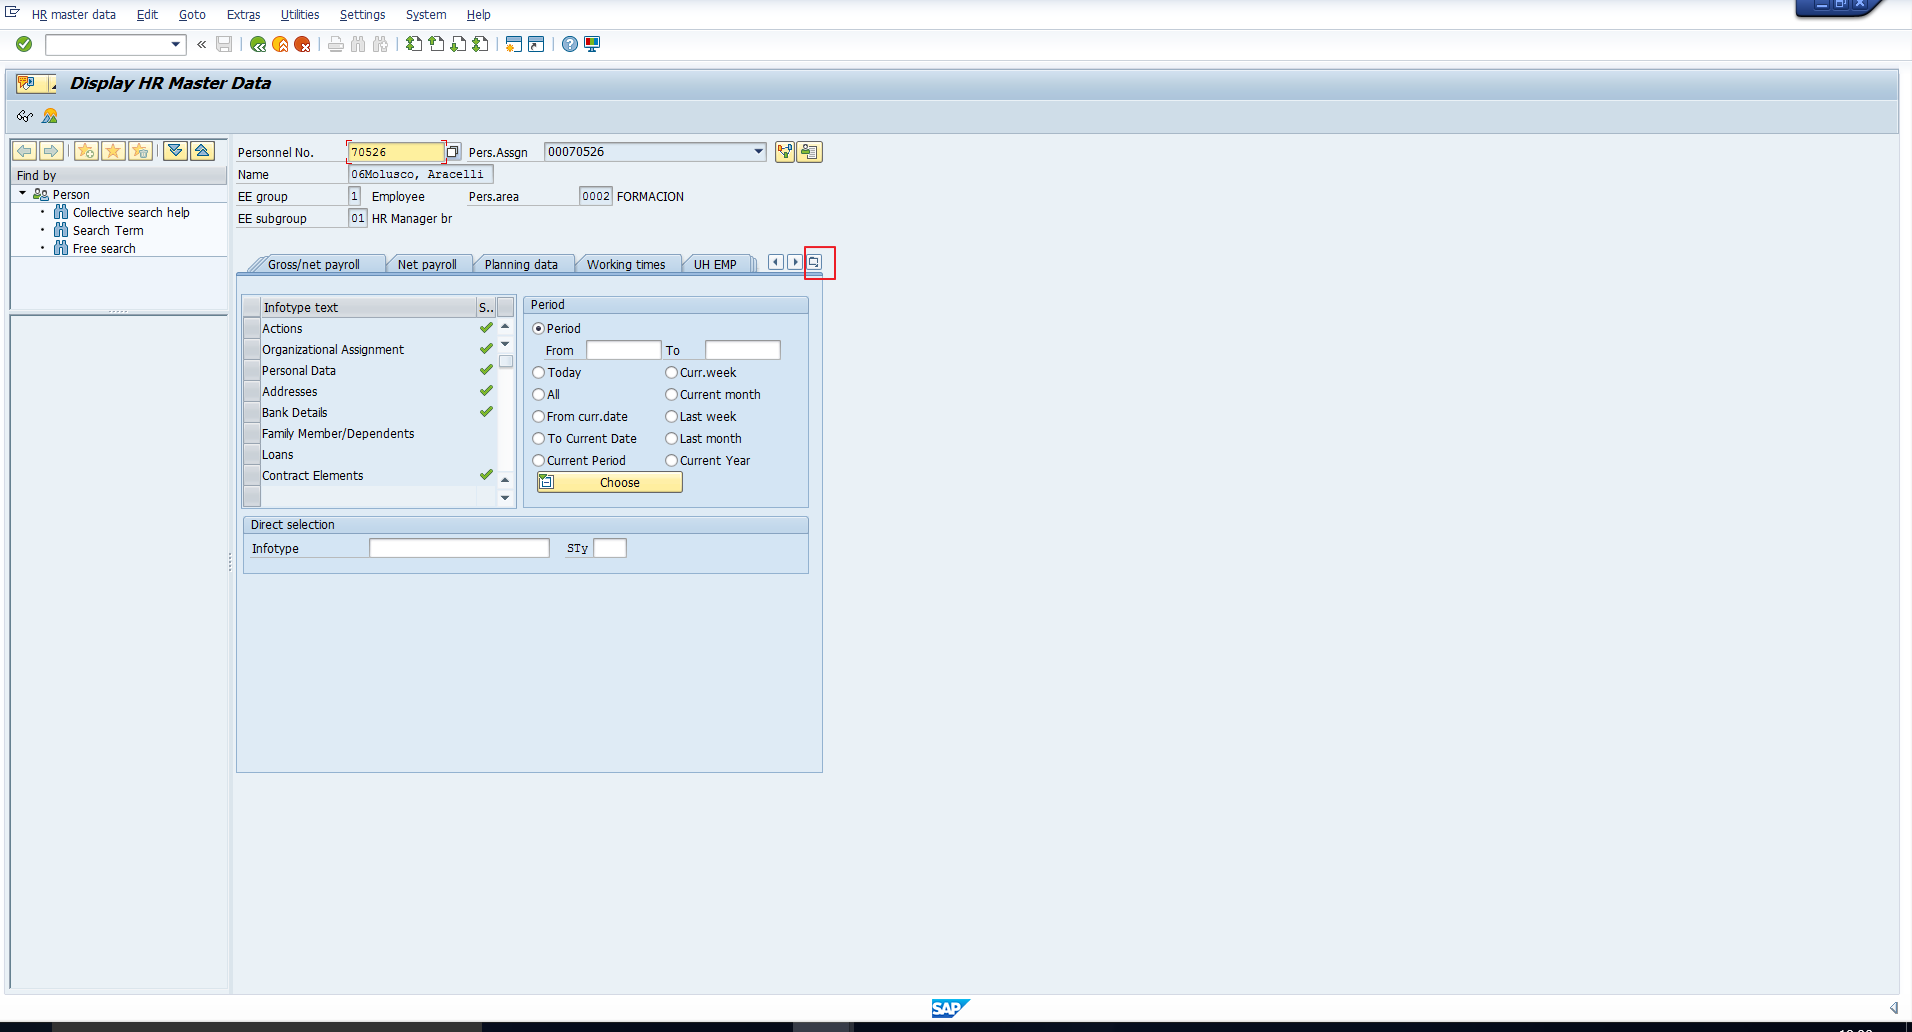
There are also other menus further right, to view these you can scroll to the right using the Right arrow key as highlighted in the picture below.

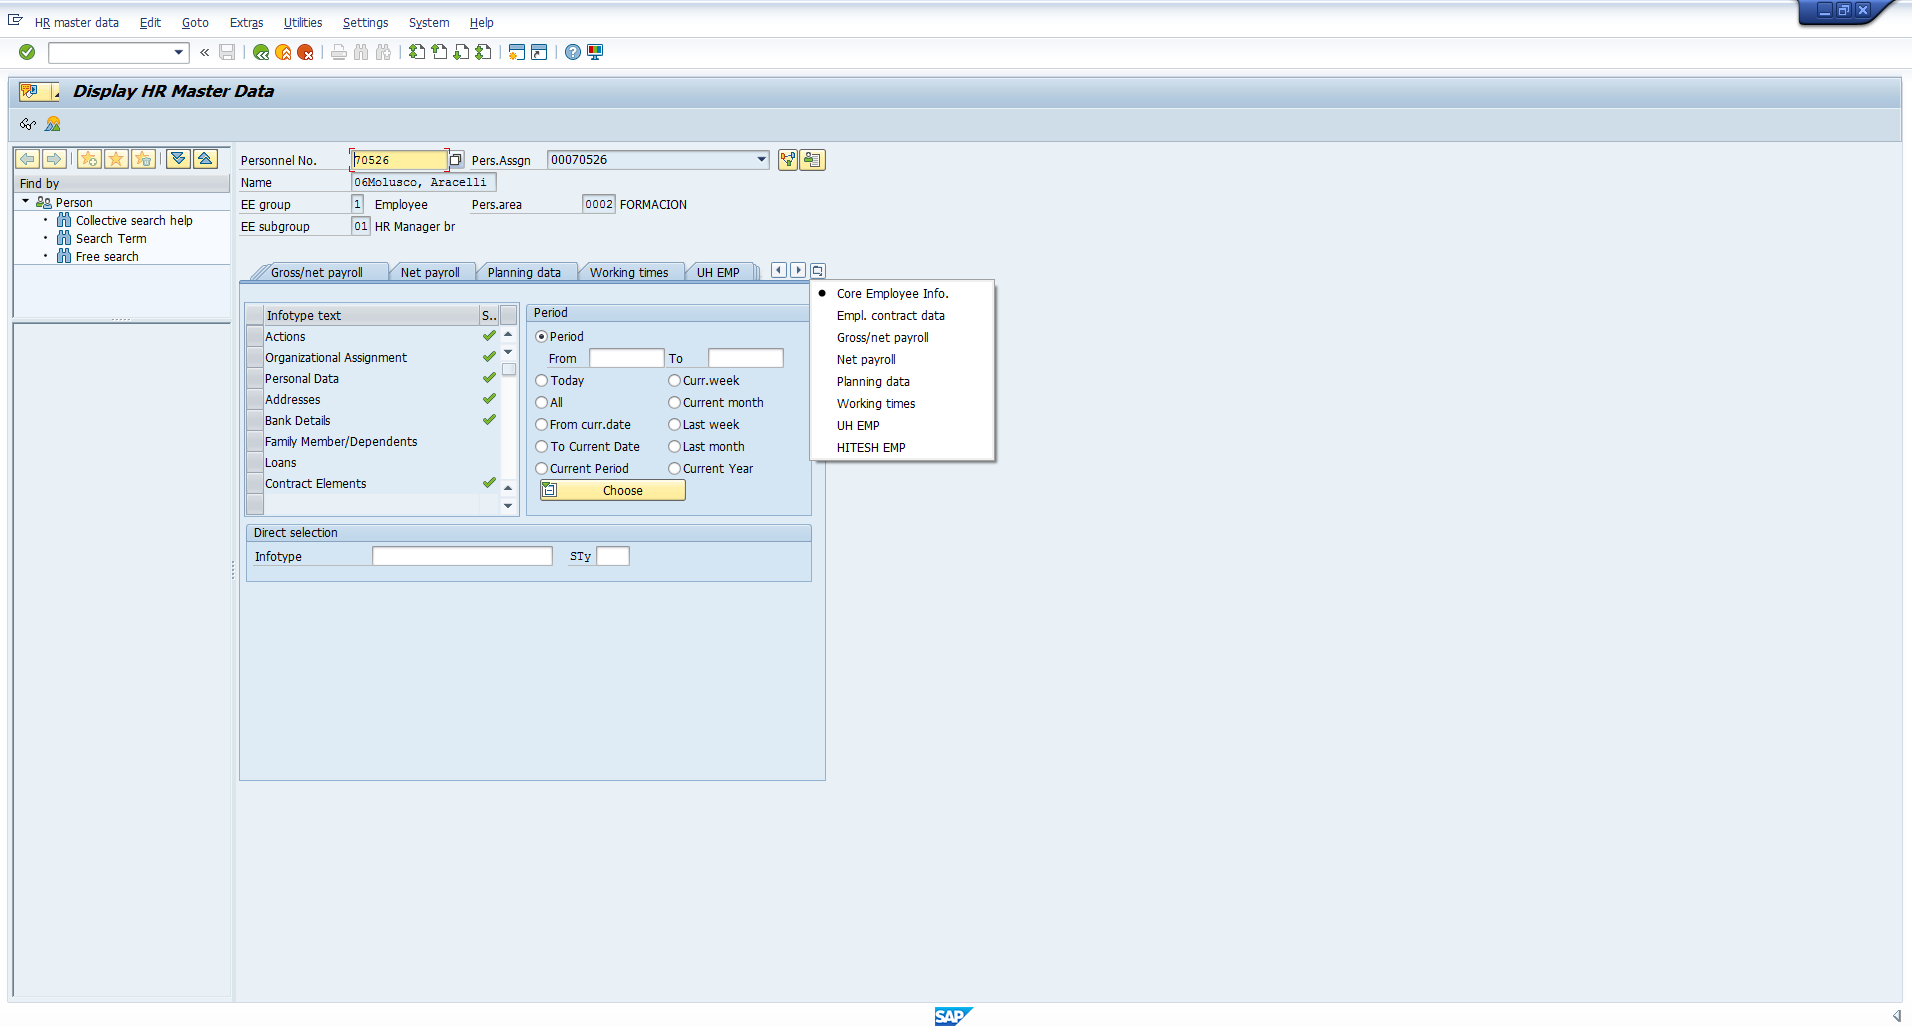
You can also check the entire list of infotype menus by clicking on the icon shown in the next picture.
The list in our system is shown below.
You can check the list of infotypes in each menu by clicking on the tab corresponding to that menu.
For example, in the next picture, we can see the list of infotypes grouped together in the Gross/net payroll menu.
SAP Infotype Menu Configuration
Configuration of SAP infotype menus comprises of the below steps.
Define an Infotype Menu
Here you define an infotype menu by following the customizing path (transaction code SPRO):
Personnel Management- Personnel Administration – Customizing Procedures – Infotype menus – Infotype menu

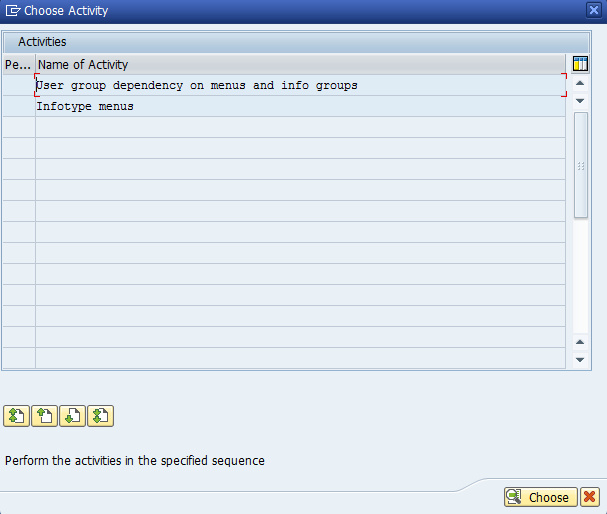
Further, this step consists of two activities as you can see on the next screenshot.

Determine Whether the Menu Should be Dependent on User Group
You can choose whether the menu should be dependent on User group. For example, in an organization where all HR maintenance activity is handled centrally by a common team, the need for User group-dependent menus may not arise. Whereas in another organization, where Personnel Administration data entry is handled by one team, Payroll-related data entry is handled by a second and Time-related data entry by a third, three user groups will be required along with different user group-dependent Infotype menus.
To configure this dependency, choose the first activity shown on the screenshot above. It takes you to the screen depicted below.
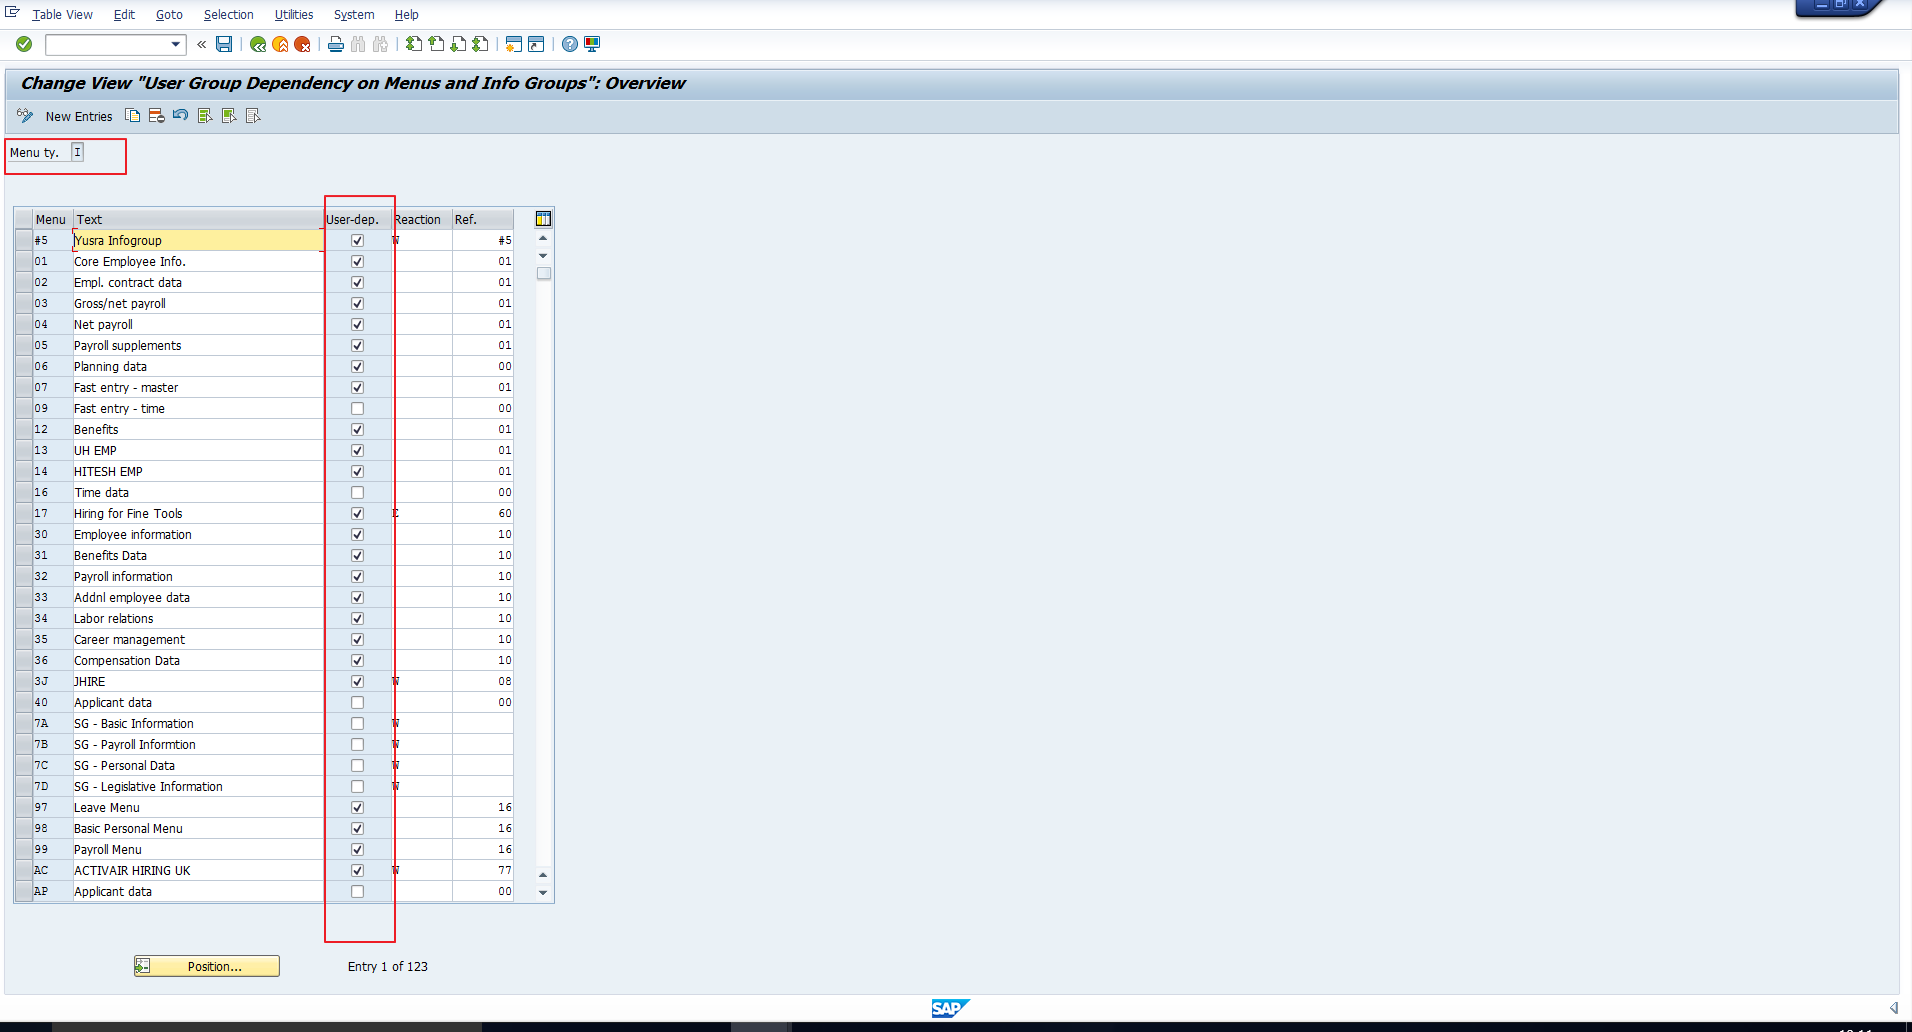
Note that the menu type is I (Infotype menu). This applies to all Infotype menus and this field is non-editable. In this screen, you can create a new Infotype menu. You can specify that it is User group-dependent by checking the flag as highlighted in the picture above. Leave the flag unchecked if the menu should not be dependent on User group.

There are two columns highlighted in the screenshot above.
The Ref. column is used to specify the Reference user group that should be used for the menu layout if the User group has not been maintained for the user.
The Reaction column is used to specify how the system should react if the User group has not been maintained for the user.
You can set any of the below mentioned reactions:
- <Blank> – The menu for the specified reference user group is displayed without any message.
- ‘W’ – The menu for the specified reference user group is displayed along with a Warning message.
- ‘E’ – No menu is displayed but an Error is thrown to convey that the User group has not been maintained.
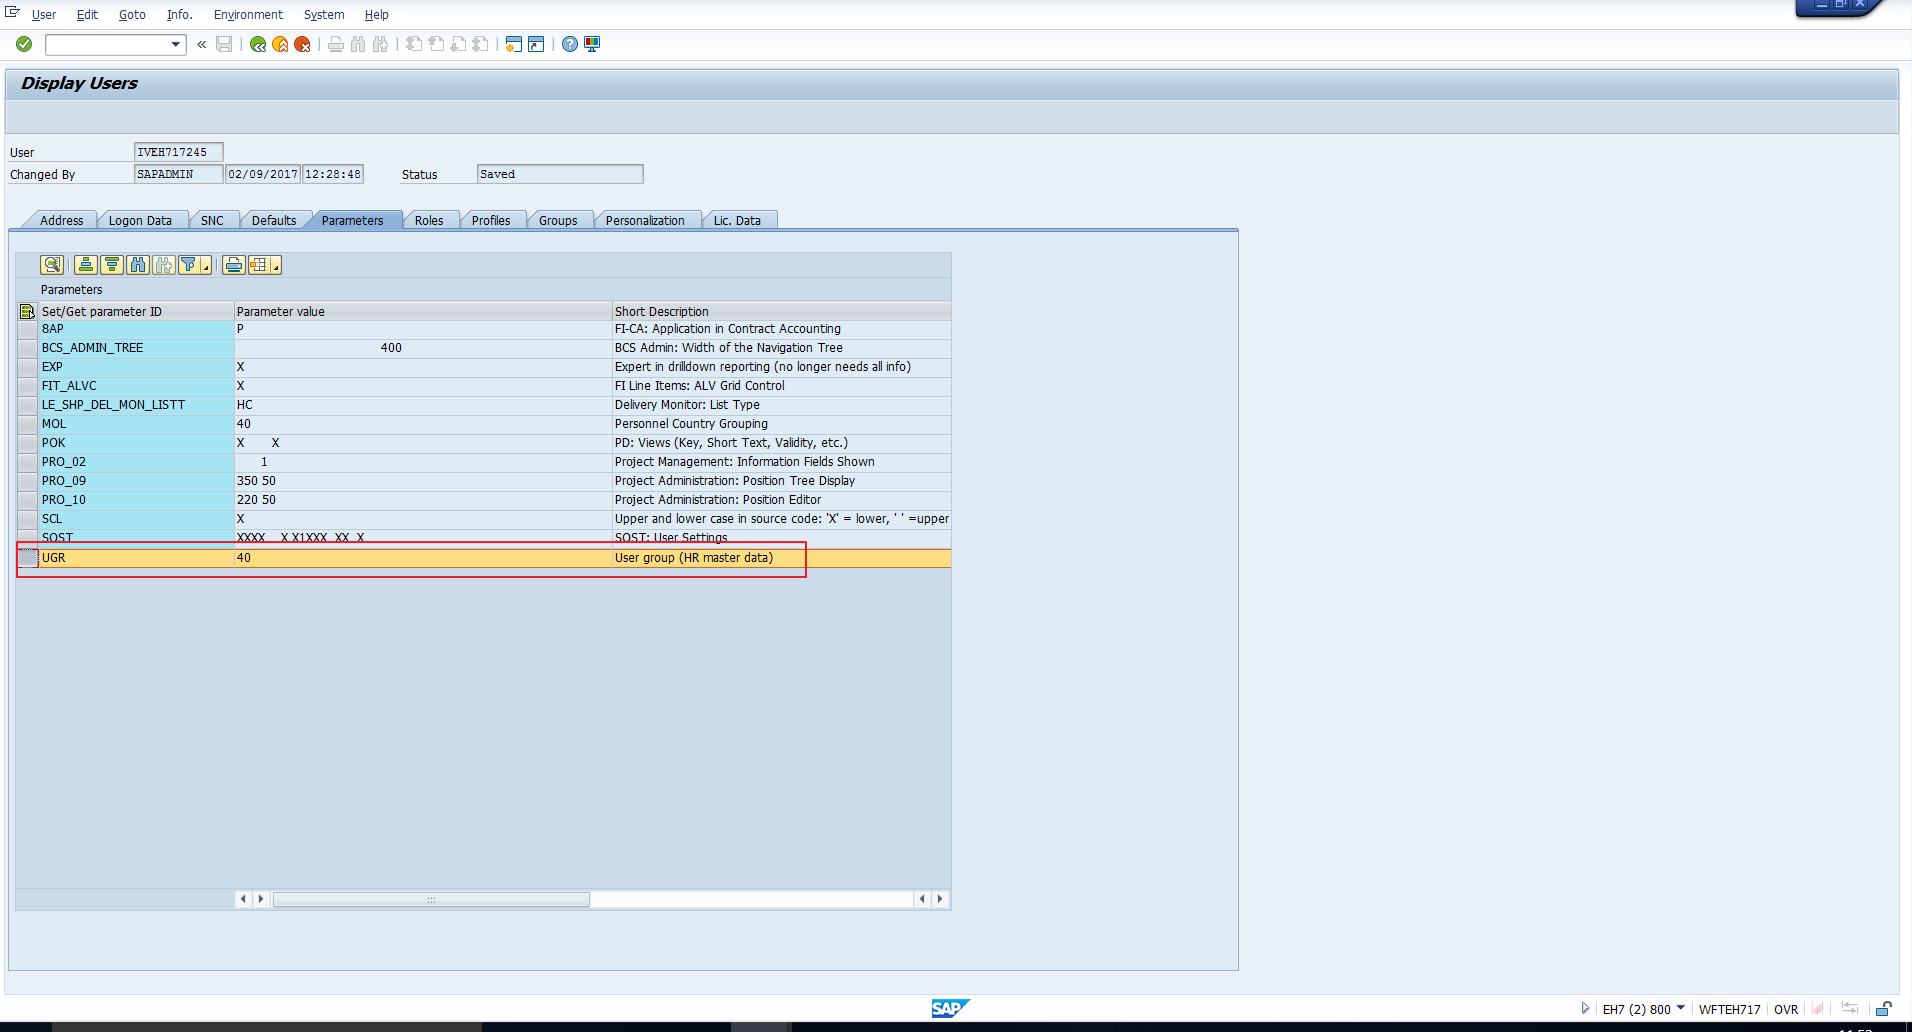
On a side note, the parameter UGR should be assigned to every user during user creation. The parameter value indicates the User group.
List Out the Infotypes in the Infotype Menu
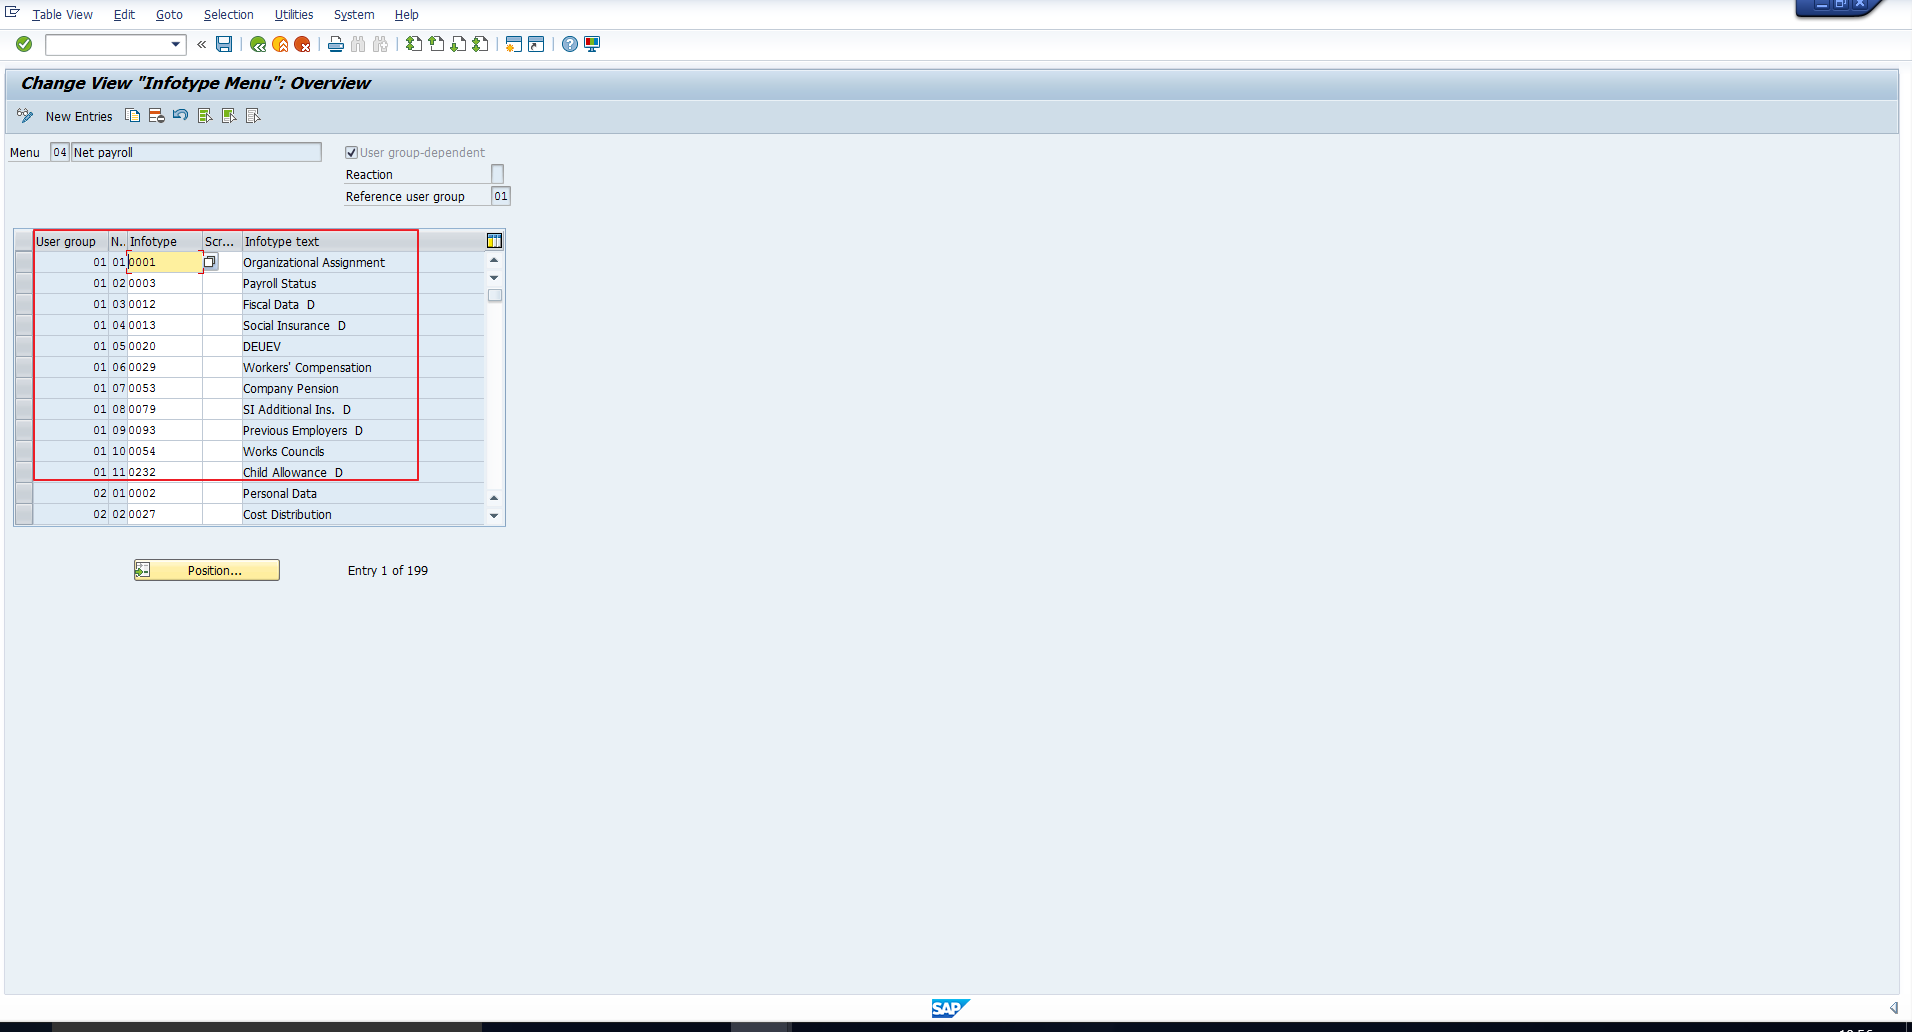
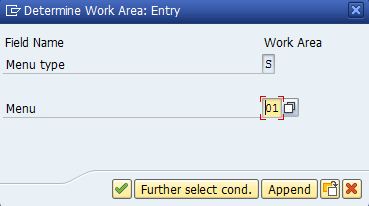
To edit the infotypes in an infotype menu, choose the second activity in the choose menu dialog shown above. It takes you to the pop-up box depicted in the picture below. Enter the two-character menu code for which you want to edit the list of infotypes. We have entered 04 (Net payroll) as an example.

The next picture depicts the sequence of infotypes that will be displayed in the Net payroll menu for the User group 01.
The next picture depicts the sequence of infotypes that will be displayed in the Net payroll menu for the User group 02.
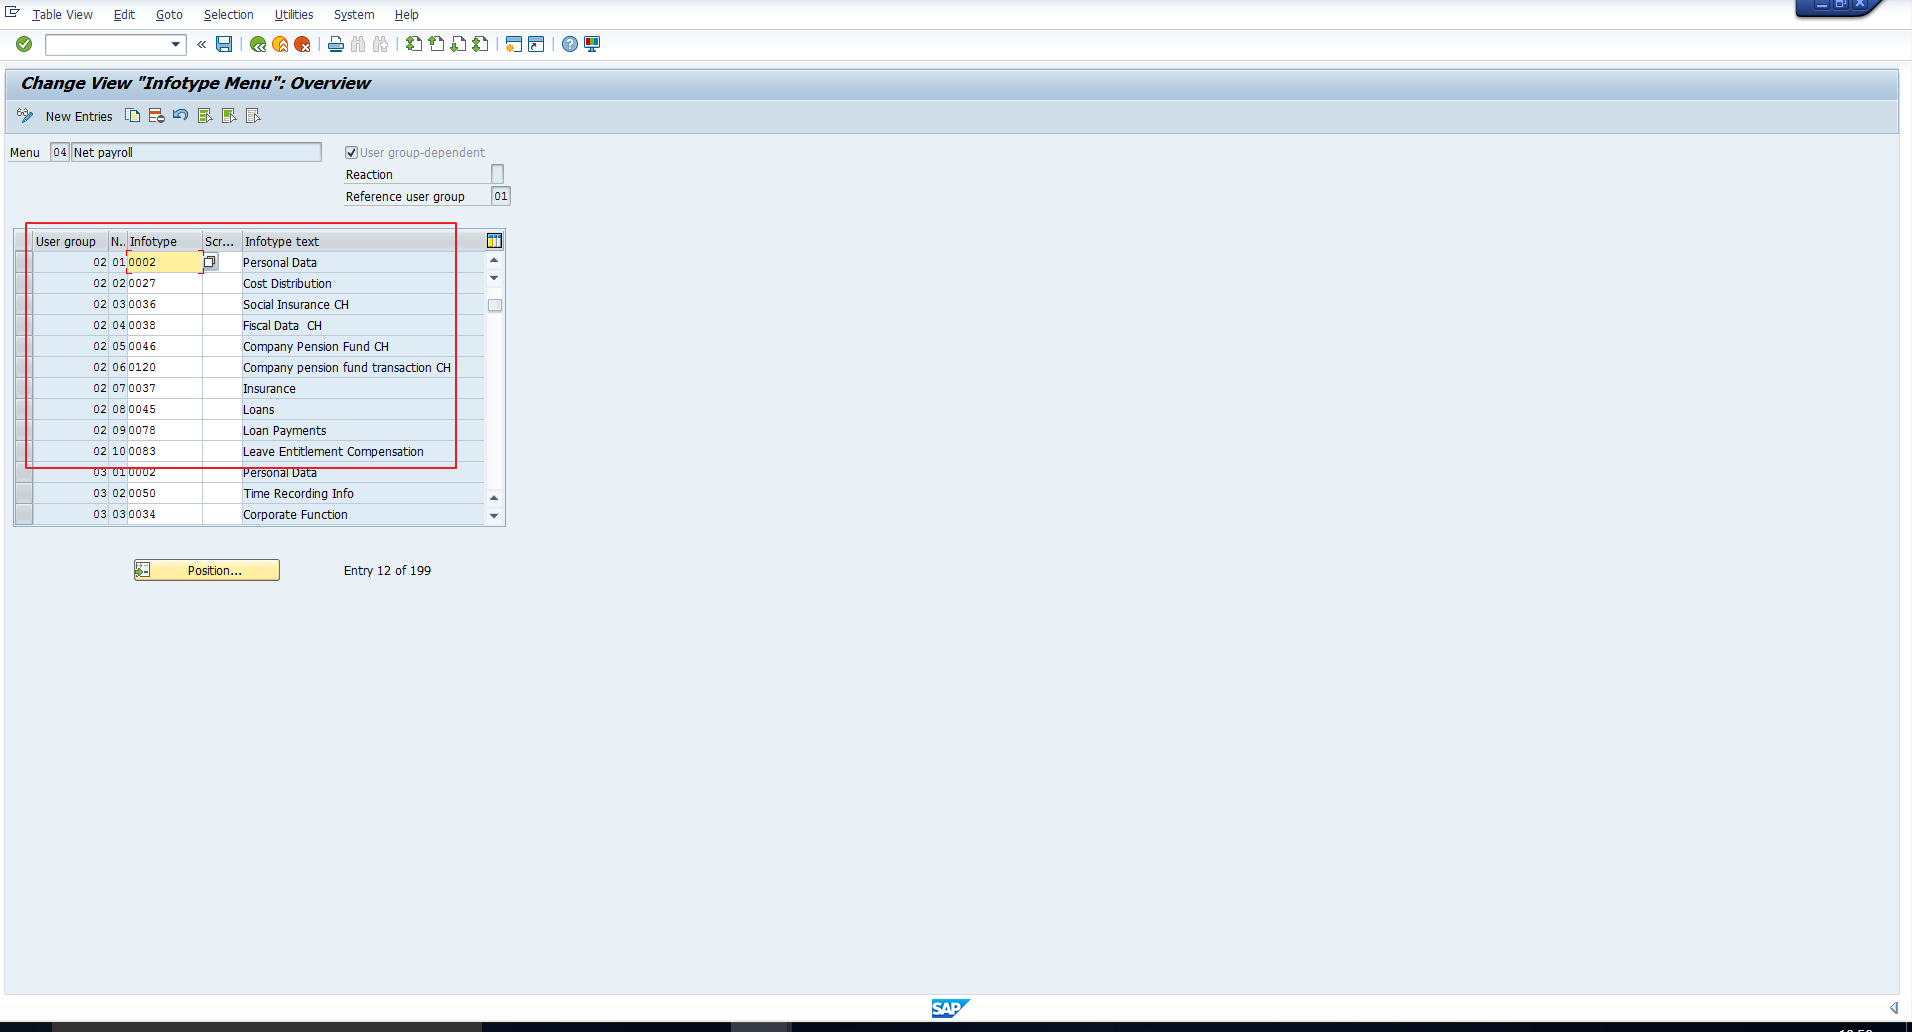
Similarly, the required sequence of infotypes can be defined for all the user groups in the organization.
Determine Choice of SAP Infotype Menu
In this activity, we define which infotype menus should be displayed as tab strips in the Display HR master data and the Maintain HR master data views for each user group.
Follow the below the Customizing path (transaction code SPRO) as shown in the next picture:
Personnel Management – Personnel Administration – Customizing Procedures – Infotype menus – Determine choice of infotype menus
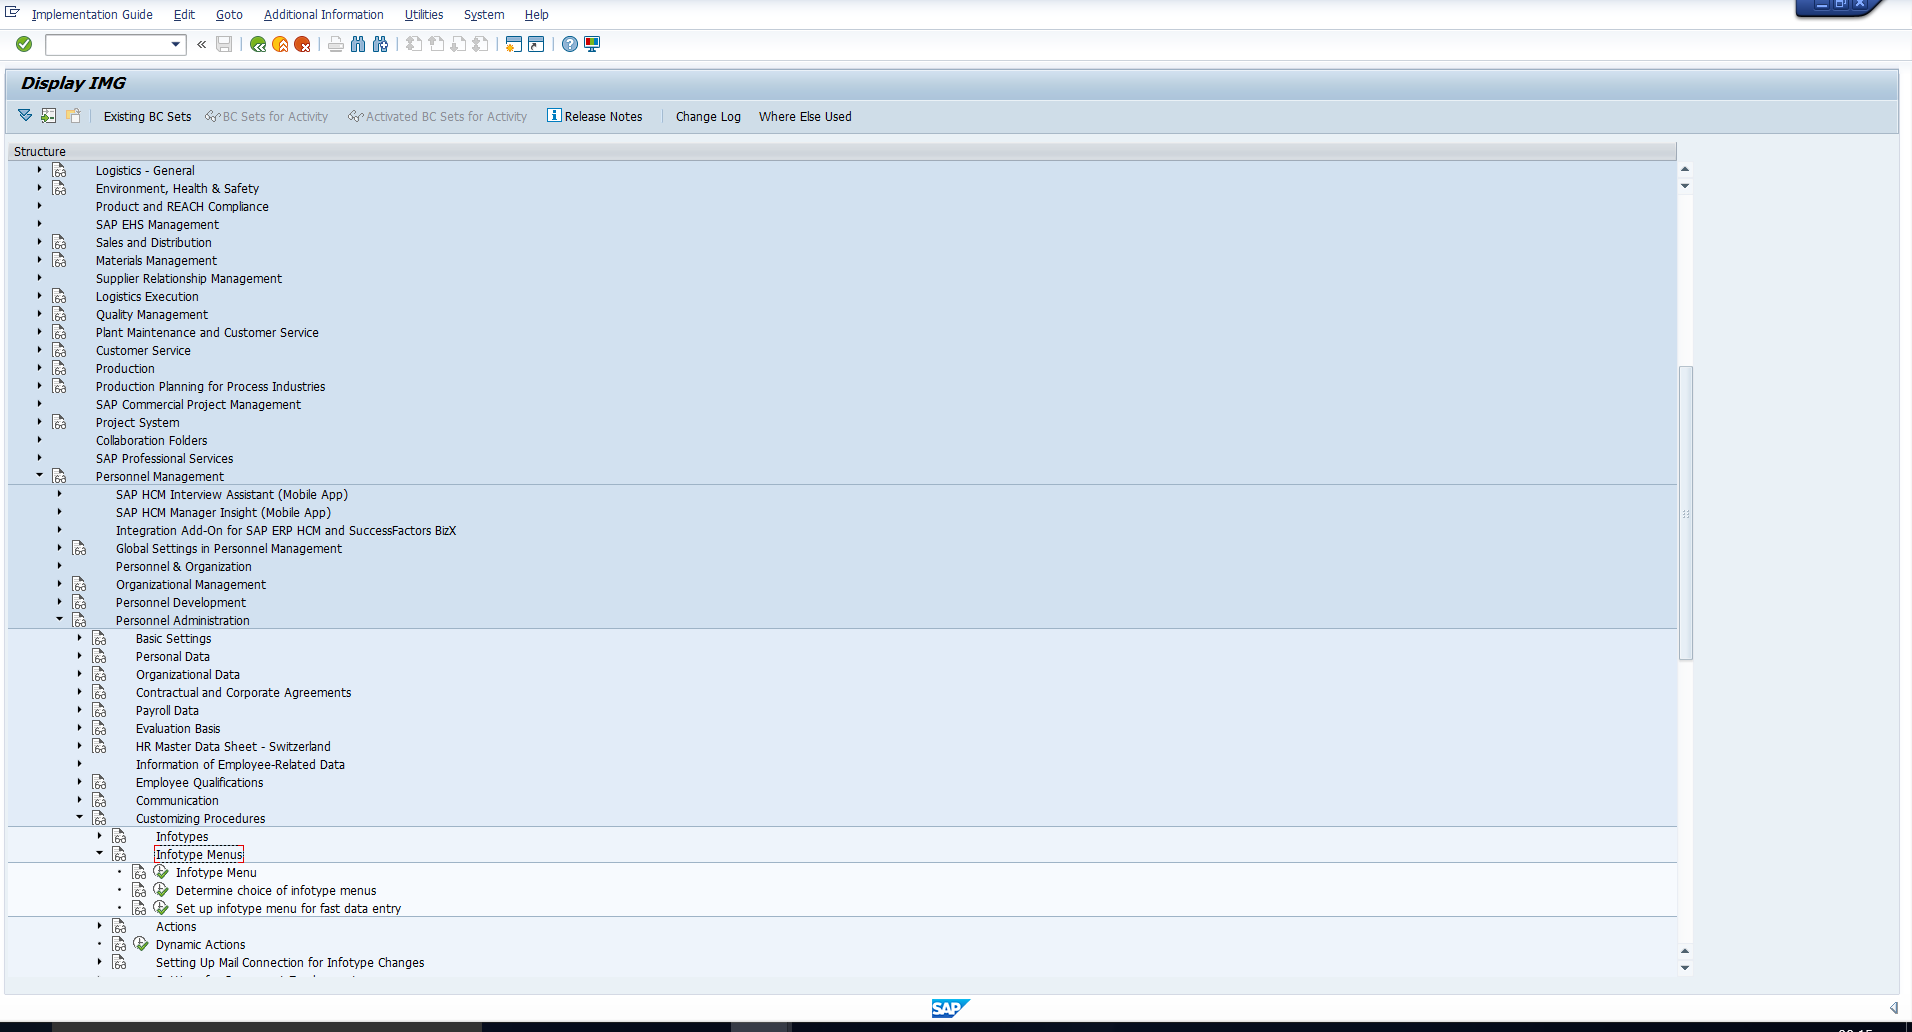
The screen will pop up as shown in the picture below.
Double click on the second activity. Enter Menu ‘01’ in the screen as shown in the next picture. Menu ‘01’ is the menu for HR master data and hence this must be entered here. Do not confuse this with the two-character infotype menu codes in the previous activity.
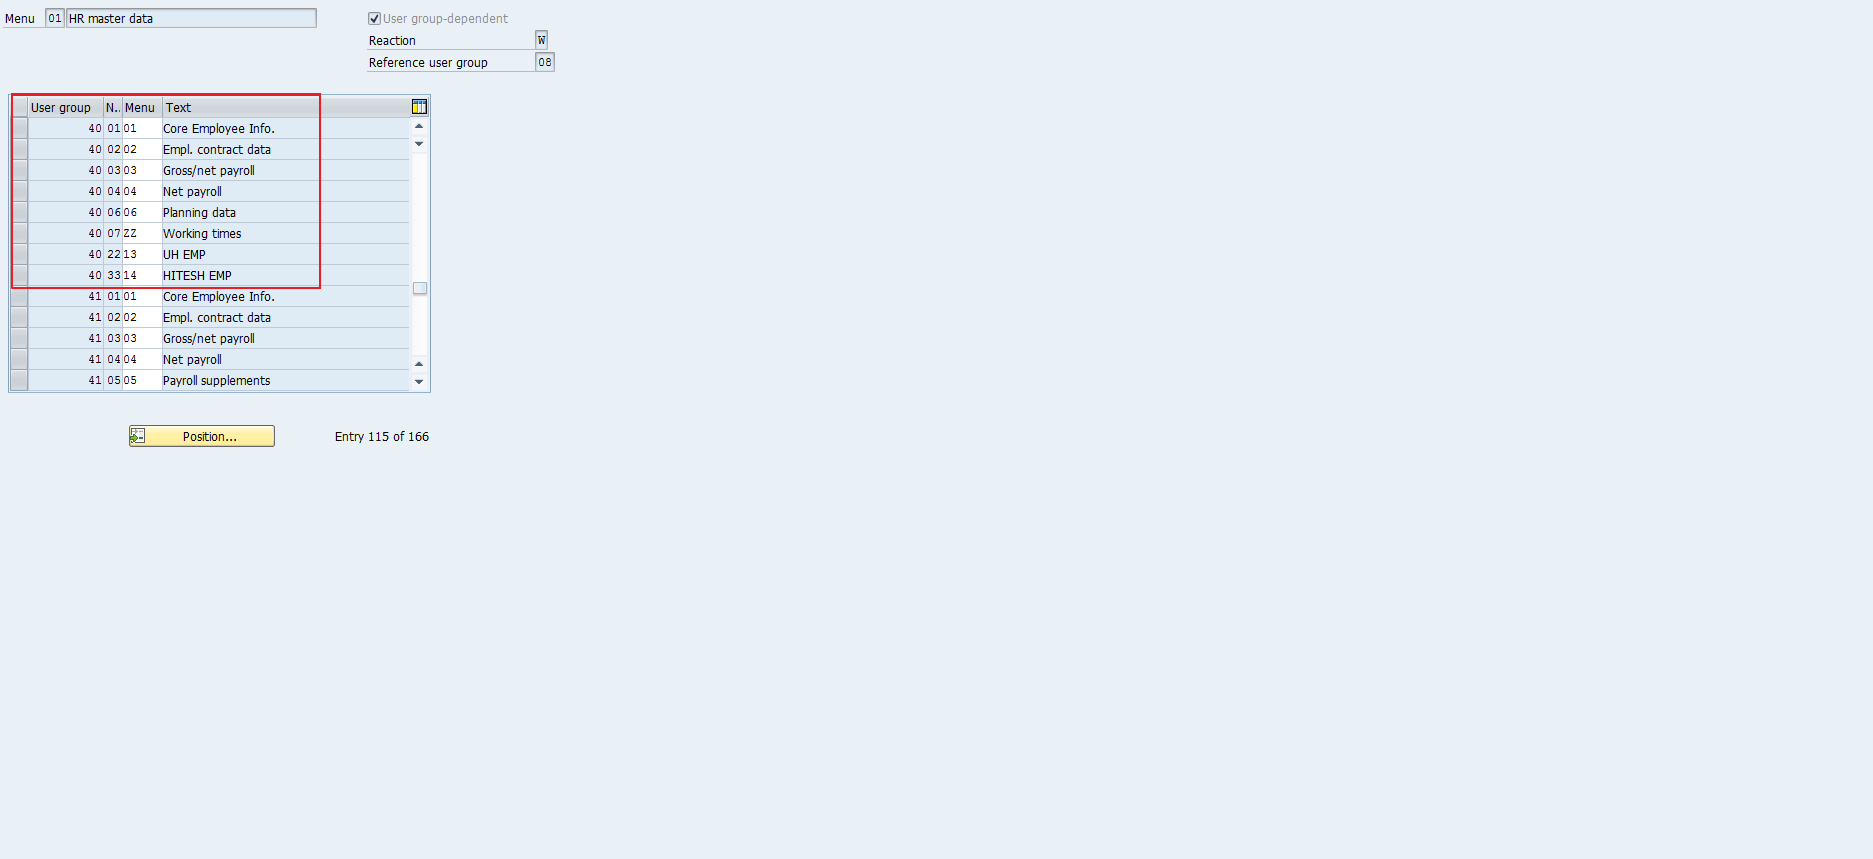
In the screen that follows, the sequence of infotype menus is defined for each user group. Our user id has been assigned to user group 40 as can be seen in the screenshot below.
The sequence of menus for user group 40 is depicted in the next screenshot. If you revisit one of the pictures in the beginning of this tutorial, you will see that the sequence of menus is the same in both figures. And that is the exact purpose of this configuration step – to define the infotype menus visible in the HR master data views.
Example
Assume that we want to create a new Infotype menu “Time Management” to group the most frequently accessed time management infotypes:
- Planned Working Time (Infotype 0007)
- Absences (Infotype 2001)
- Attendances (Infotype 2002)
- Absence Quotas (Infotype 2006)
This new menu should be accessible only to the User group 40. Let us follow the configuration steps explained in the previous section:
Define a New Infotype Menu
Determine Whether the Menu Should be Dependent on User Group
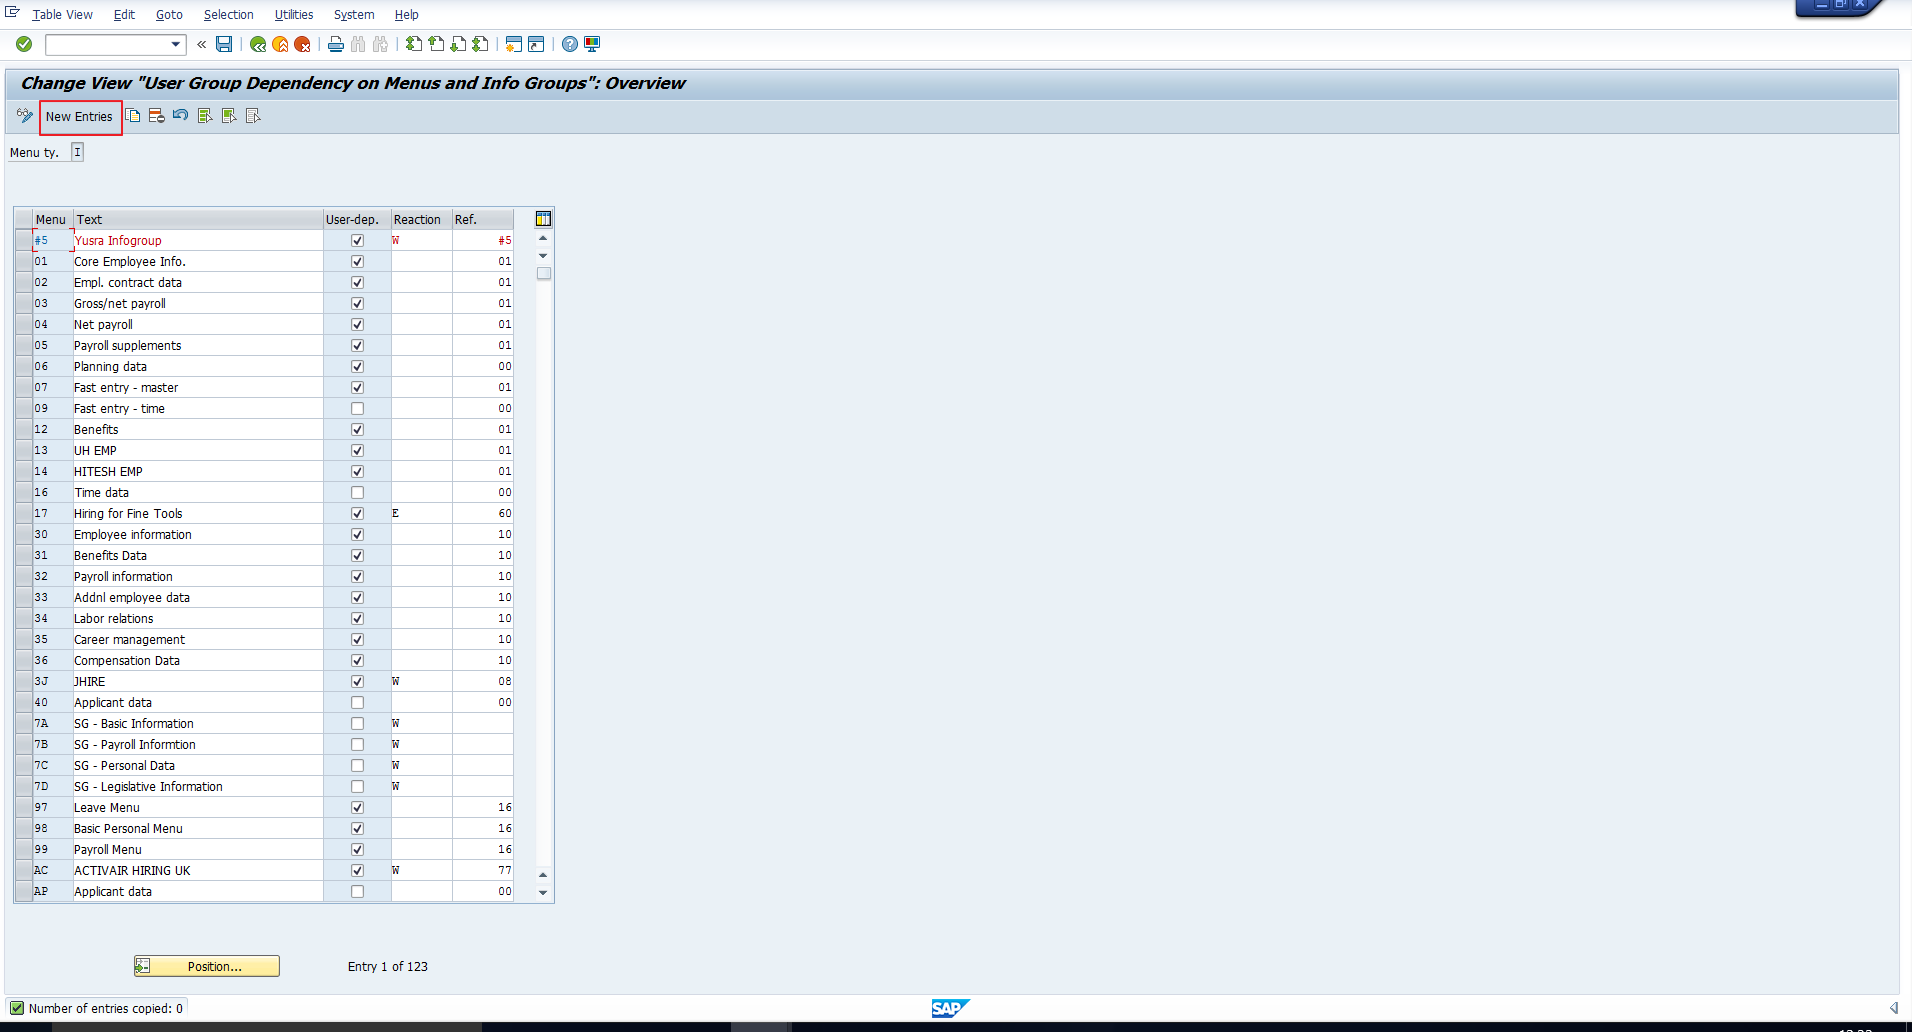
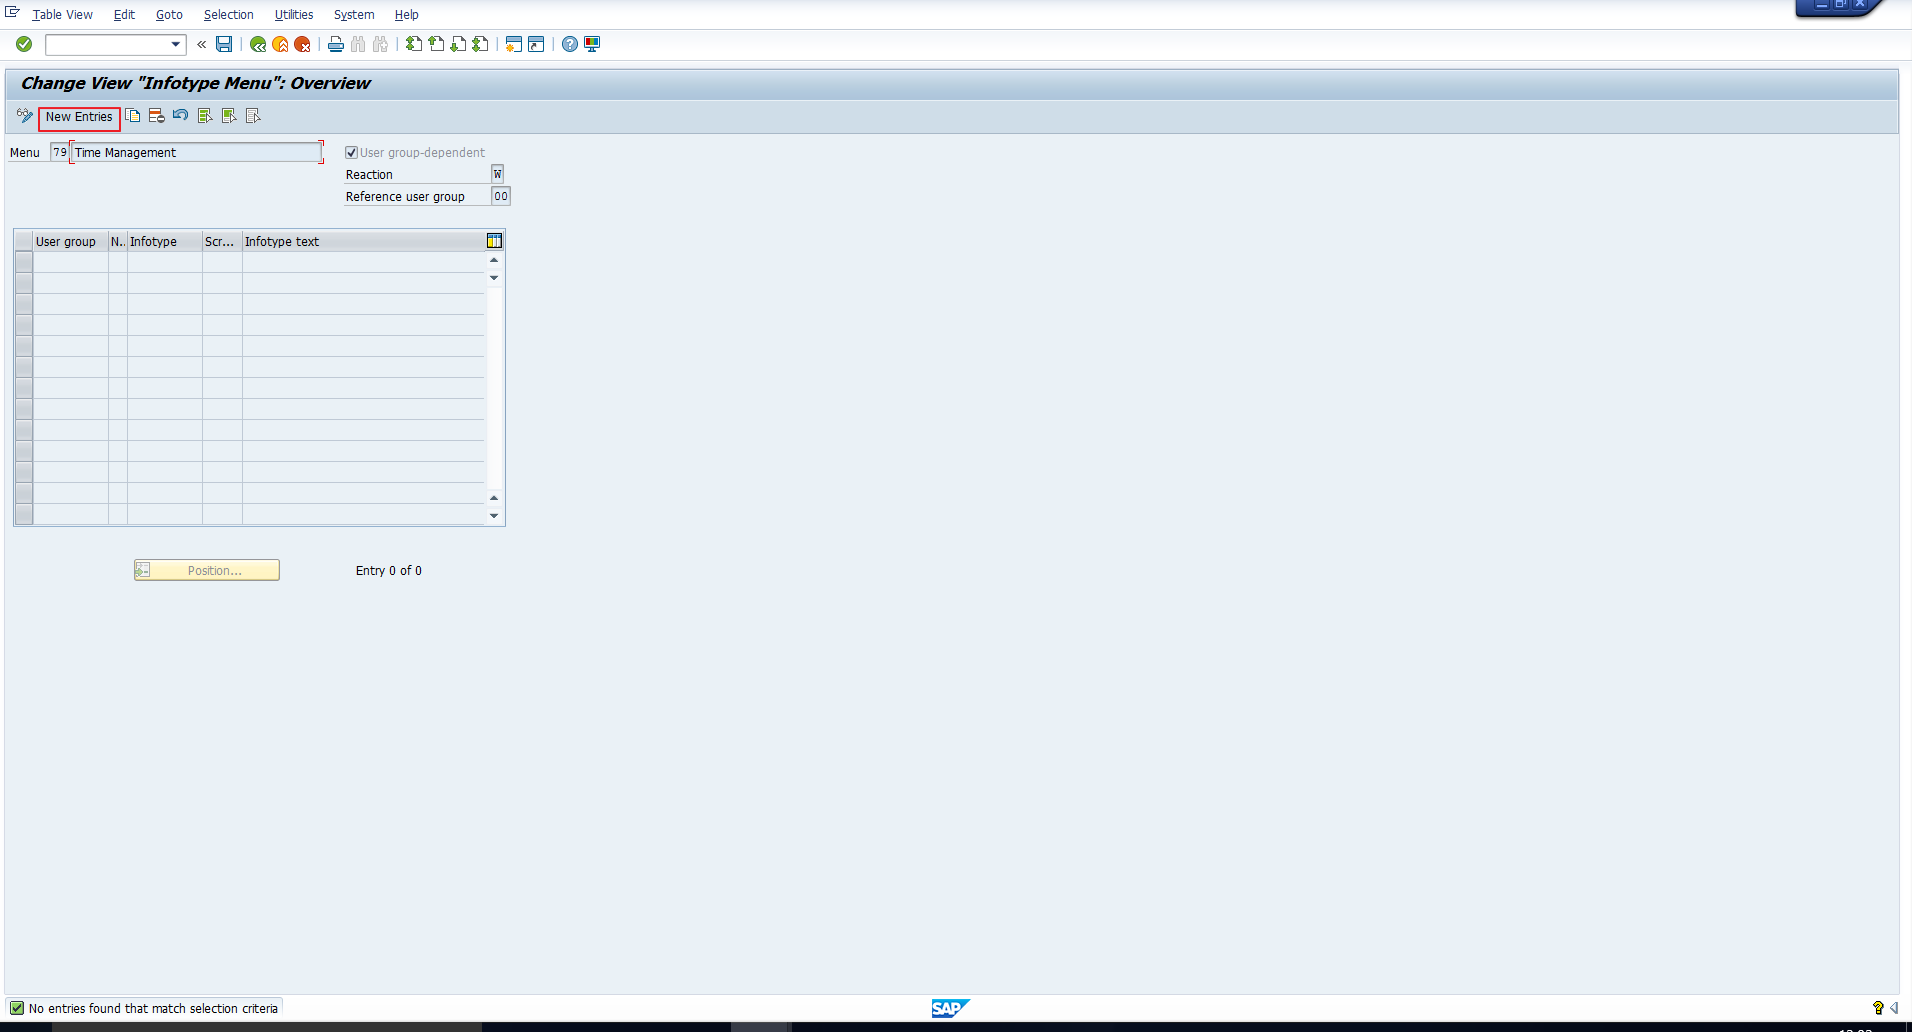
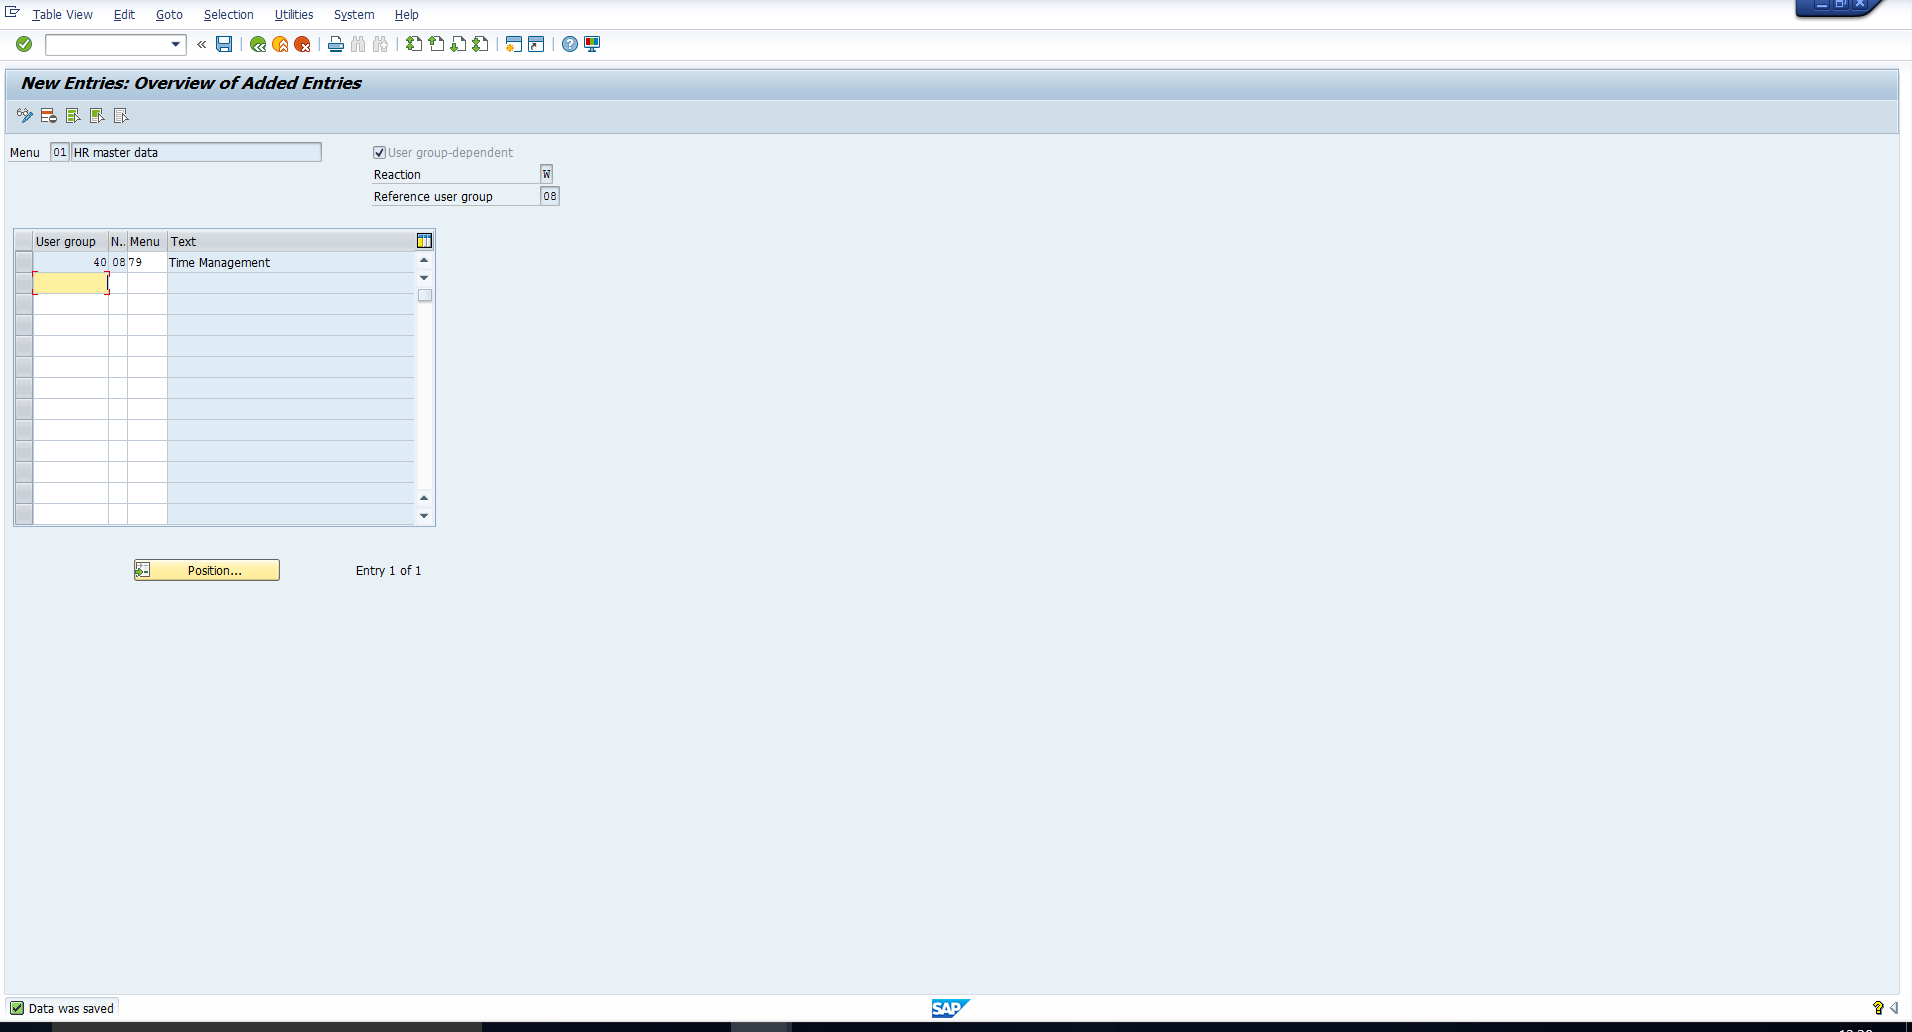
Following the Customizing path shared earlier in this tutorial, we will create a new menu by clicking on the New entries icon shown in the picture below.
We then enter the required details. Let’s assign the code 79 and the text “Time Management” and save the entry.
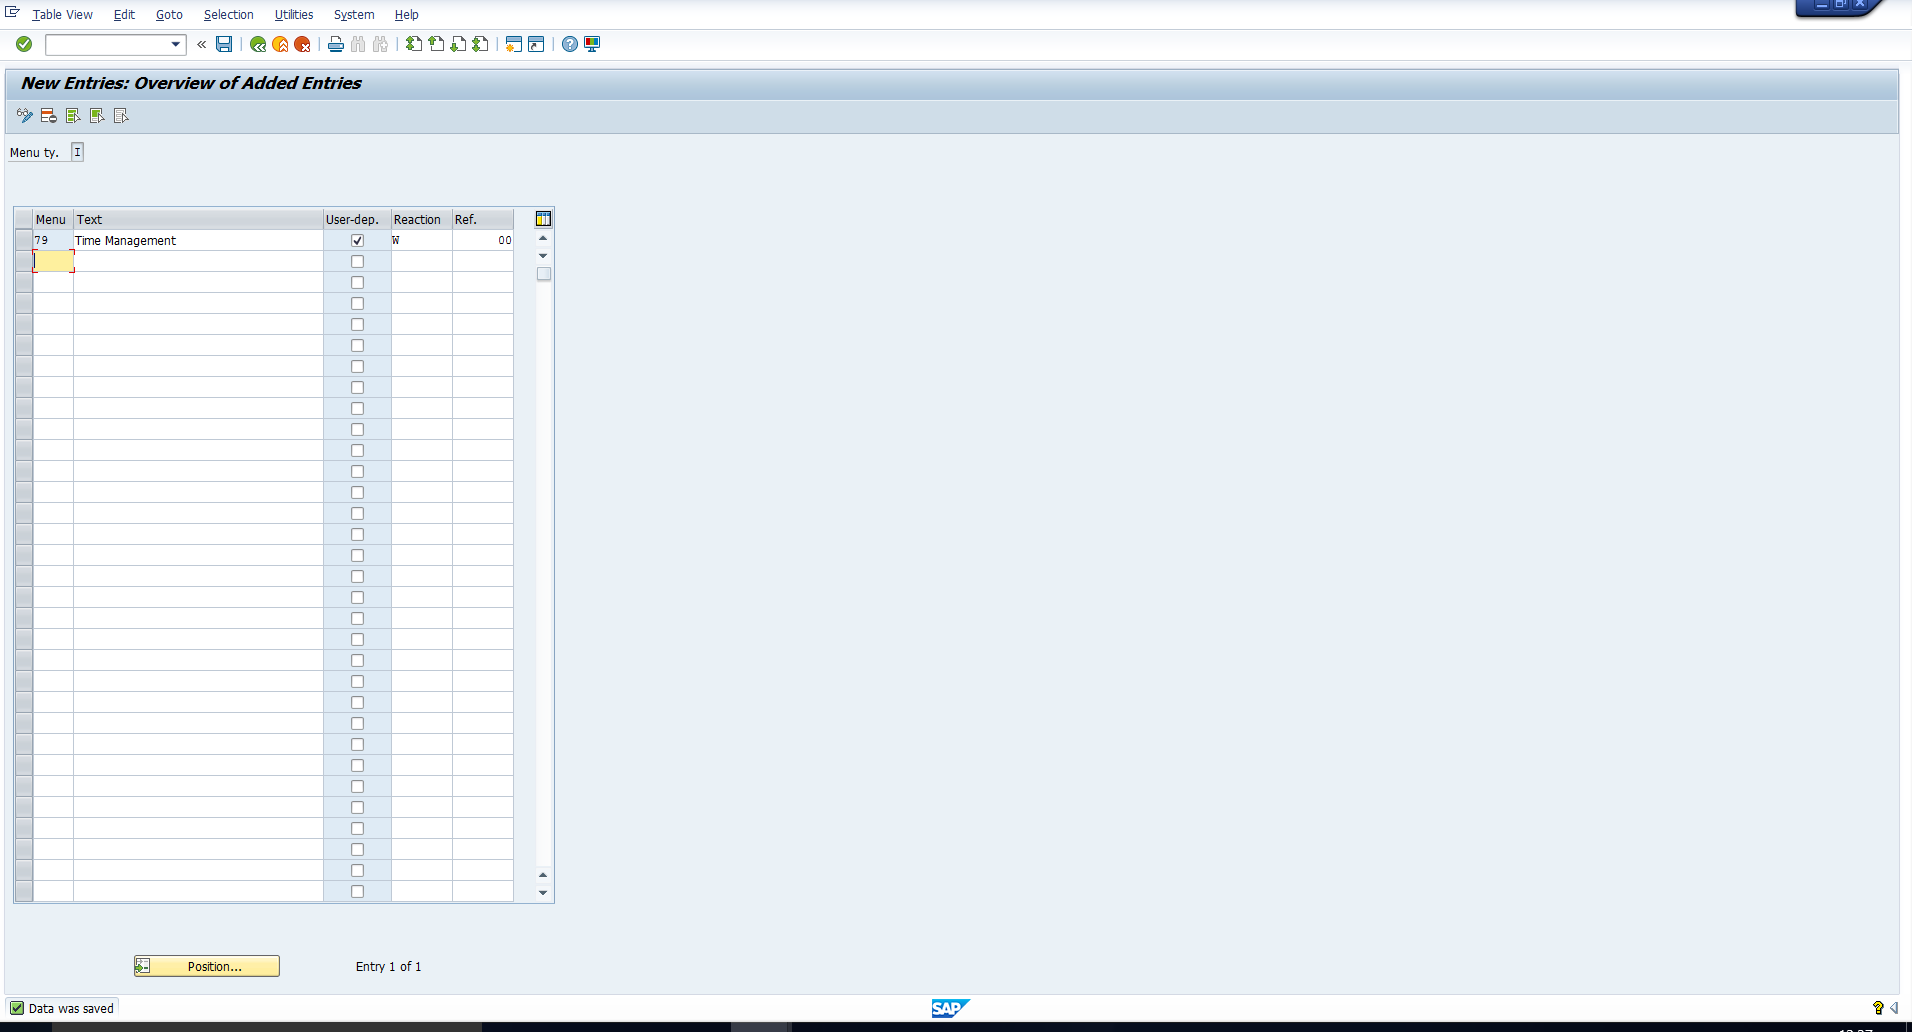
The menu Time Management has now been created. The next step is to add the desired infotypes to this menu.
List Out the Infotypes in the Infotype Menu
Edit the infotypes in an infotype menu. It takes you to the pop-up box depicted below. Enter the two-character menu code for which you want to edit the list of infotypes. In our example, we need to enter 79 as this is the code assigned in the previous step.
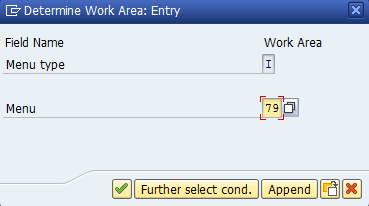
The following screen appears:
Then enter the sequence of Infotypes required in the menu as shown below. Save the entries.
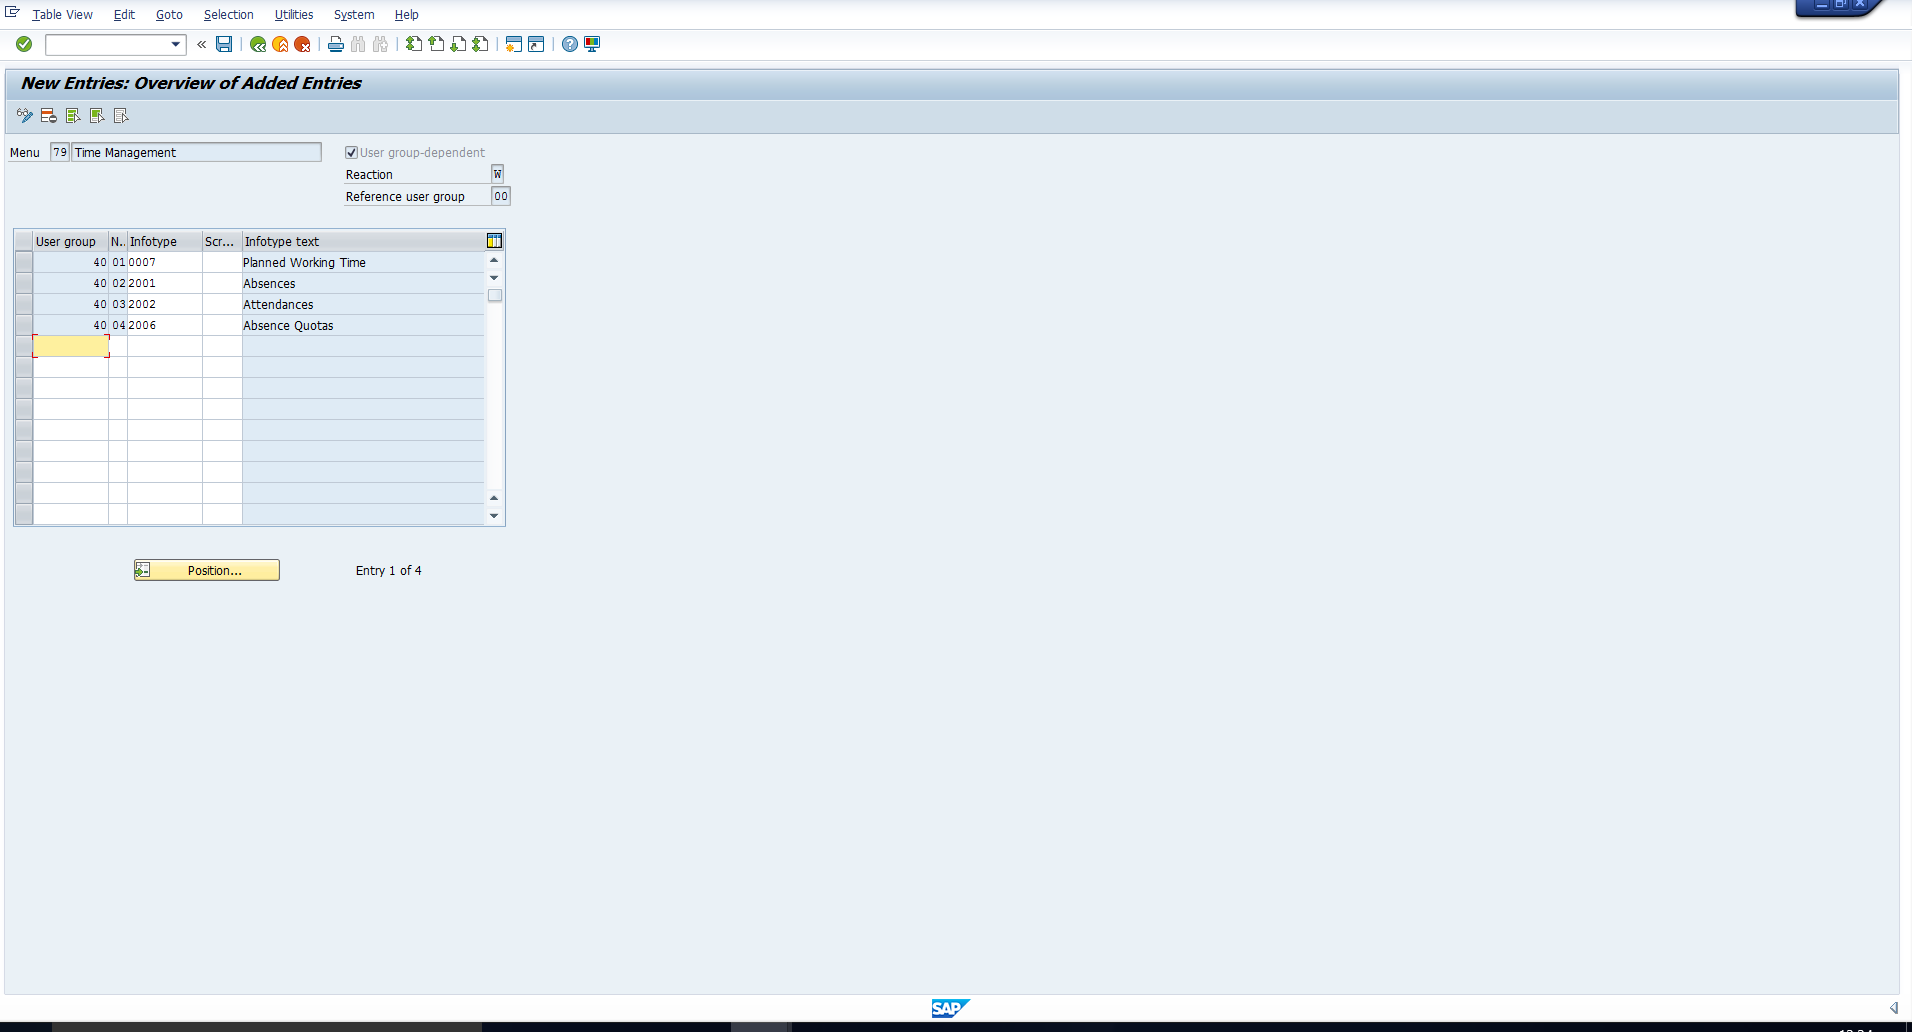
Note that we have entered infotypes for User group 40 only in accordance with the requirement.
Determine Choice of Infotype Menu
Next, we need to add the newly created Time Management menu to the HR master data views. For this, we follow the Customizing path (transaction code SPRO):
Personnel Management- Personnel Administration – Customizing Procedures – Infotype menus – Determine choice of infotype menus
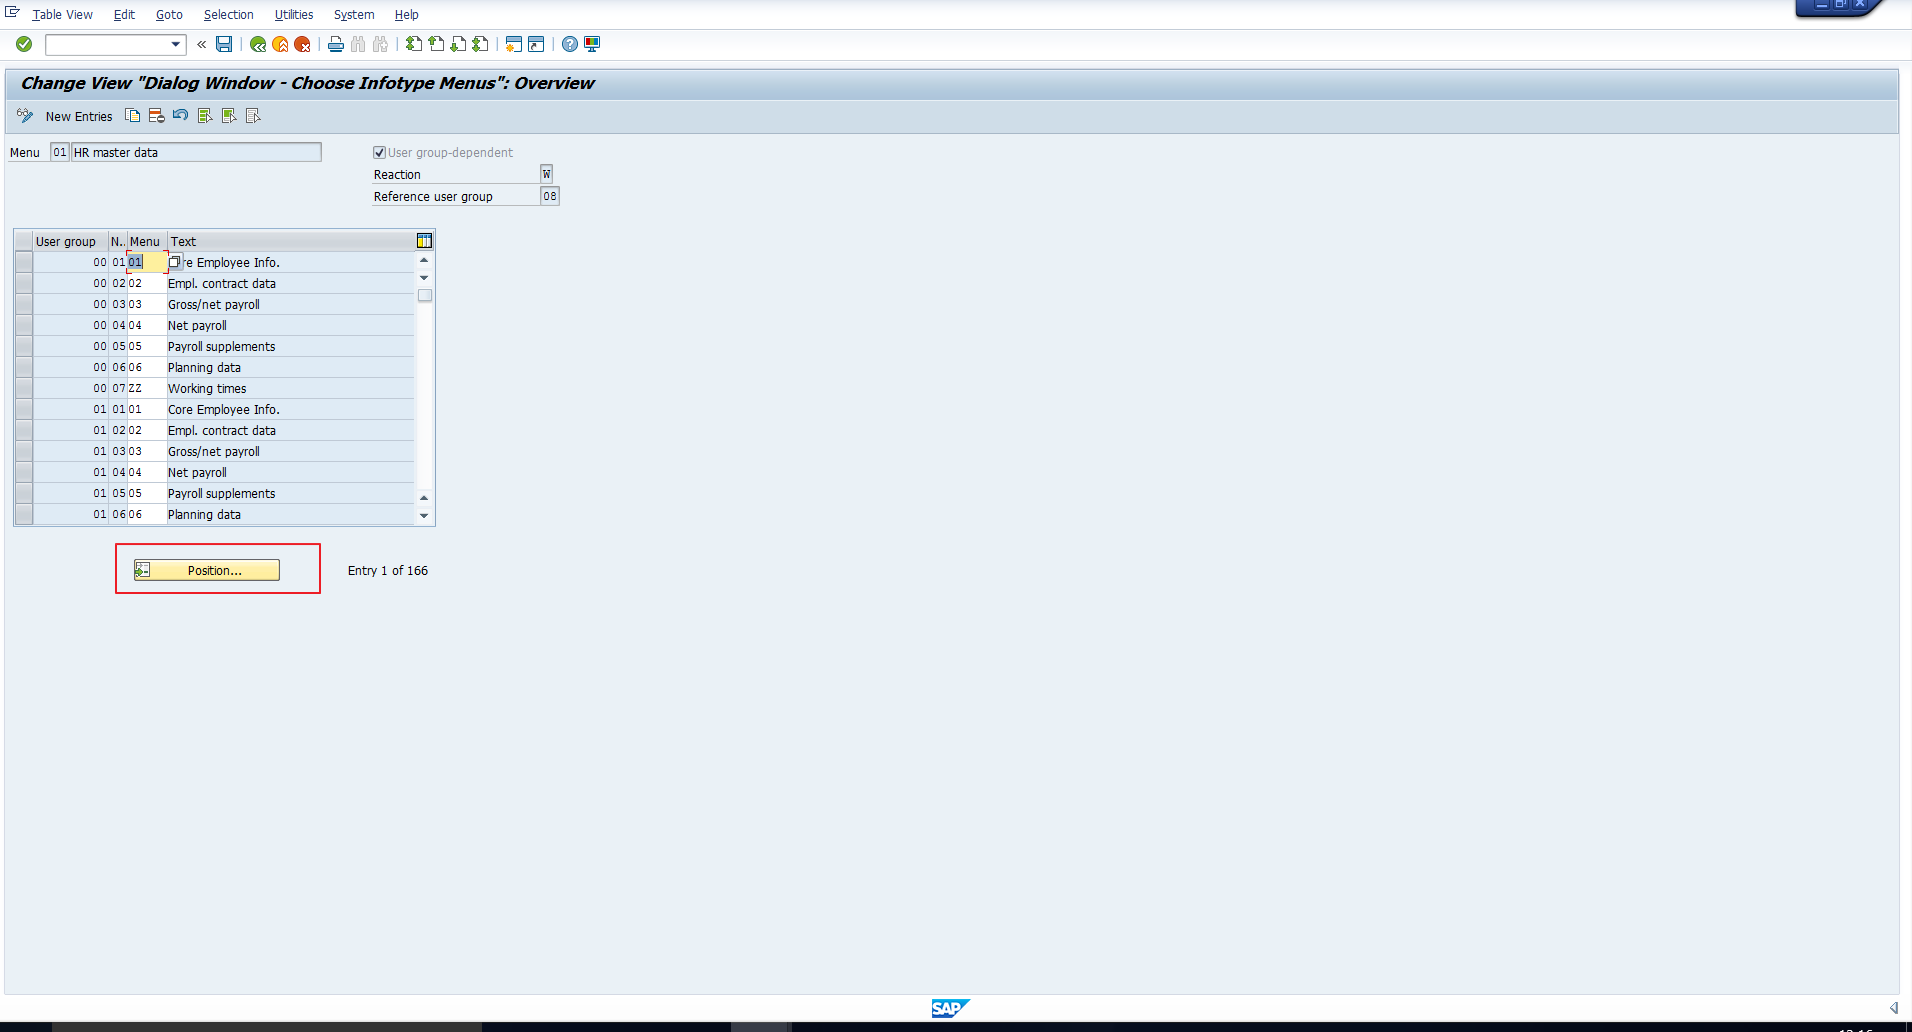
Double click on the second activity. Enter Menu ‘01’. In the screen that follows, search for the User group 40 using the Position button.
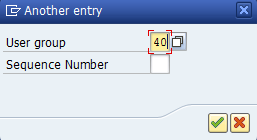
In the following screen, enter User group 40.
This takes you to the entries for User group 40 as depicted in the next picture. Check the sequence numbers already assigned to the existing menus.
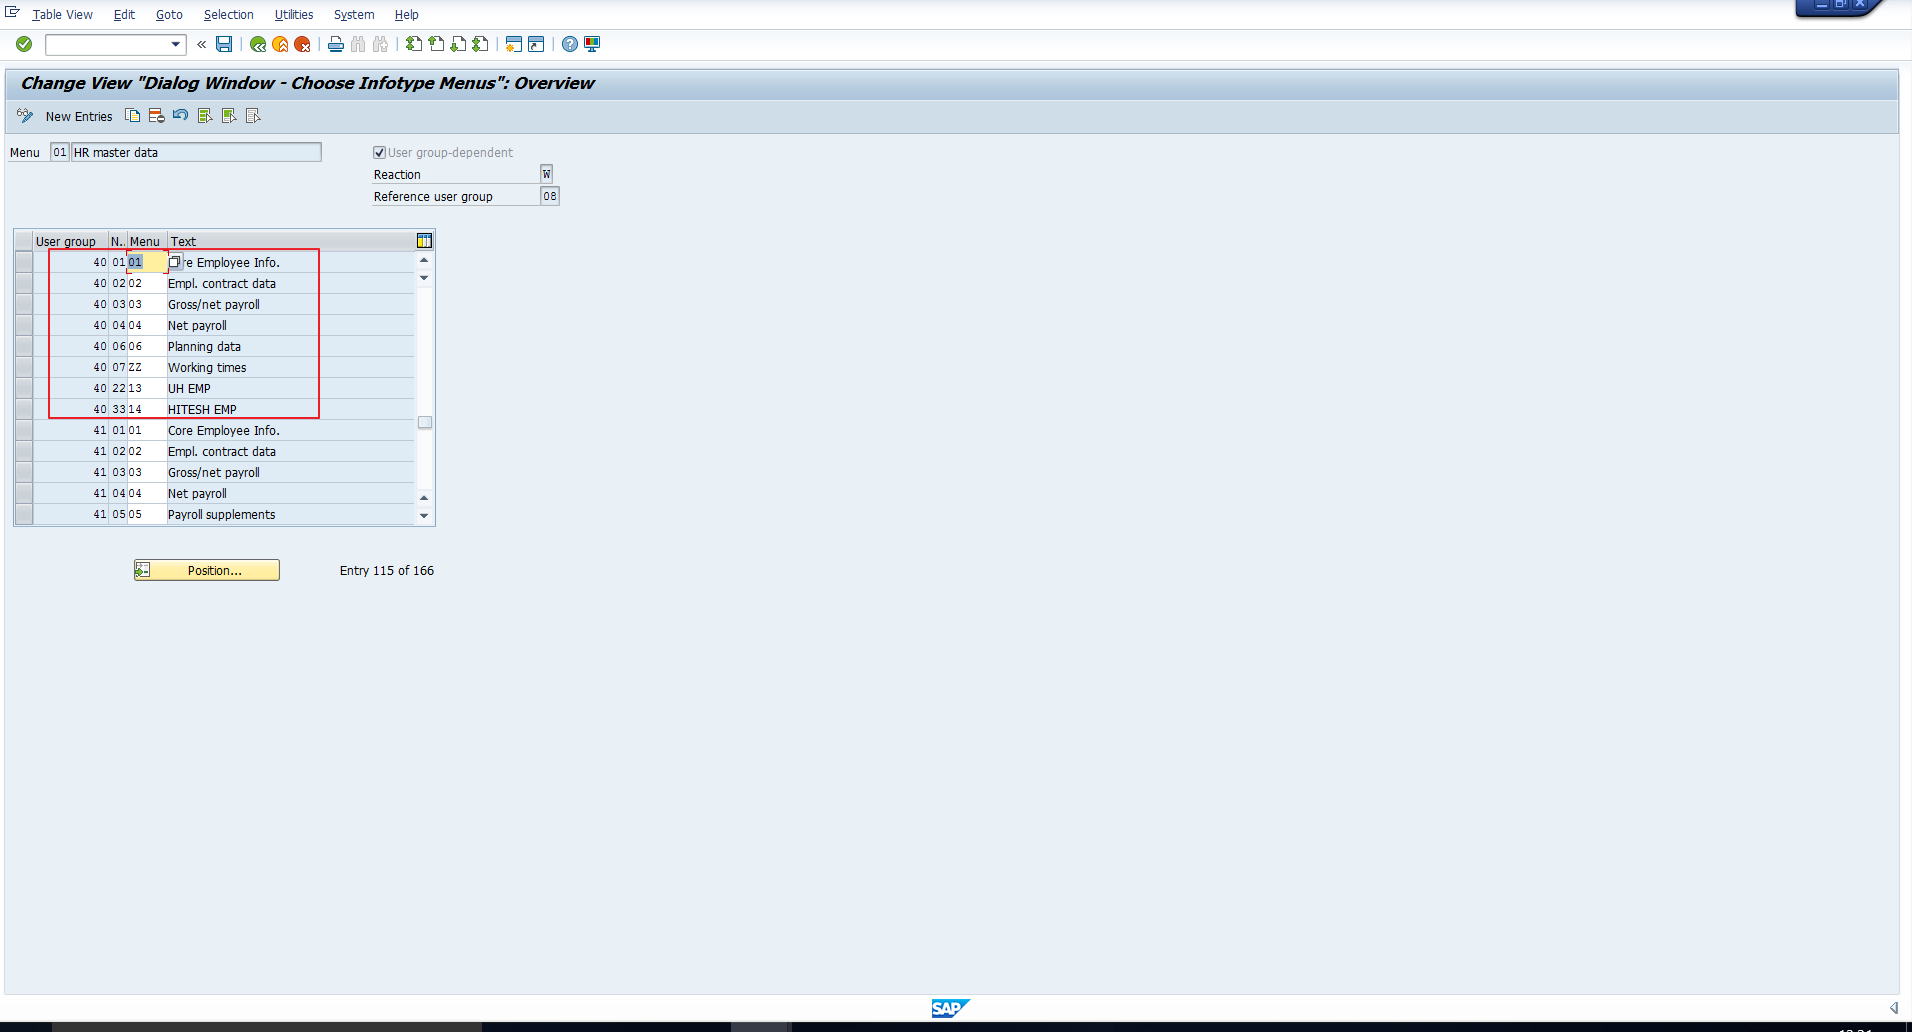
You can assign a suitable sequence number to the Time Management menu based on where you want to position it. Say, you want to position it after the Working Times tab. Then click on new entries and assign the sequence number 08 as shown in the screenshot below. Save the data.
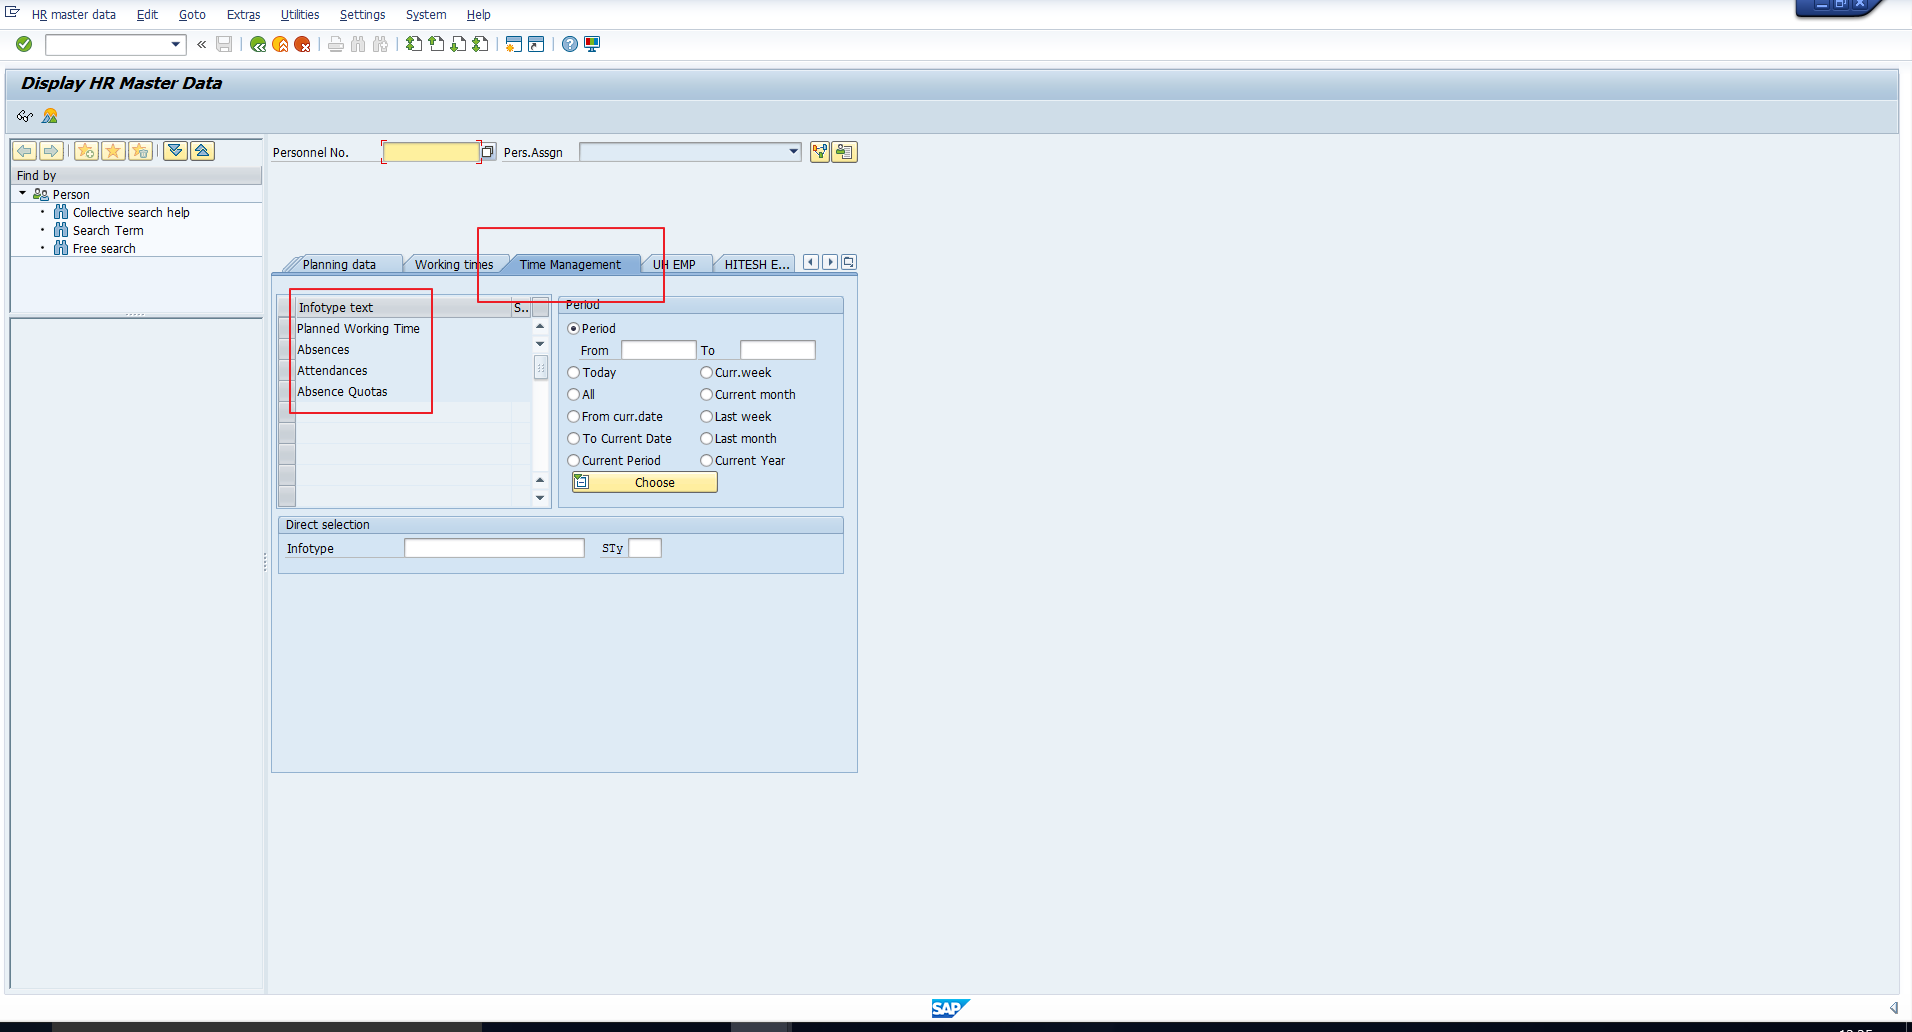
Now let’s enter the transaction code PA20 to verify that the new menu is seen in the Display HR master data view. We can see the new menu as well as desired infotypes in the picture below.
—
Did you like this tutorial? Have any questions or comments? We would love to hear your feedback in the comments section below. It’d be a big help for us, and hopefully it’s something we can address for you in improvement of our free SAP HR tutorials.
Navigation Links
Go to next lesson: SAP Infotype Header Configuration
Go to previous lesson: SAP Infotype Screen Modification
Go to overview of the course: SAP HR Training
i am not receiving emails for next lessons