
 Welcome to the tutorial on SAP HR simple maintenance in expert mode. We have already taken you through the fundamentals of Organizational Management, namely, Objects and Relationships. We have also explained the main structures in Organizational Management. There are various methods through which these objects, relationships and structures can be maintained. In this tutorial, we will familiarize you with one such tool – SAP HR Simple Maintenance in Expert Mode.
As the name suggests, SAP HR Simple Maintenance allows the creation and maintenance of objects, relationships and organizational plans with ease and efficiency. It is most suited to set up the basic framework of an organizational structure, and to create several objects (e.g. organizational units, positions) and relationships at one go.
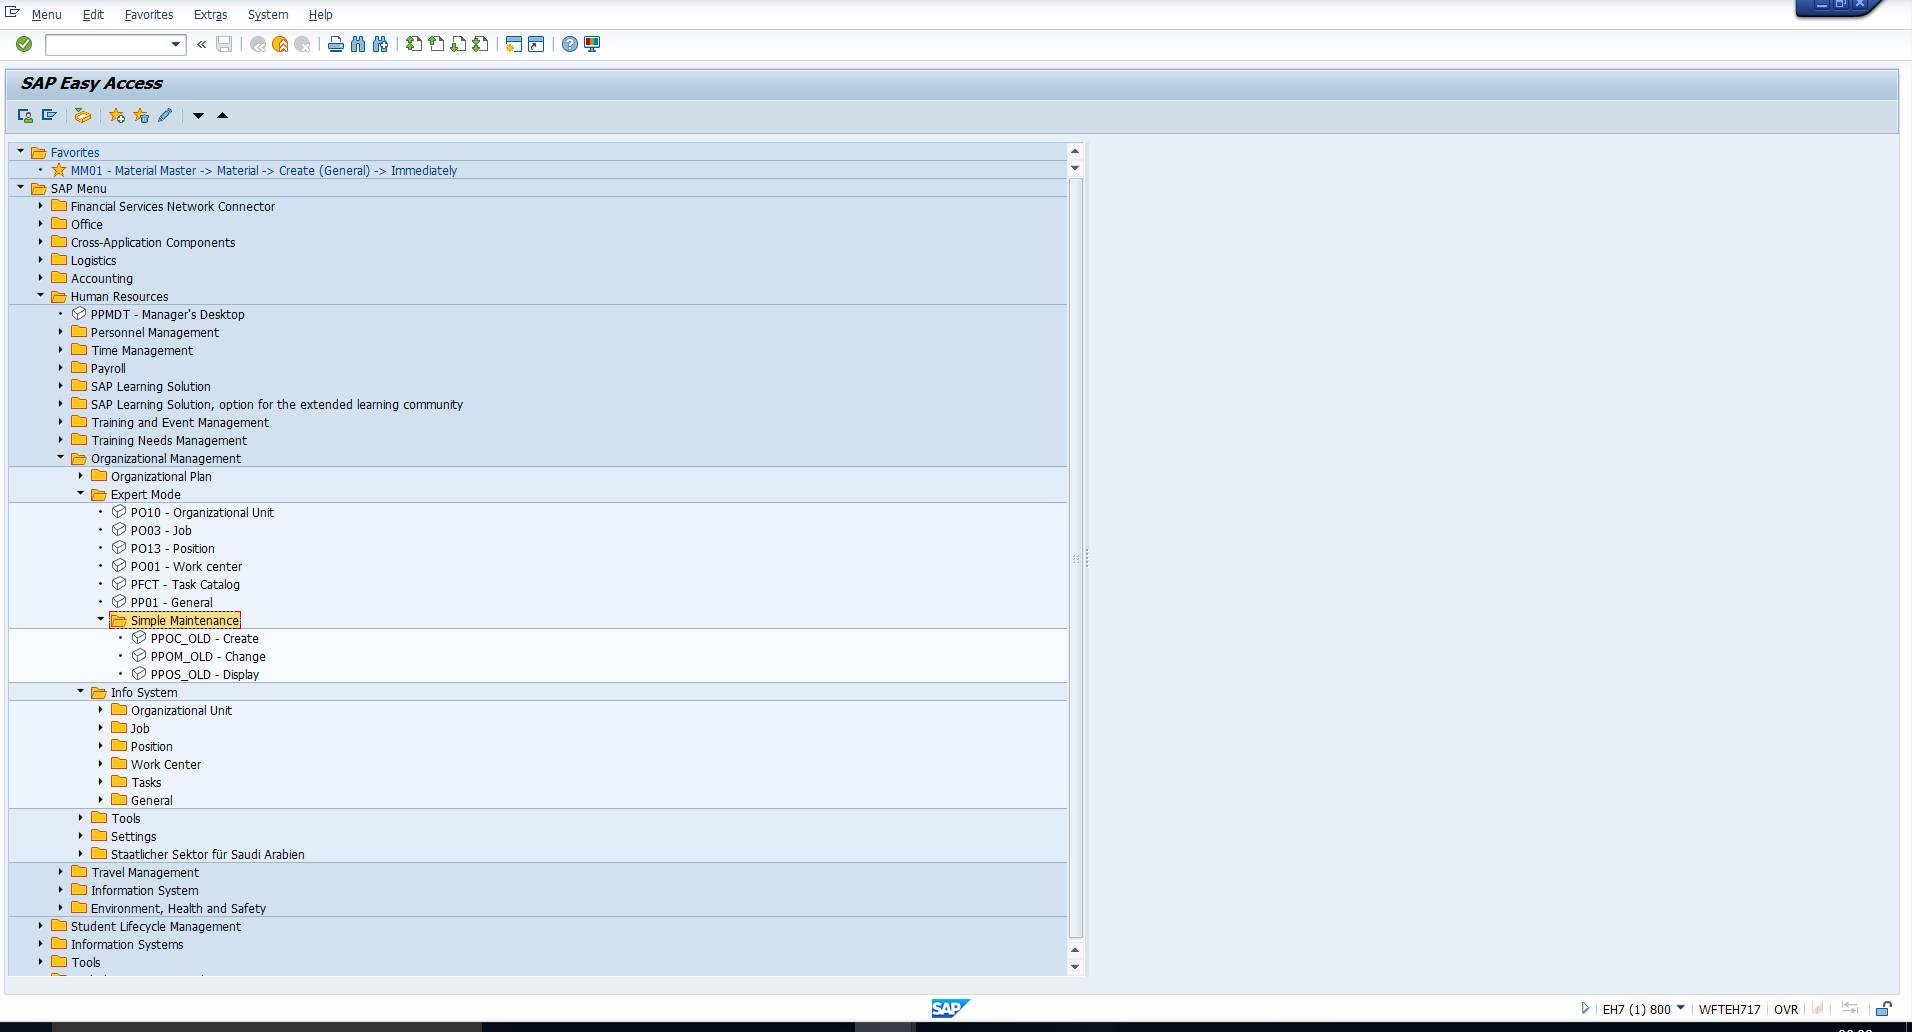
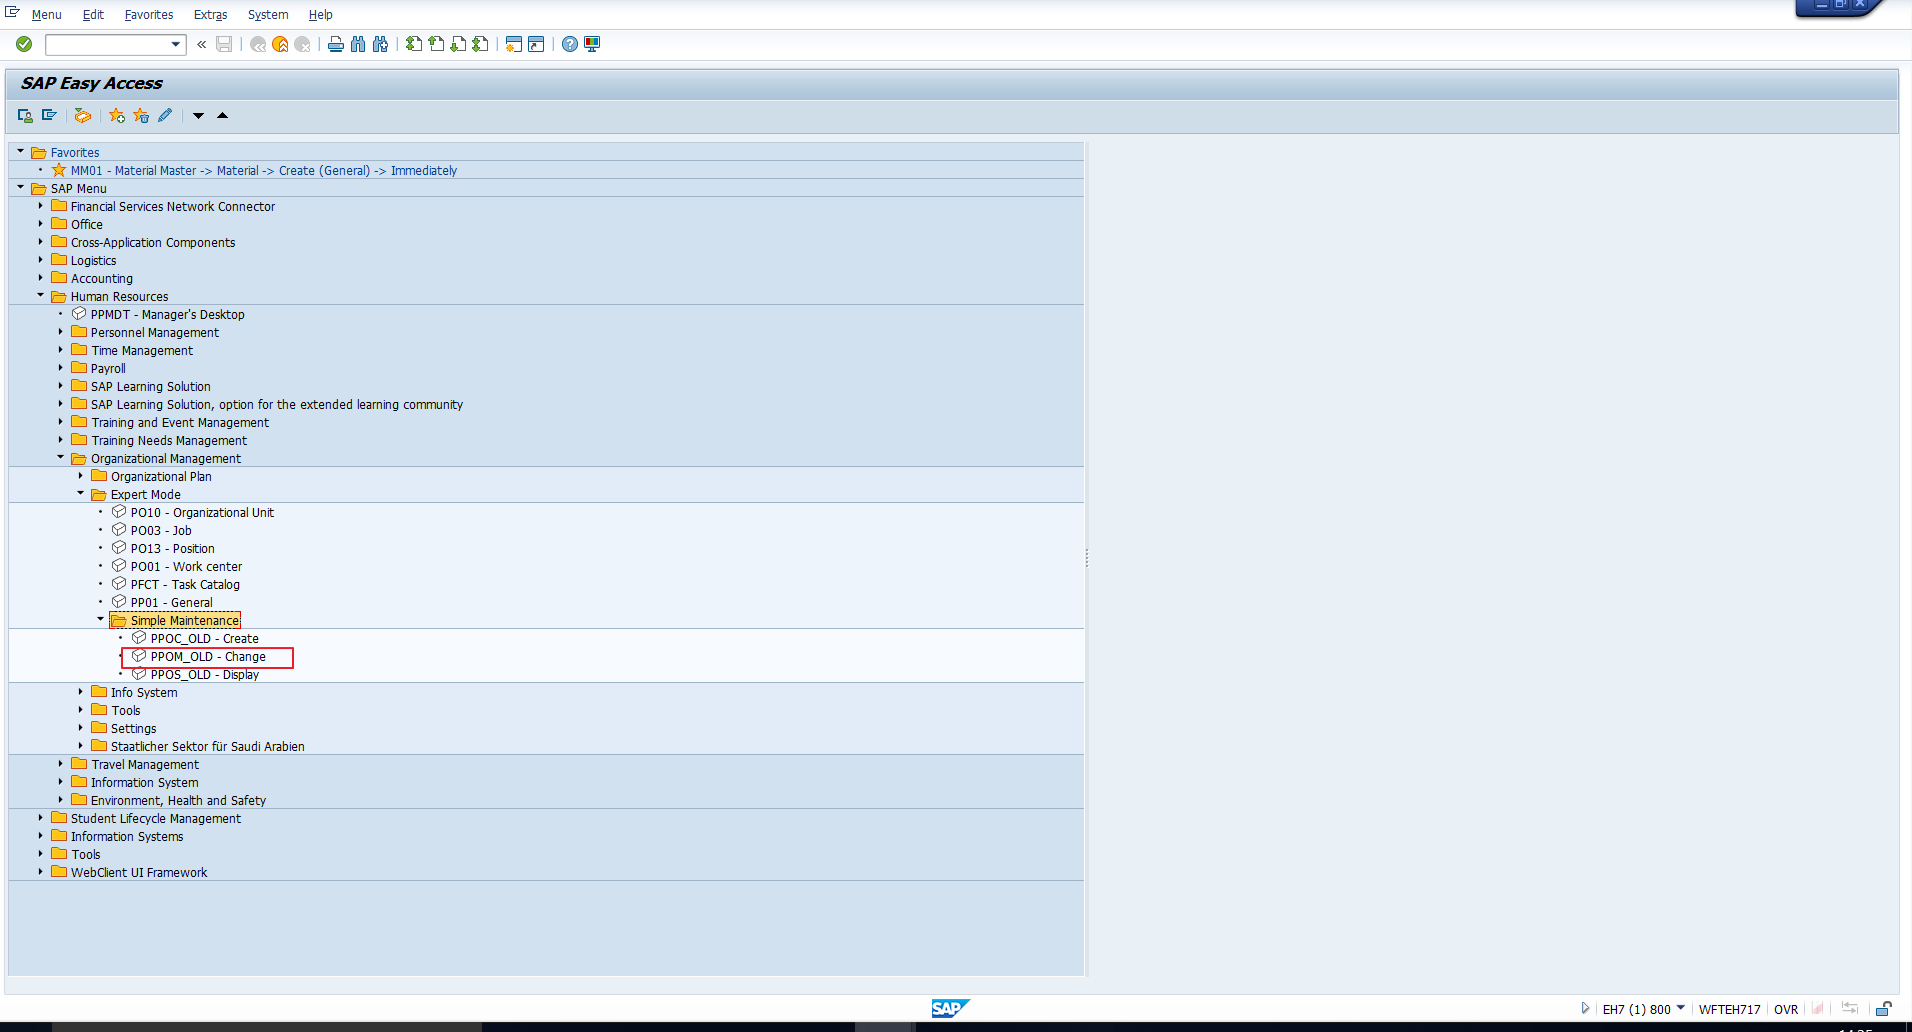
To access SAP HR Simple Maintenance in Expert Mode, follow the below menu path in the SAP Easy Access menu:
Human Resources – Organizational management – Expert mode – Simple maintenance
This path has been depicted in Figure 1.
Creating an Organizational Structure
Assume we want to build a simple organizational plan for a company XYZ Ltd which has an organizational structure as depicted in Figure 2.
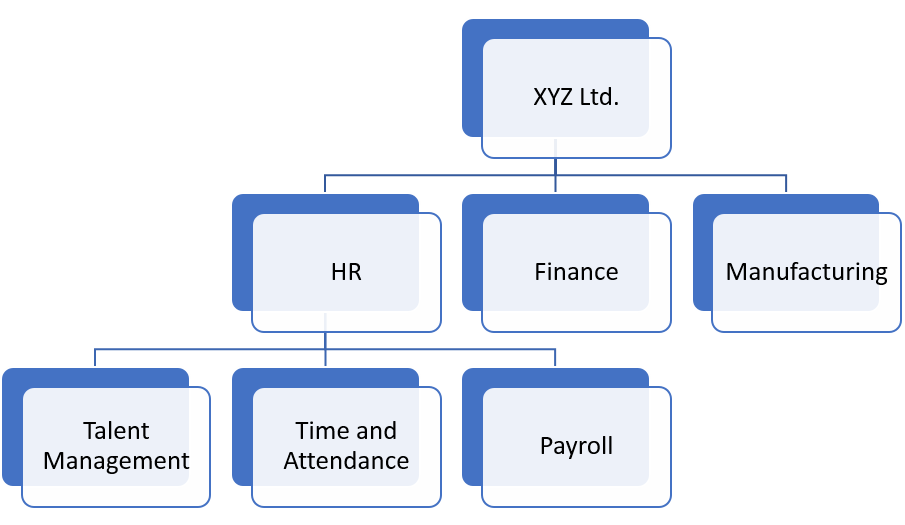
Let us see how we can build this structure in SAP. Each box you see in Figure 2 is basically an organizational unit. By creating relationships between these organizational units, we can build this organizational structure.
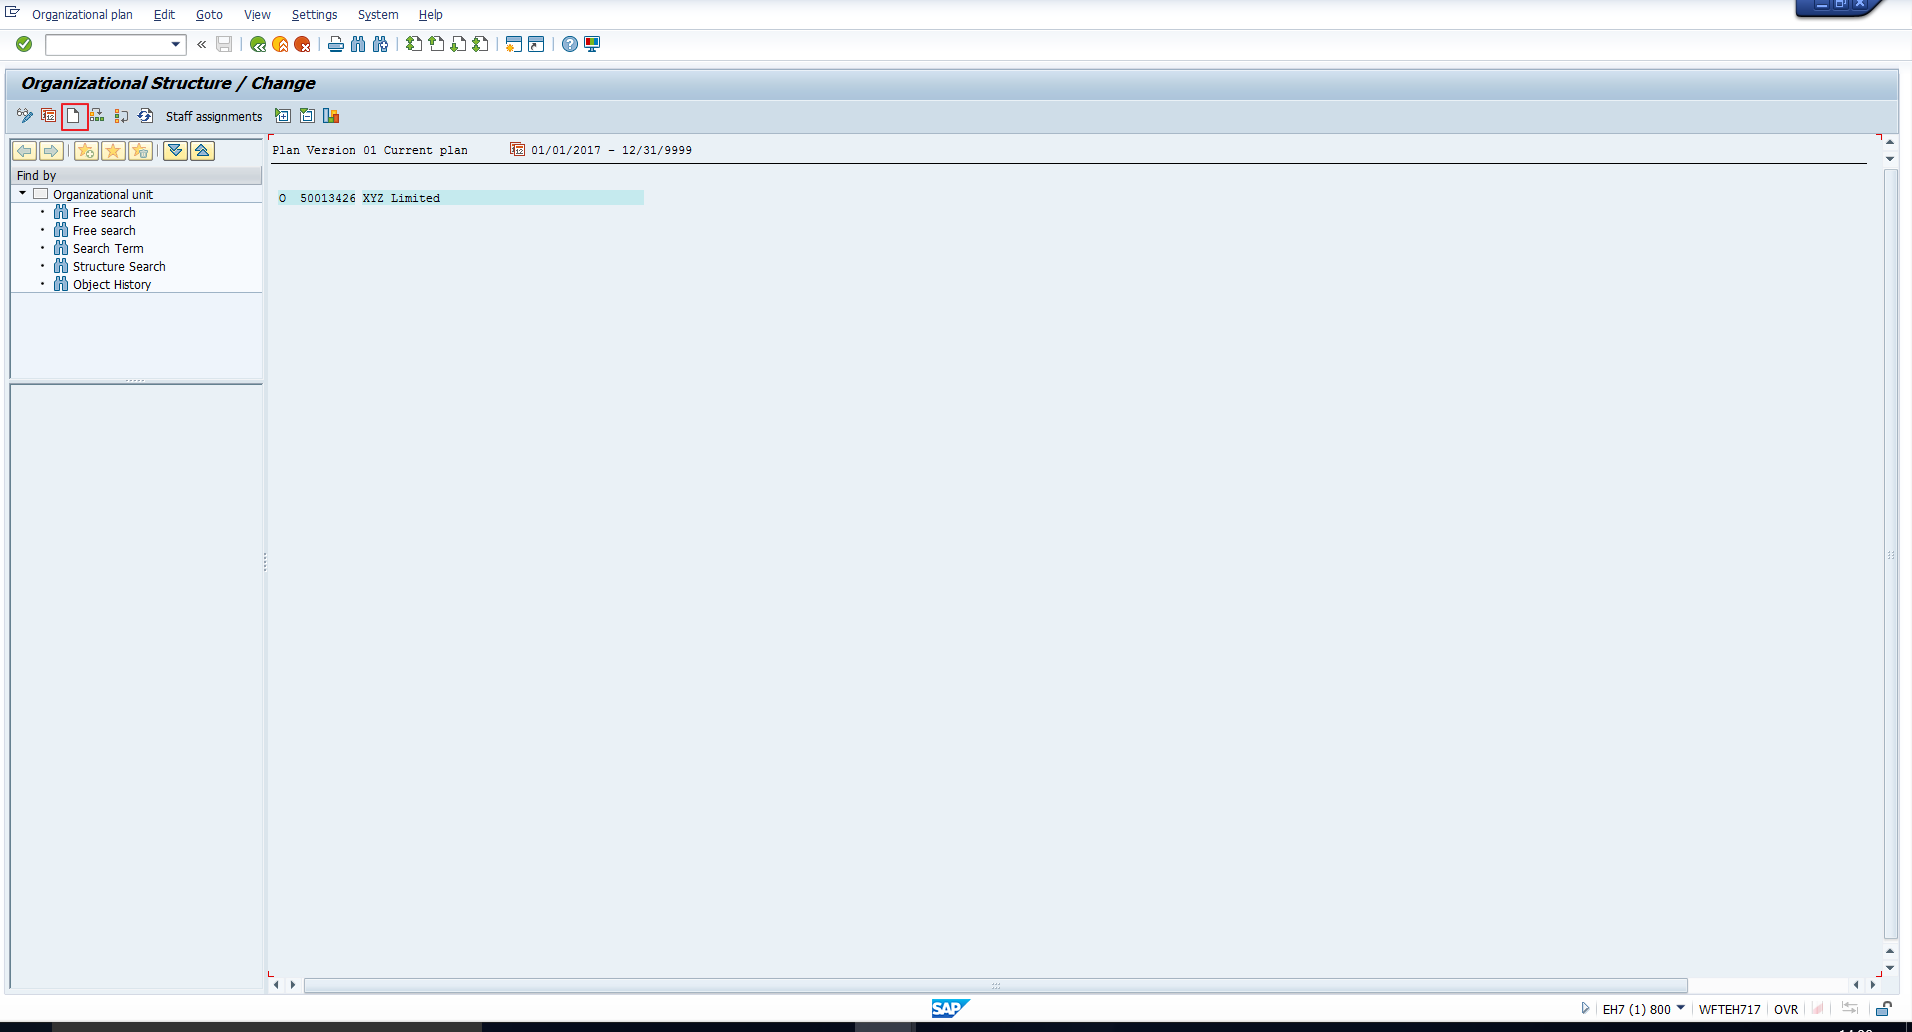
Now, to create a new organizational structure, double click on the Simple maintenance “Create” transaction highlighted in Figure 3. Alternatively, you can directly enter the transaction code PPOC_OLD.
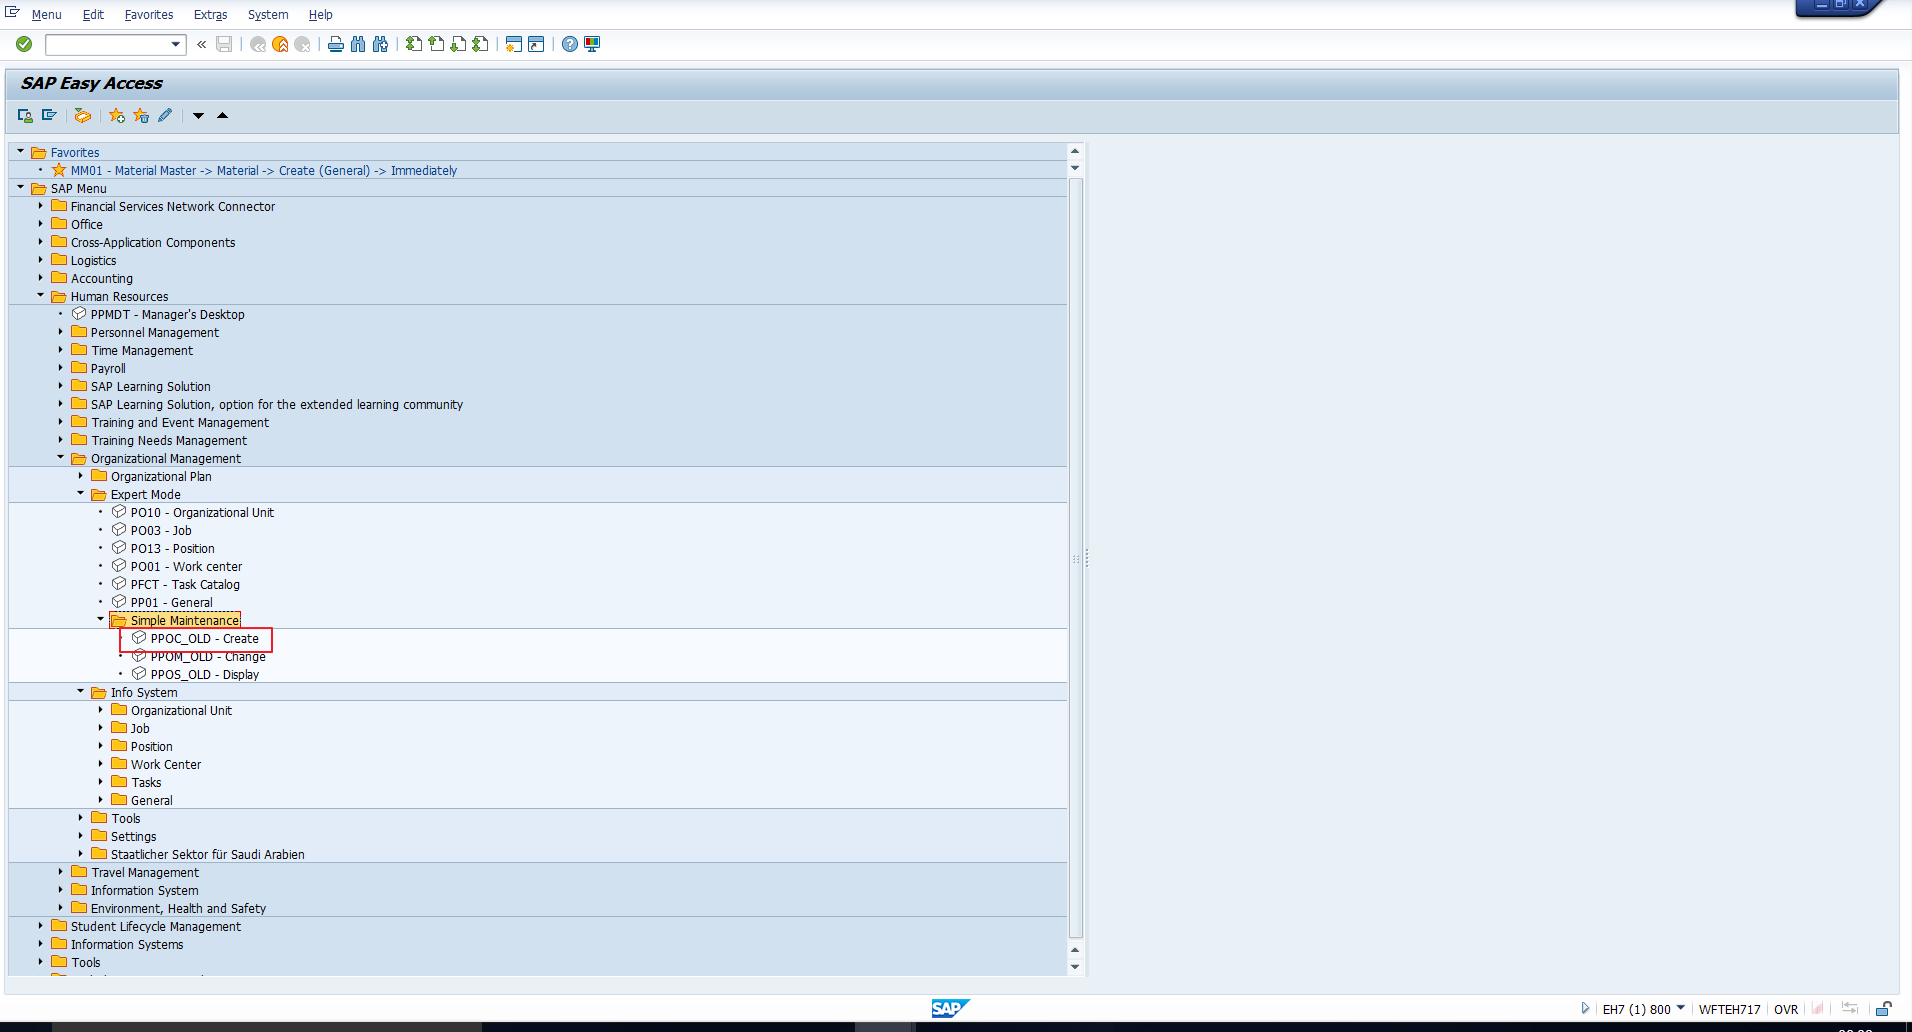
This takes you to the screen depicted in Figure 4.
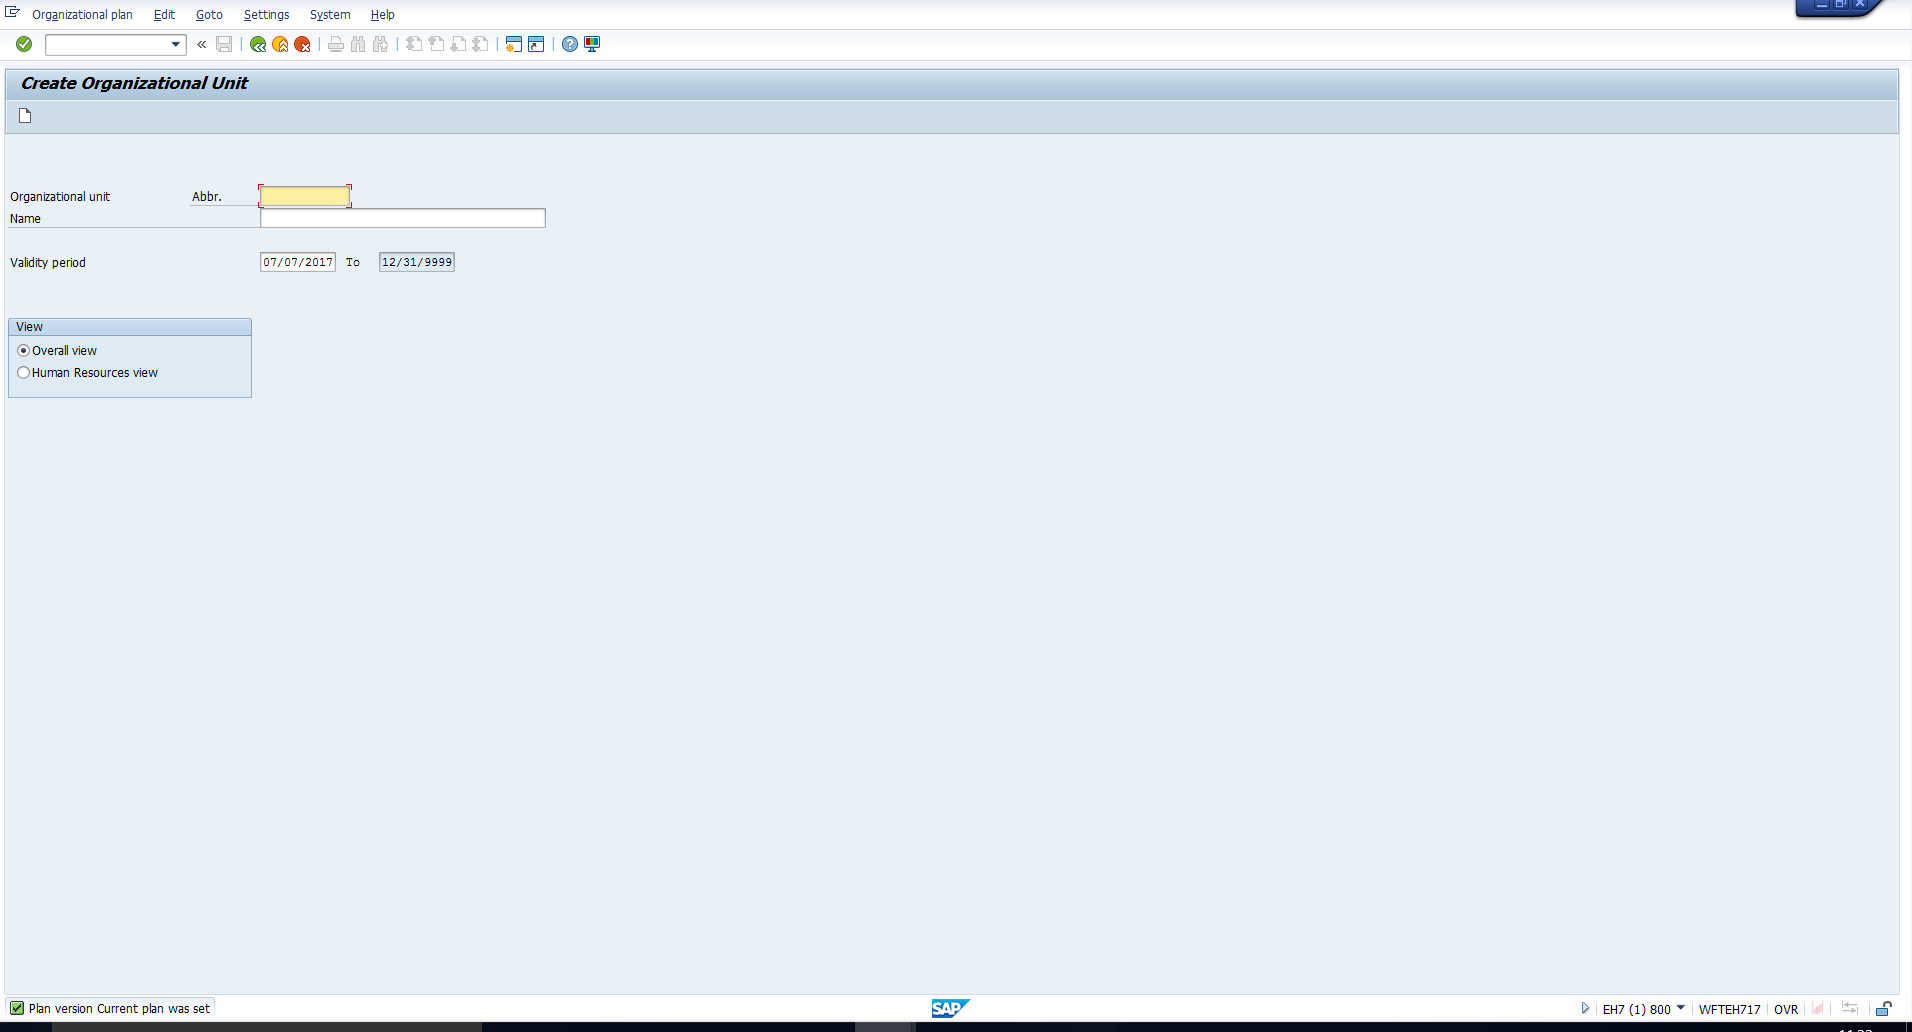
The creation of the organizational structure begins with the creation of the root organizational unit. Hence, let us begin with the creation of the root organization unit, XYZ Ltd. Enter the abbreviation (up to 12 characters) and name (up to 40 characters), as well as the required validity start date, as we have illustrated in Figure 5. Then click on the Create icon.

This will take us to the screen in Figure 6, where we can see the organizational unit XYZ Limited has been created. You can also see that an 8-digit code has been automatically assigned to this object. This code is known as the object ID and is used to uniquely identify the object.
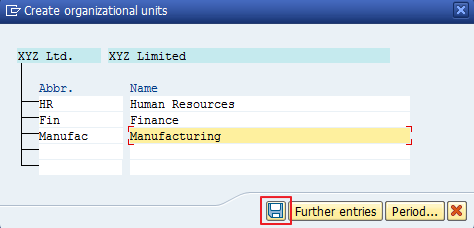
Next, we need to create the subordinate organizational units. As we can see in Figure 2, we need to create three subordinate organizational units – HR, Finance and Manufacturing.
To do this, place your cursor on the root organizational unit under which you need to create the subordinate organizational units, and click on the Create icon that has been highlighted in Figure 6.
On doing this, a pop-up screen will be displayed where you can enter the details of the subordinate organizational units. You can see this in Figure 7. Click on the Save icon.
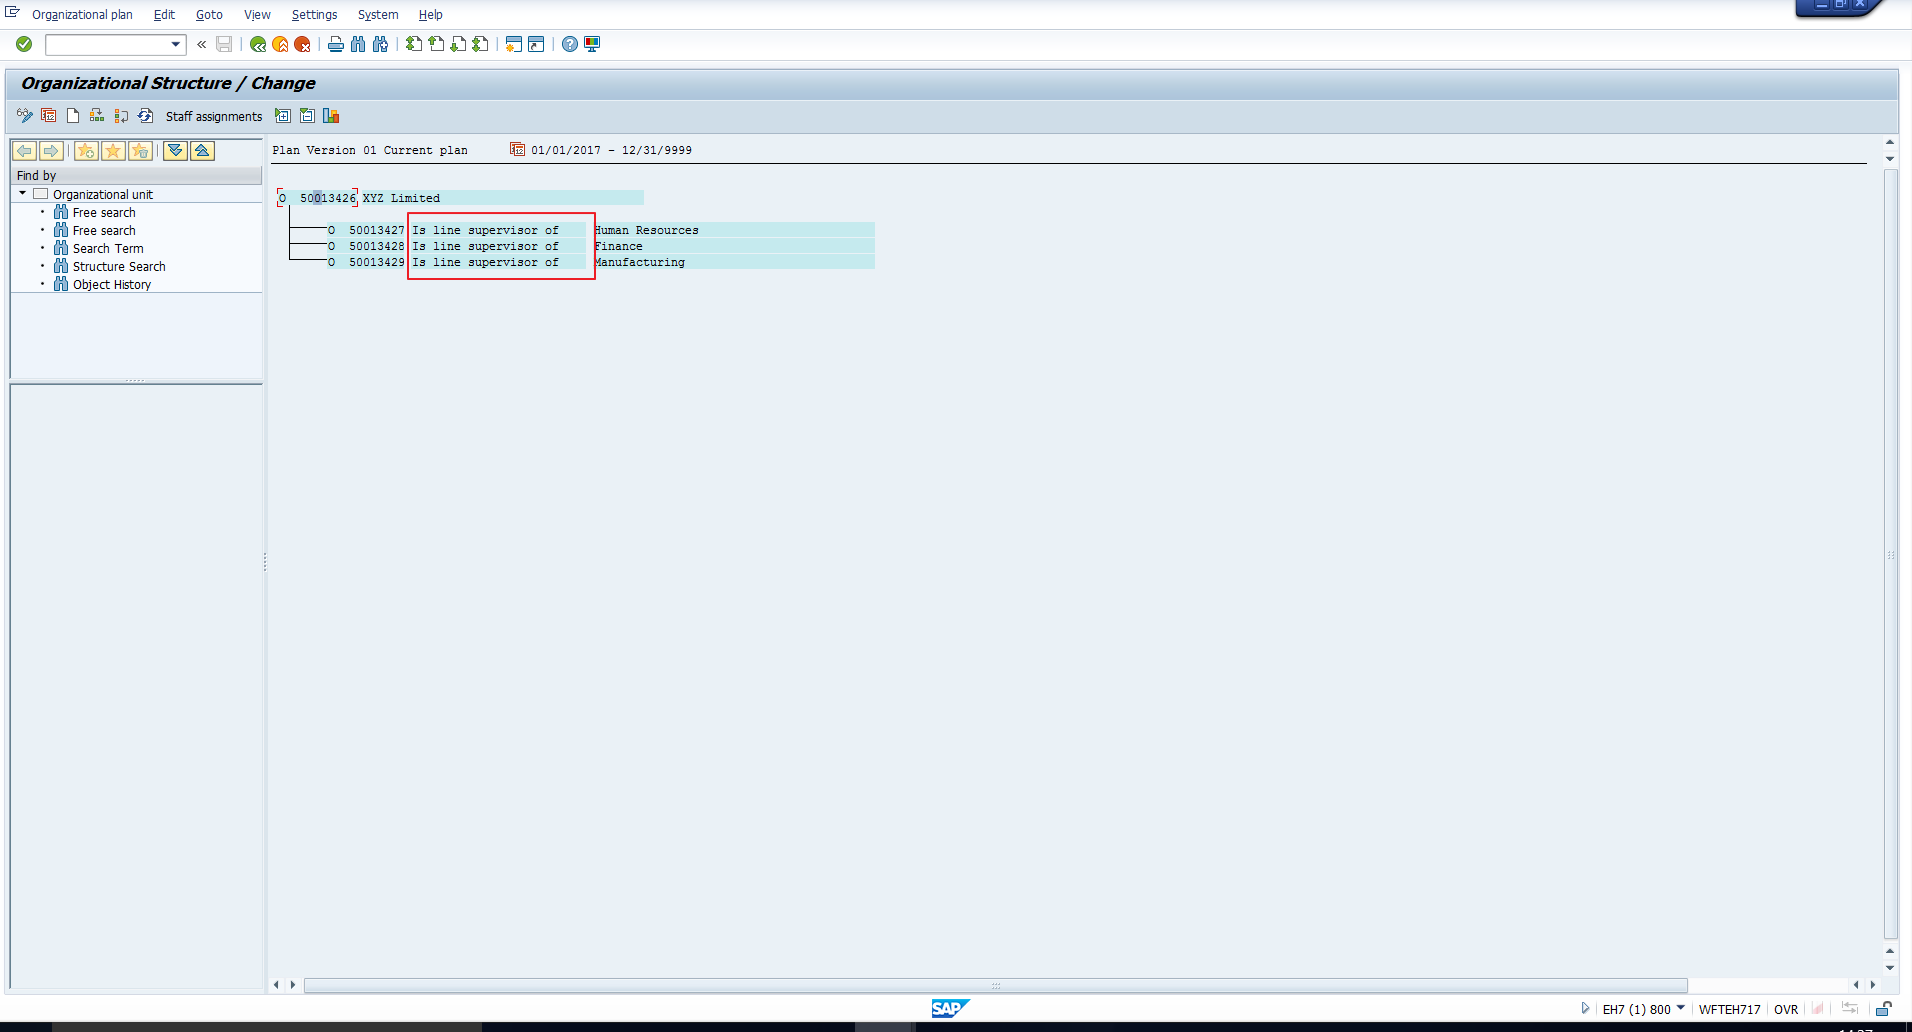
The three organizational units are then created with automatically generated unique object IDs, as shown in Figure 8. In addition, the relationships between each of these organizational units and the root organization unit also get automatically created. This is the “Is line supervisor” relationship that has been highlighted in Figure 8.
In the same way, let us create the next level of organizational units shown in Figure 2. Click on the organizational unit under which we need to create subordinate organizational units. So, in this case, click on the “Human Resources” organizational unit. Then click on the Create icon. In the pop-up that follows, enter the details of the subordinate organizational units, as shown in Figure 9.
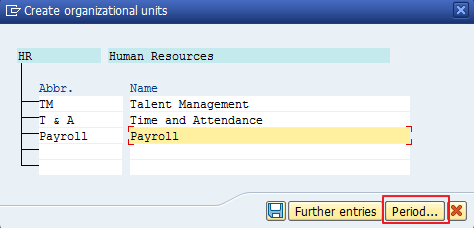
We have also highlighted the Period button in Figure 9. Use this button if you want to change the validity of the organizational units or the relationships to be created. If you do not explicitly change the validity, the newly created objects and relationships will be assigned the same validity as the superior organizational unit under which you are carrying out the creation.
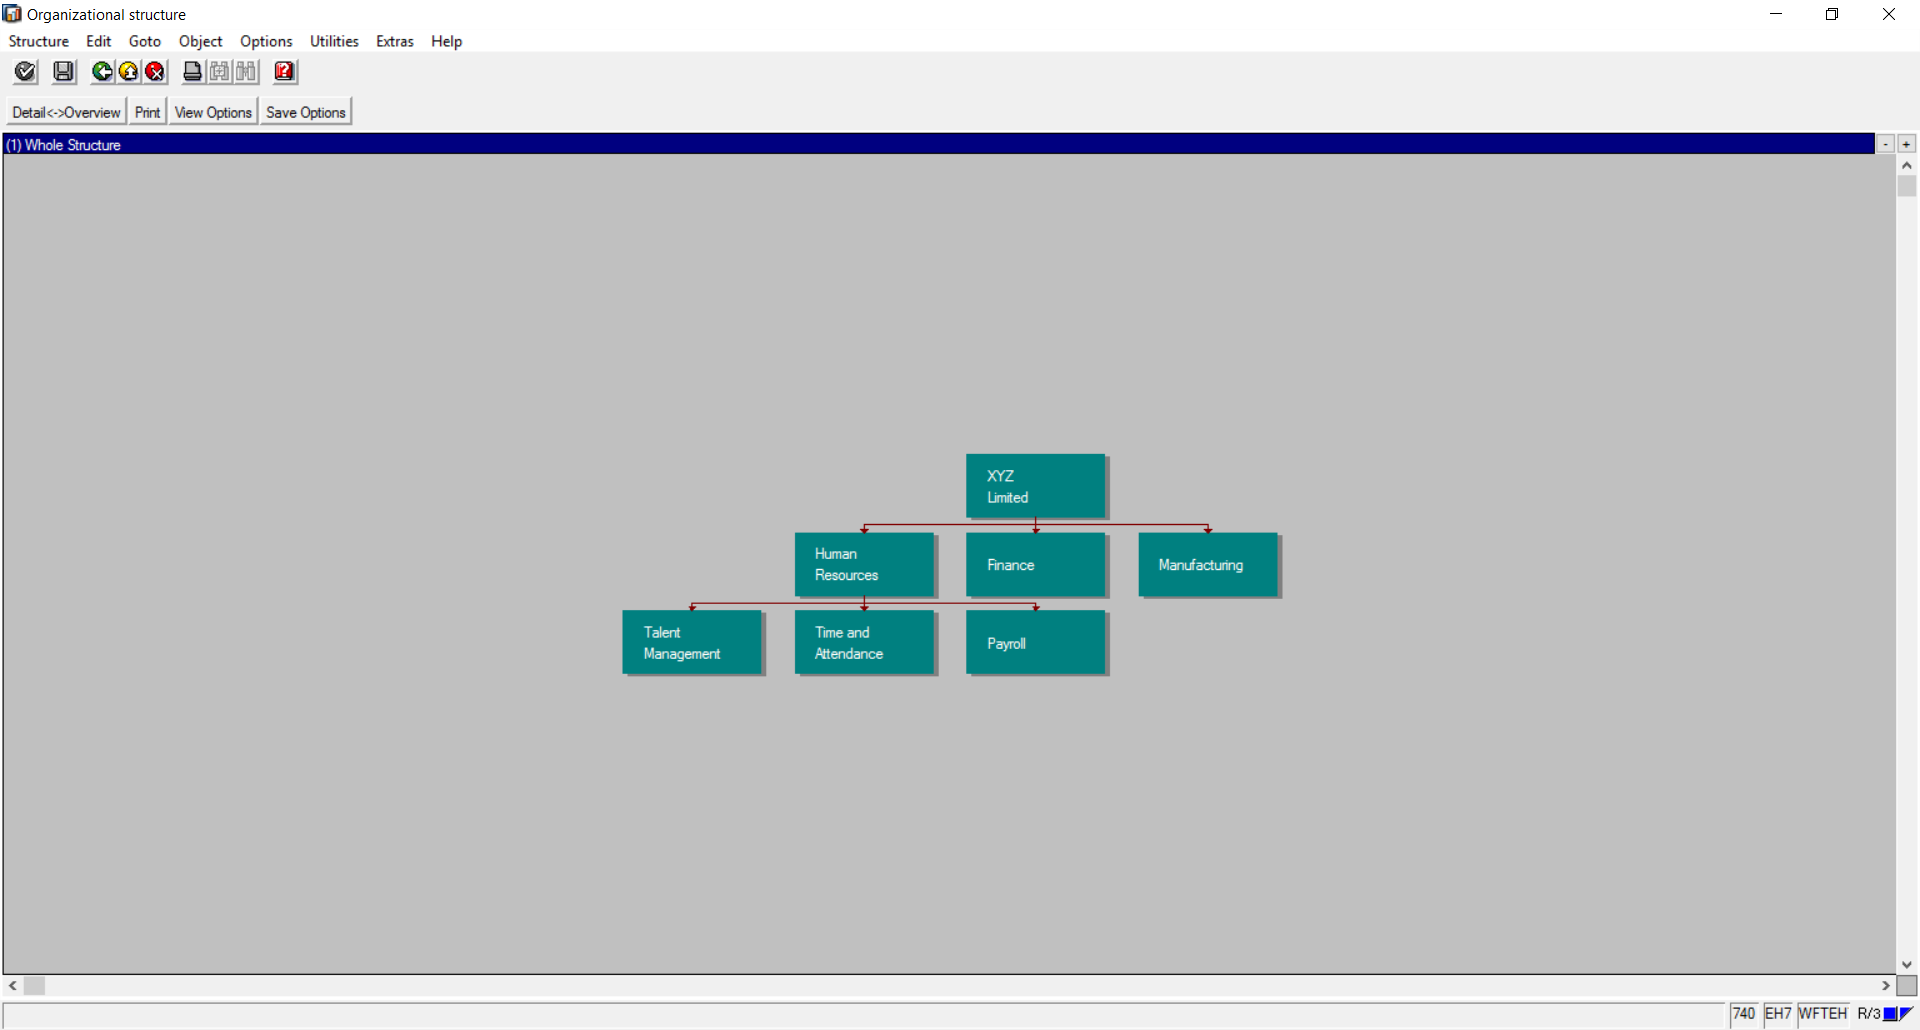
Once you save the data, the organizational units will be visible in the organizational structure as shown in Figure 10.

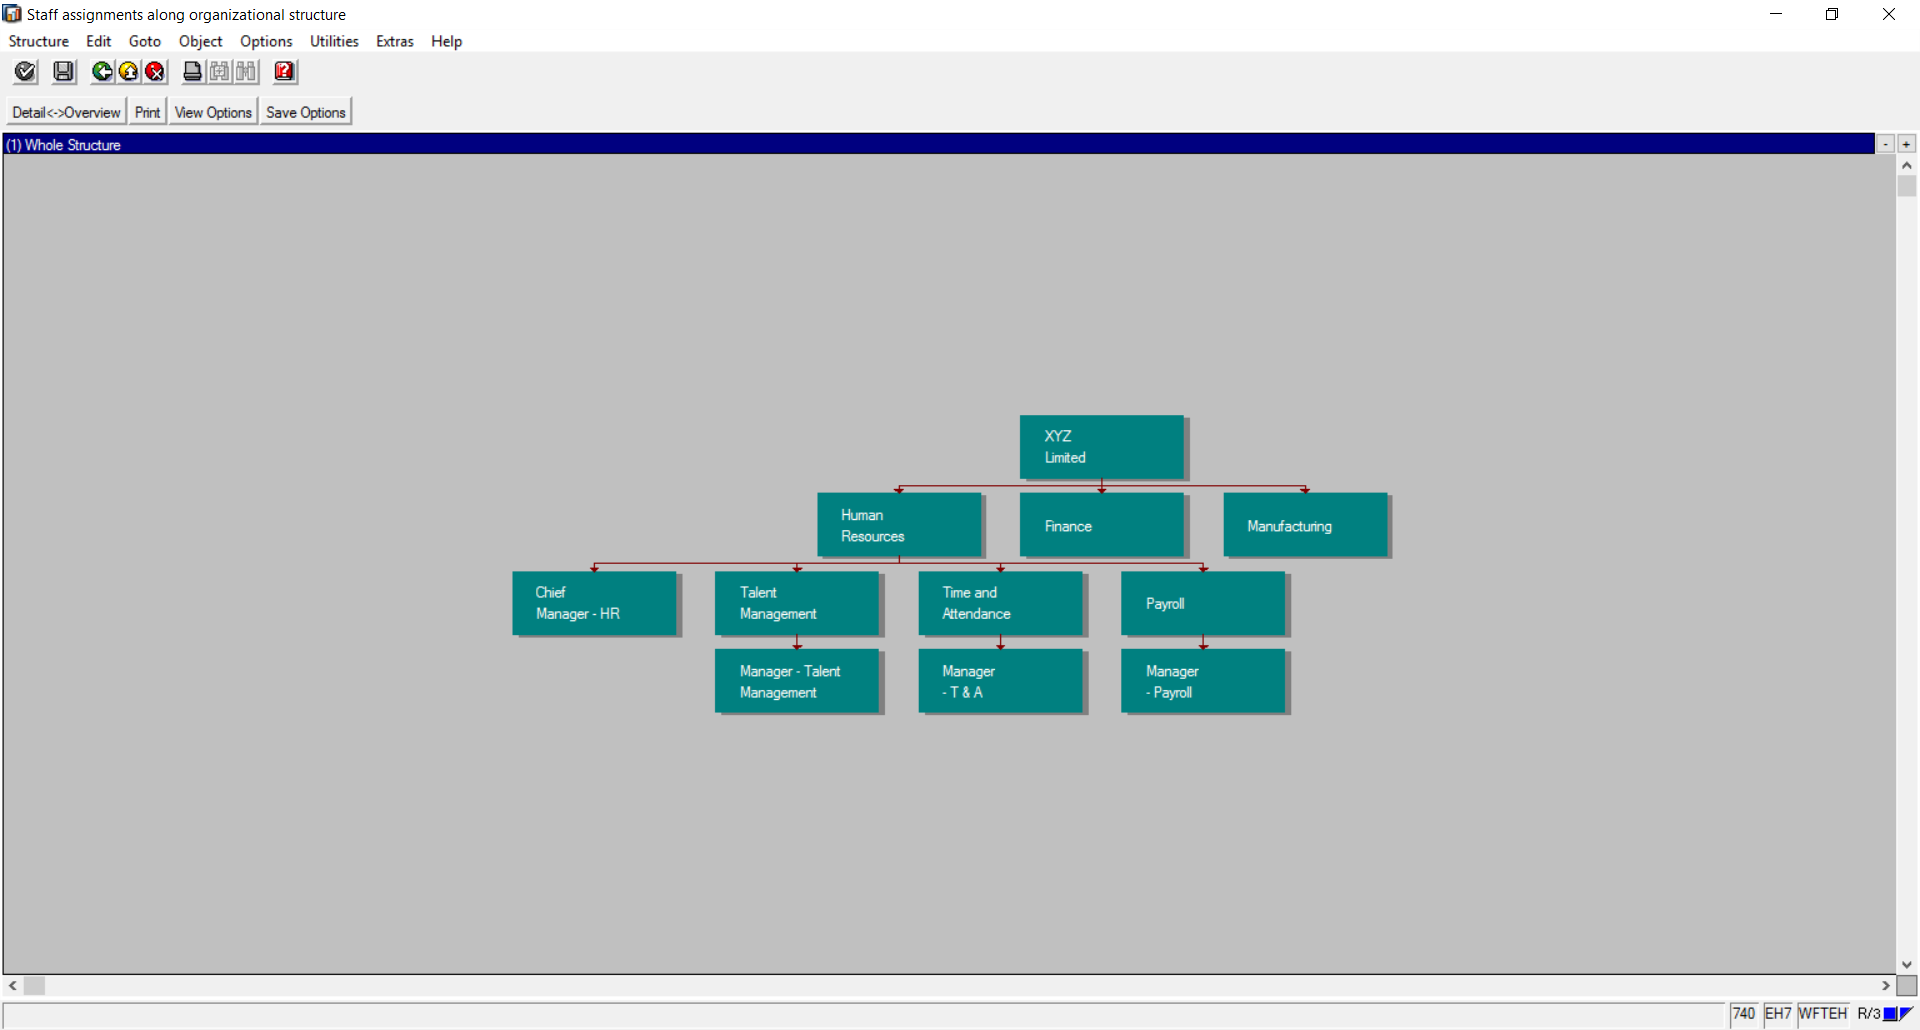
With this, we have successfully mapped the organizational structure from Figure 2 in SAP. You can click on the “Structural Graphics” icon that has been highlighted in Figure 10 to view the organizational structure in the format depicted in Figure 11.
Setting Up Staff Assignments
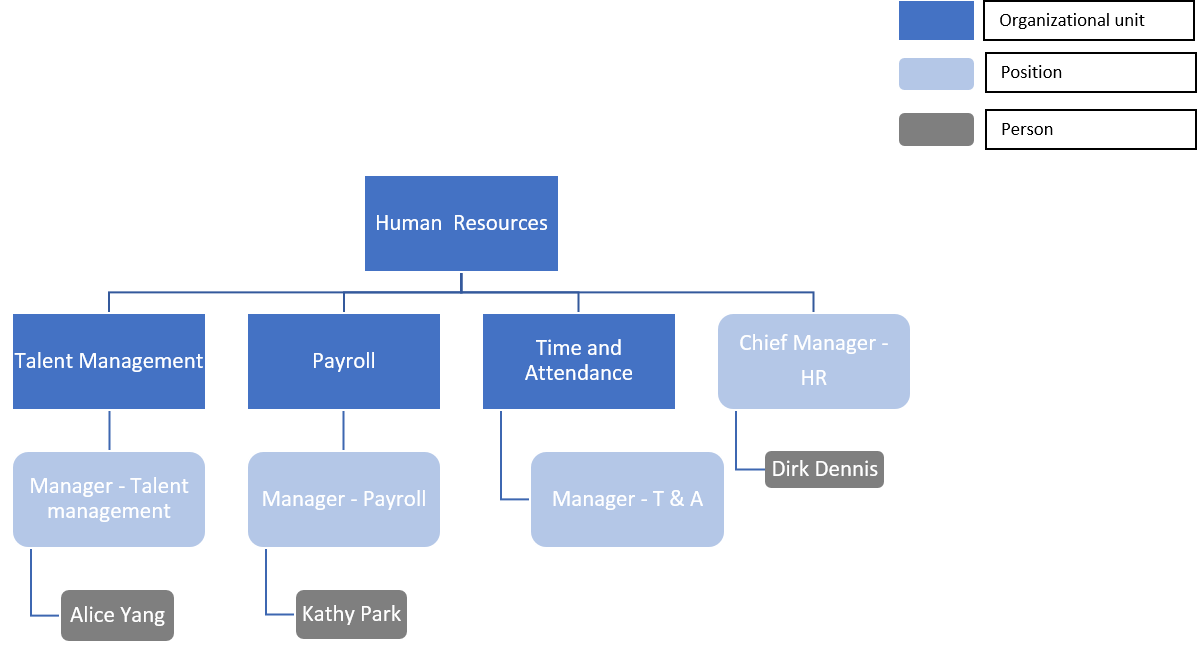
Let us now try to map the staff assignments within the human resources organizational unit as shown in Figure 12.
To do this, we must first create positions under these organizational units. Double click on the transaction highlighted in Figure 13. Alternatively execute the transaction code PPOM_OLD. Note that here we use SAP HR Simple Maintenance “Change’ transaction, as opposed to the “Create” transaction used in the previous section. The reason being, here we need to make changes to an already existing organizational structure, while in the previous section, the aim was to create a new organizational structure.
The next screen is shown in Figure 14.
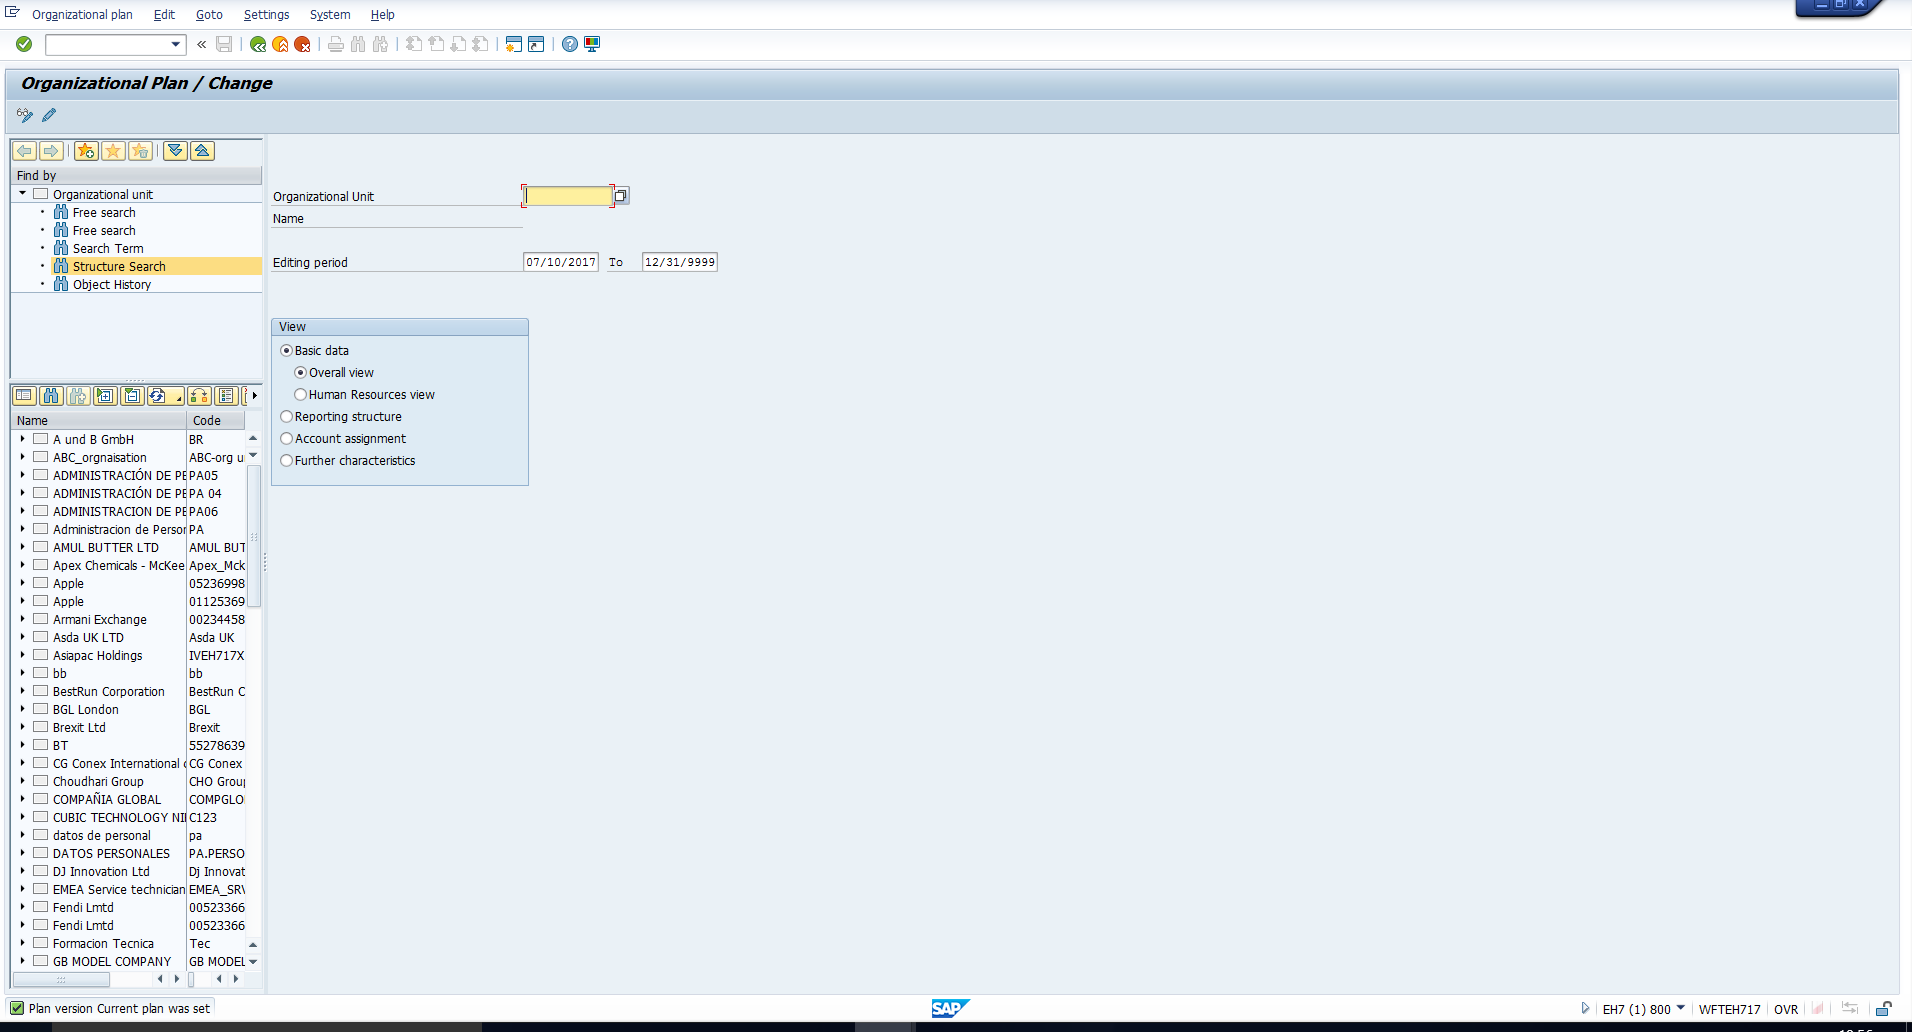
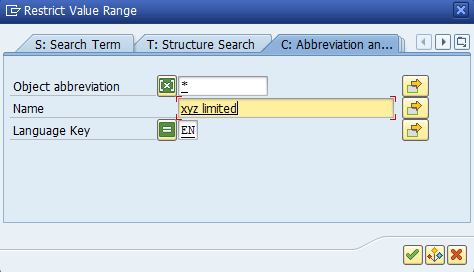
Select the root organizational unit using the search help as shown in Figure 15.
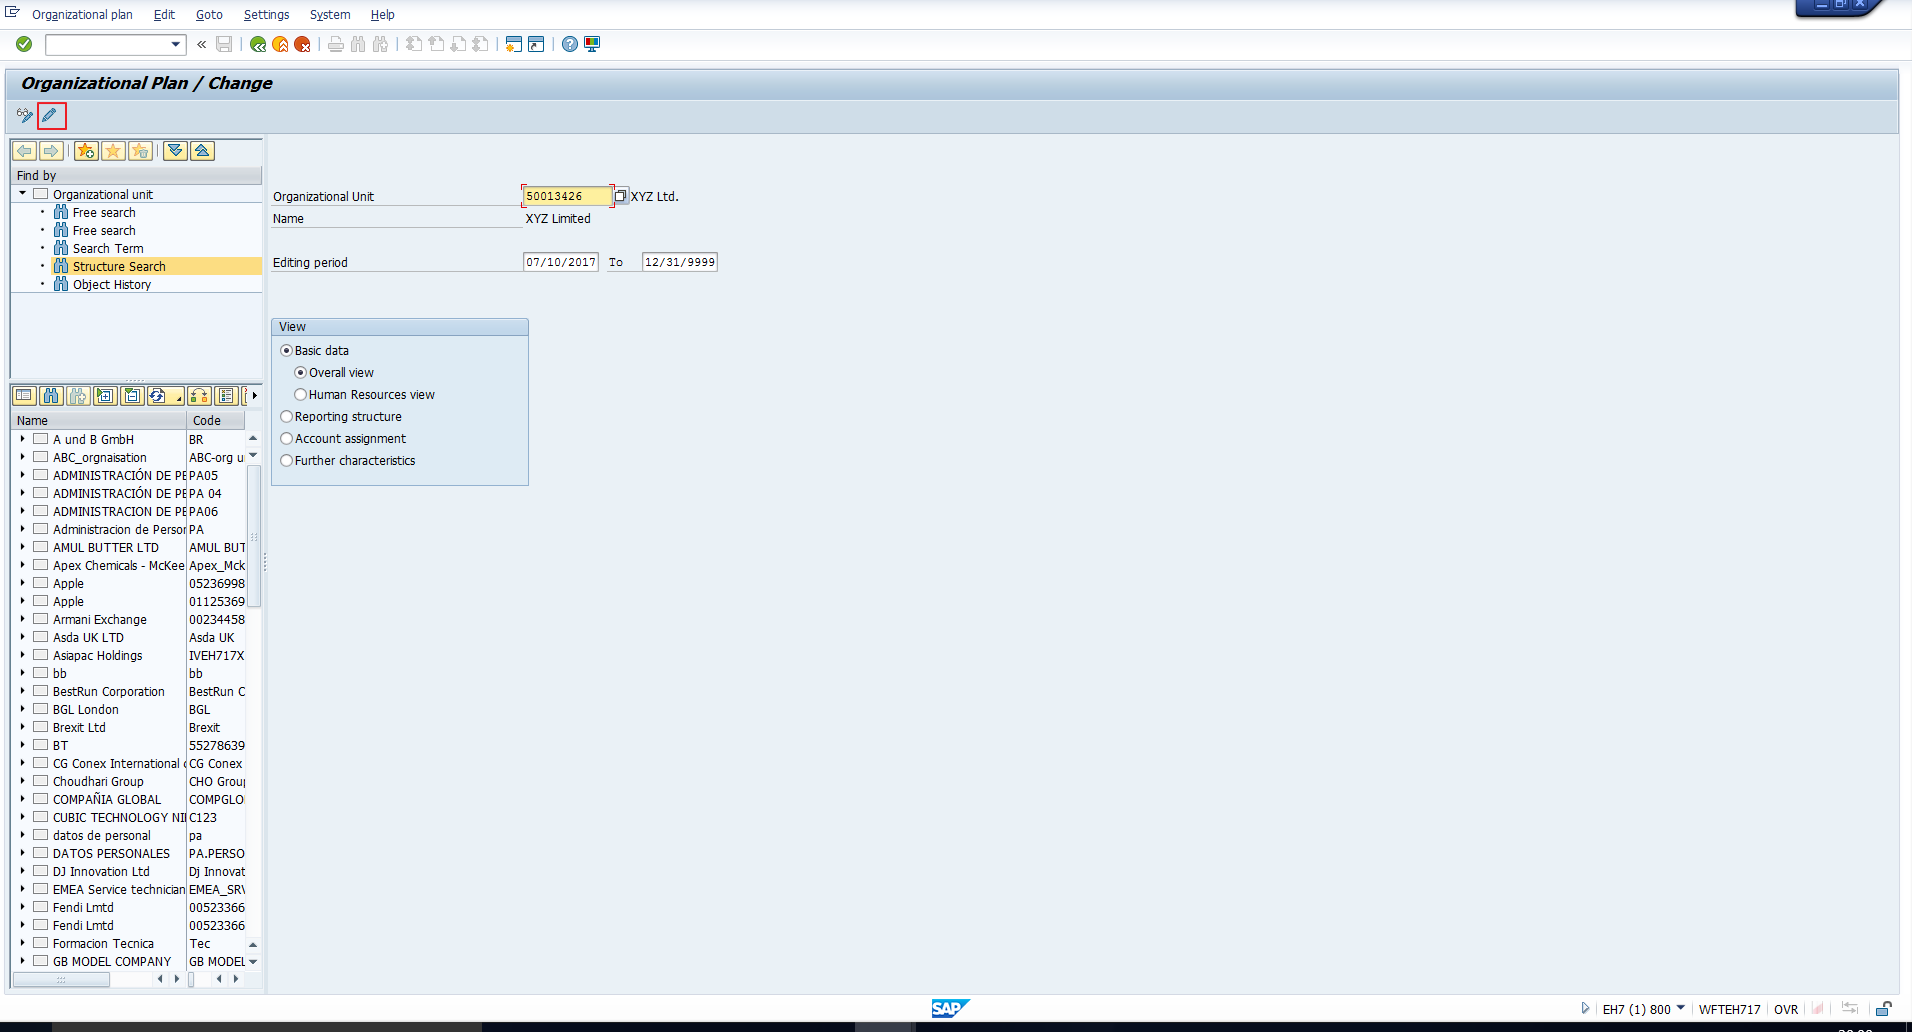
Once you select the organizational unit, the object id will be displayed. Click on the Change icon highlighted in Figure 16.
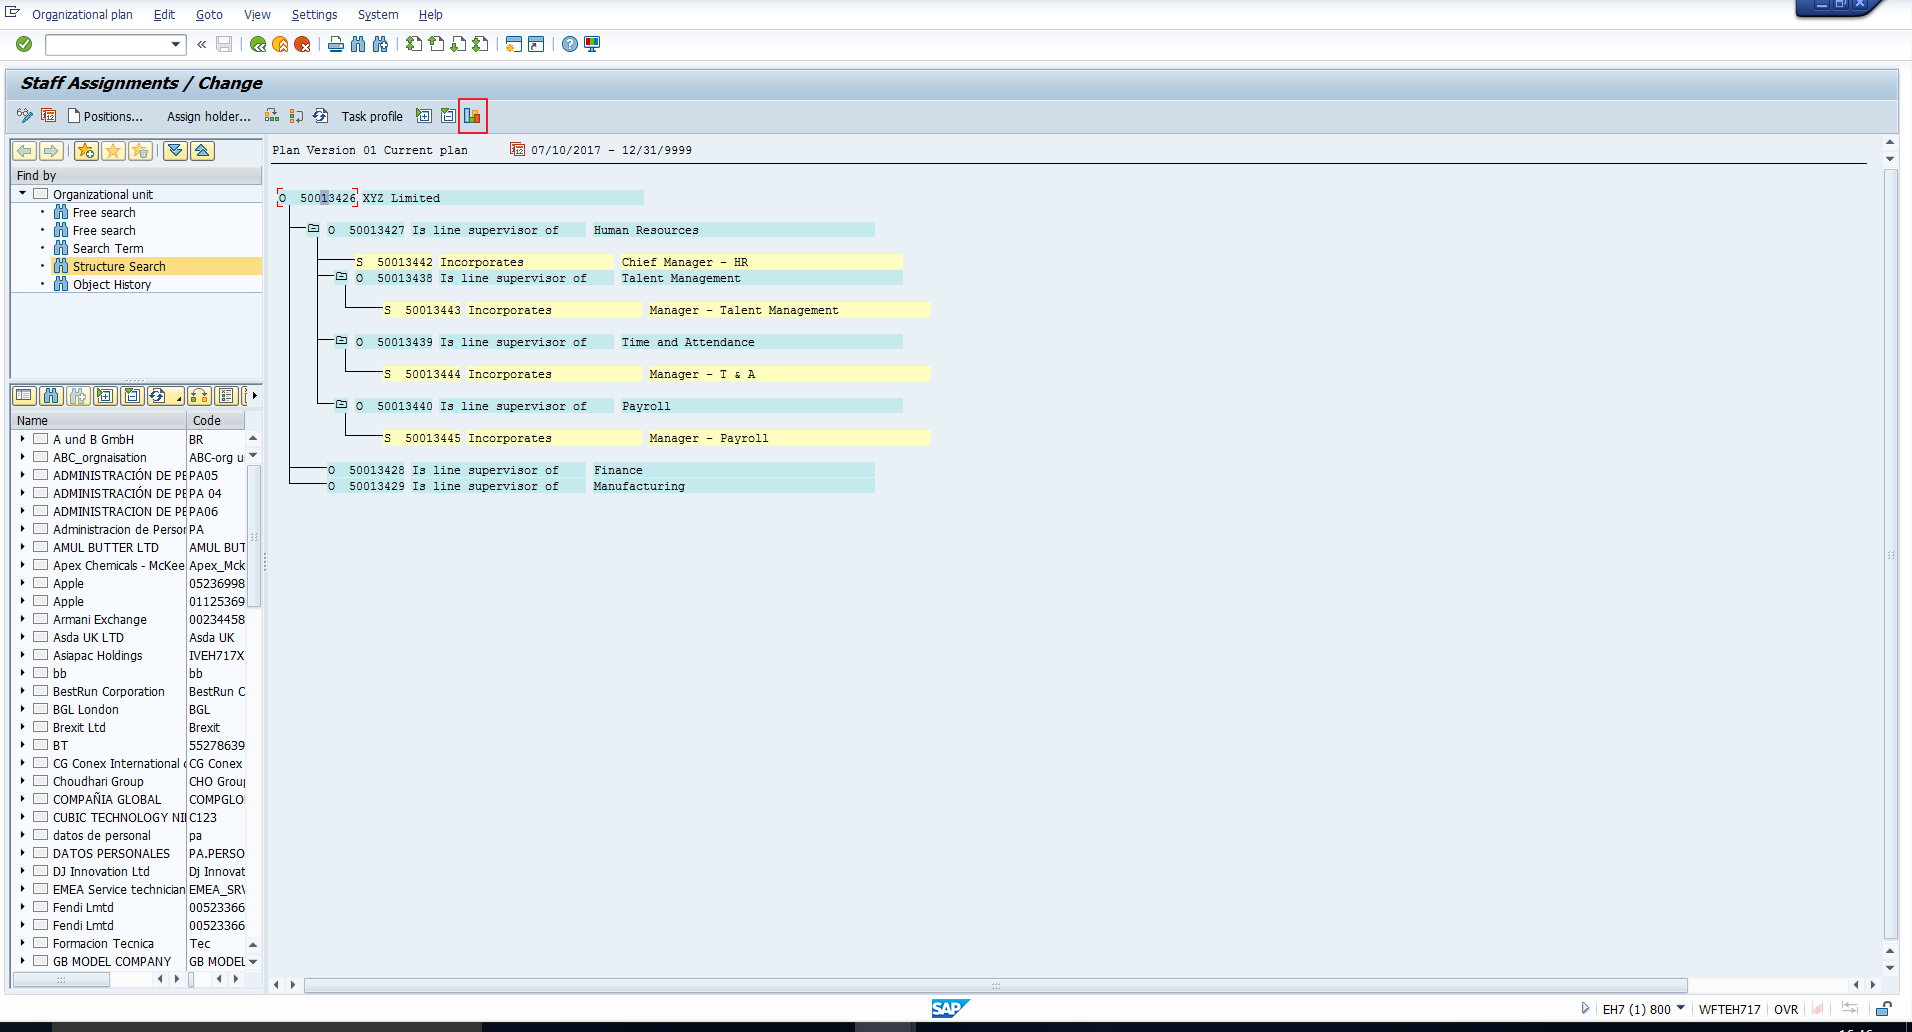
This takes you to the screen in Figure 17. To proceed with the creation of positions, you must click on the “Staff assignments” button which has been highlighted in the screenshot.
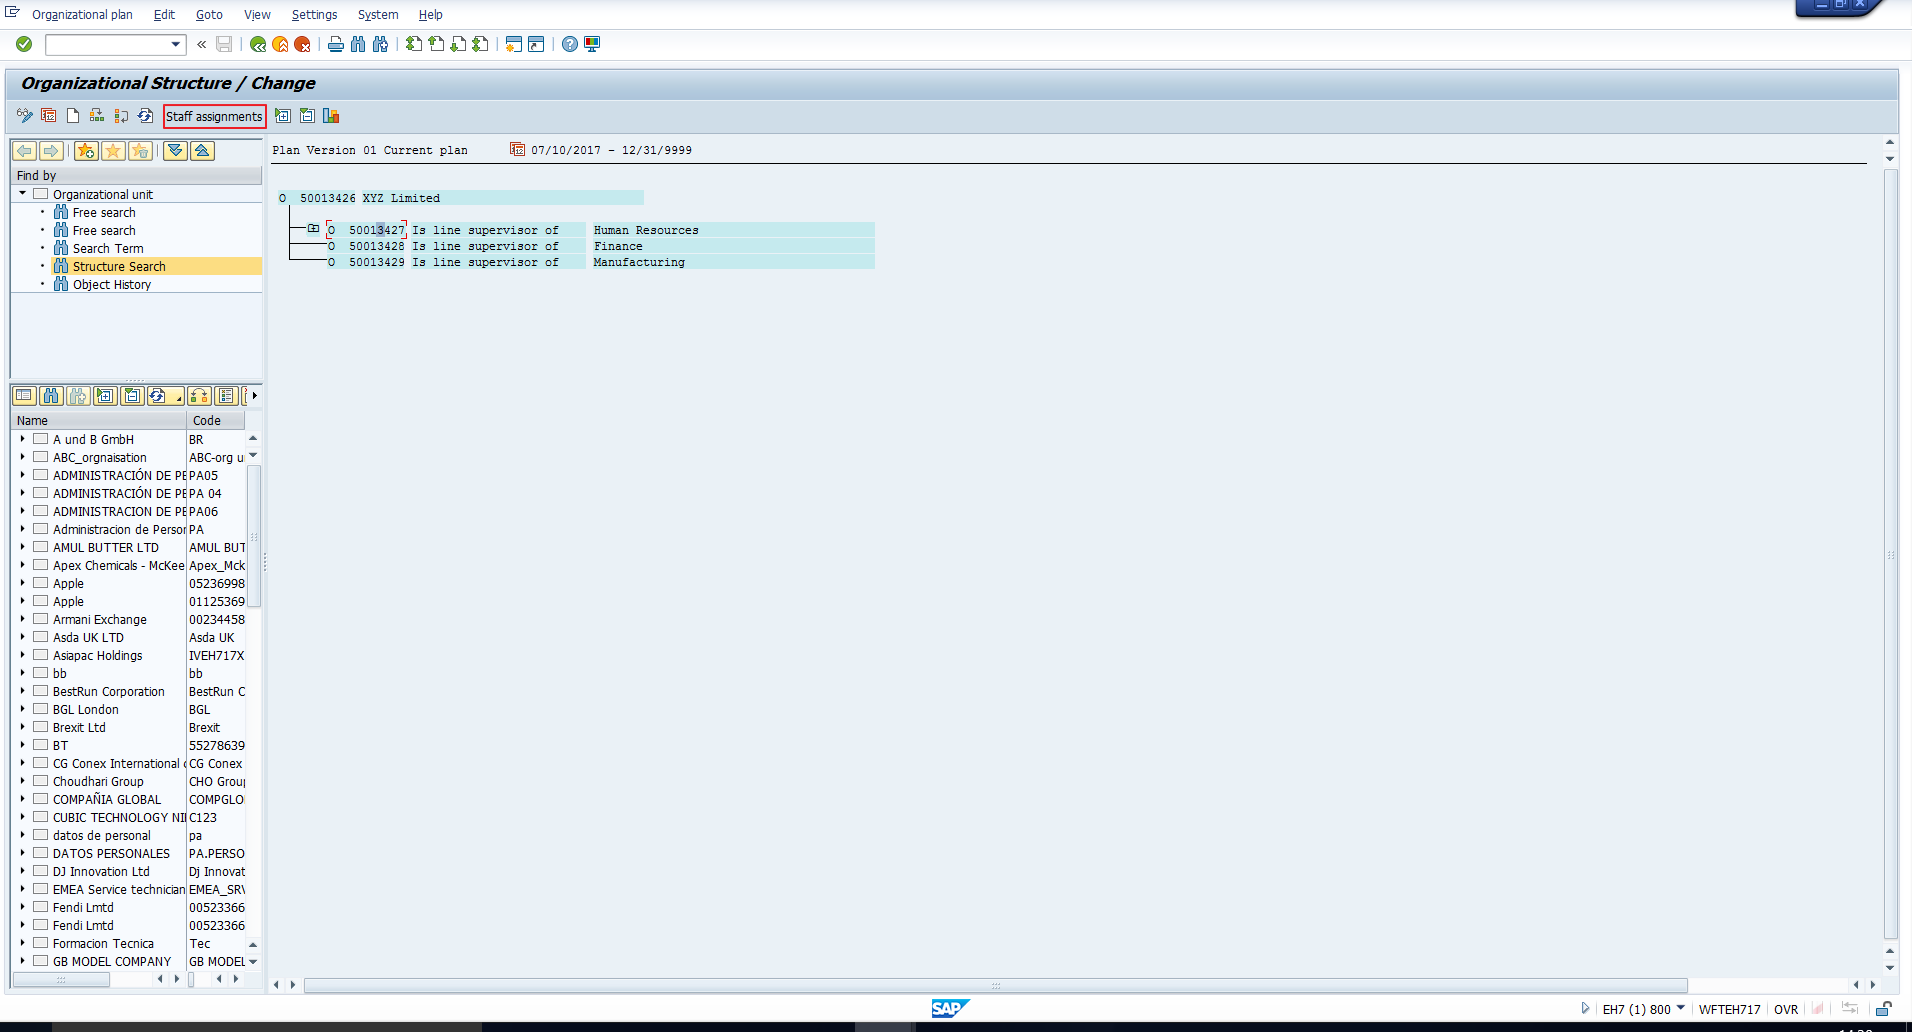
This takes you to the screen depicted in Figure 18.

Now, position the cursor on the organizational unit under which you want to create positions.
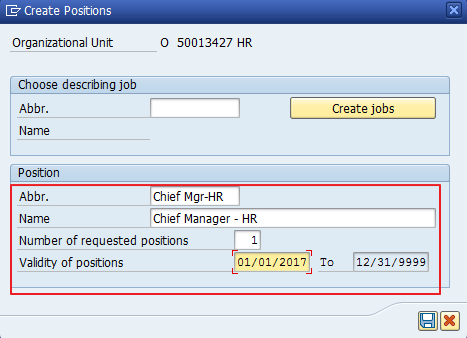
Let us begin with the creation of the Chief Manager – HR position. To create this, position the cursor on the “Human Resources” organizational unit. Then click on the Create positions icon that has been highlighted in Figure 18.
The following pop-up will be seen. Enter the necessary details as depicted in Figure 19. If your organization uses jobs, enter these details as well. Then click on the Save icon.
The position is created successfully as can be seen in Figure 20.

Similarly, create the other positions under the respective organizational units until you arrive at the structure depicted in Figure 21.
You can click on the “Structural Graphics” icon that has been highlighted in Figure 21 to view the organizational structure with positions as depicted in Figure 22.
Now that we have created positions, we proceed to linking holders to the positions. It is advisable to assign positions to employees in Personnel Administration, via personnel actions like Hiring, Transfer, Promotion. The position is assigned to the employee in the organizational assignment infotype.
However, this can also be done through SAP HR Simple maintenance as explained below.
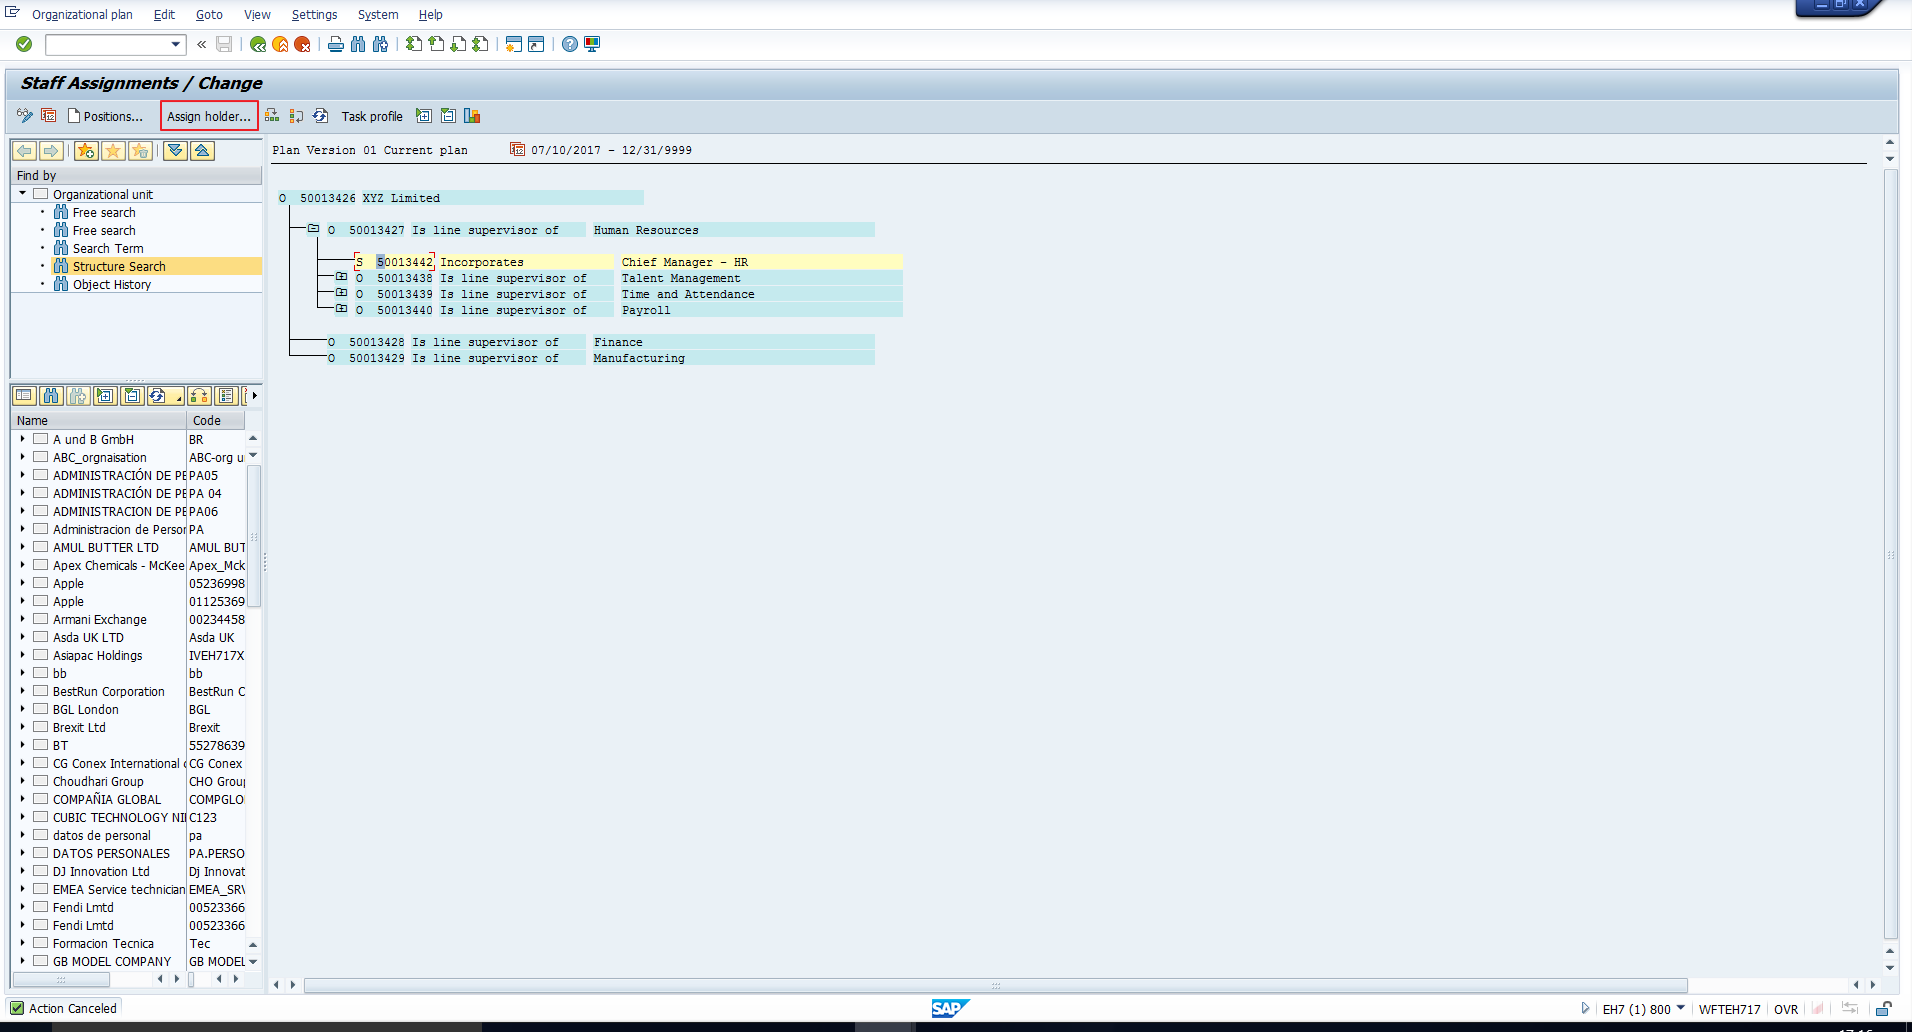
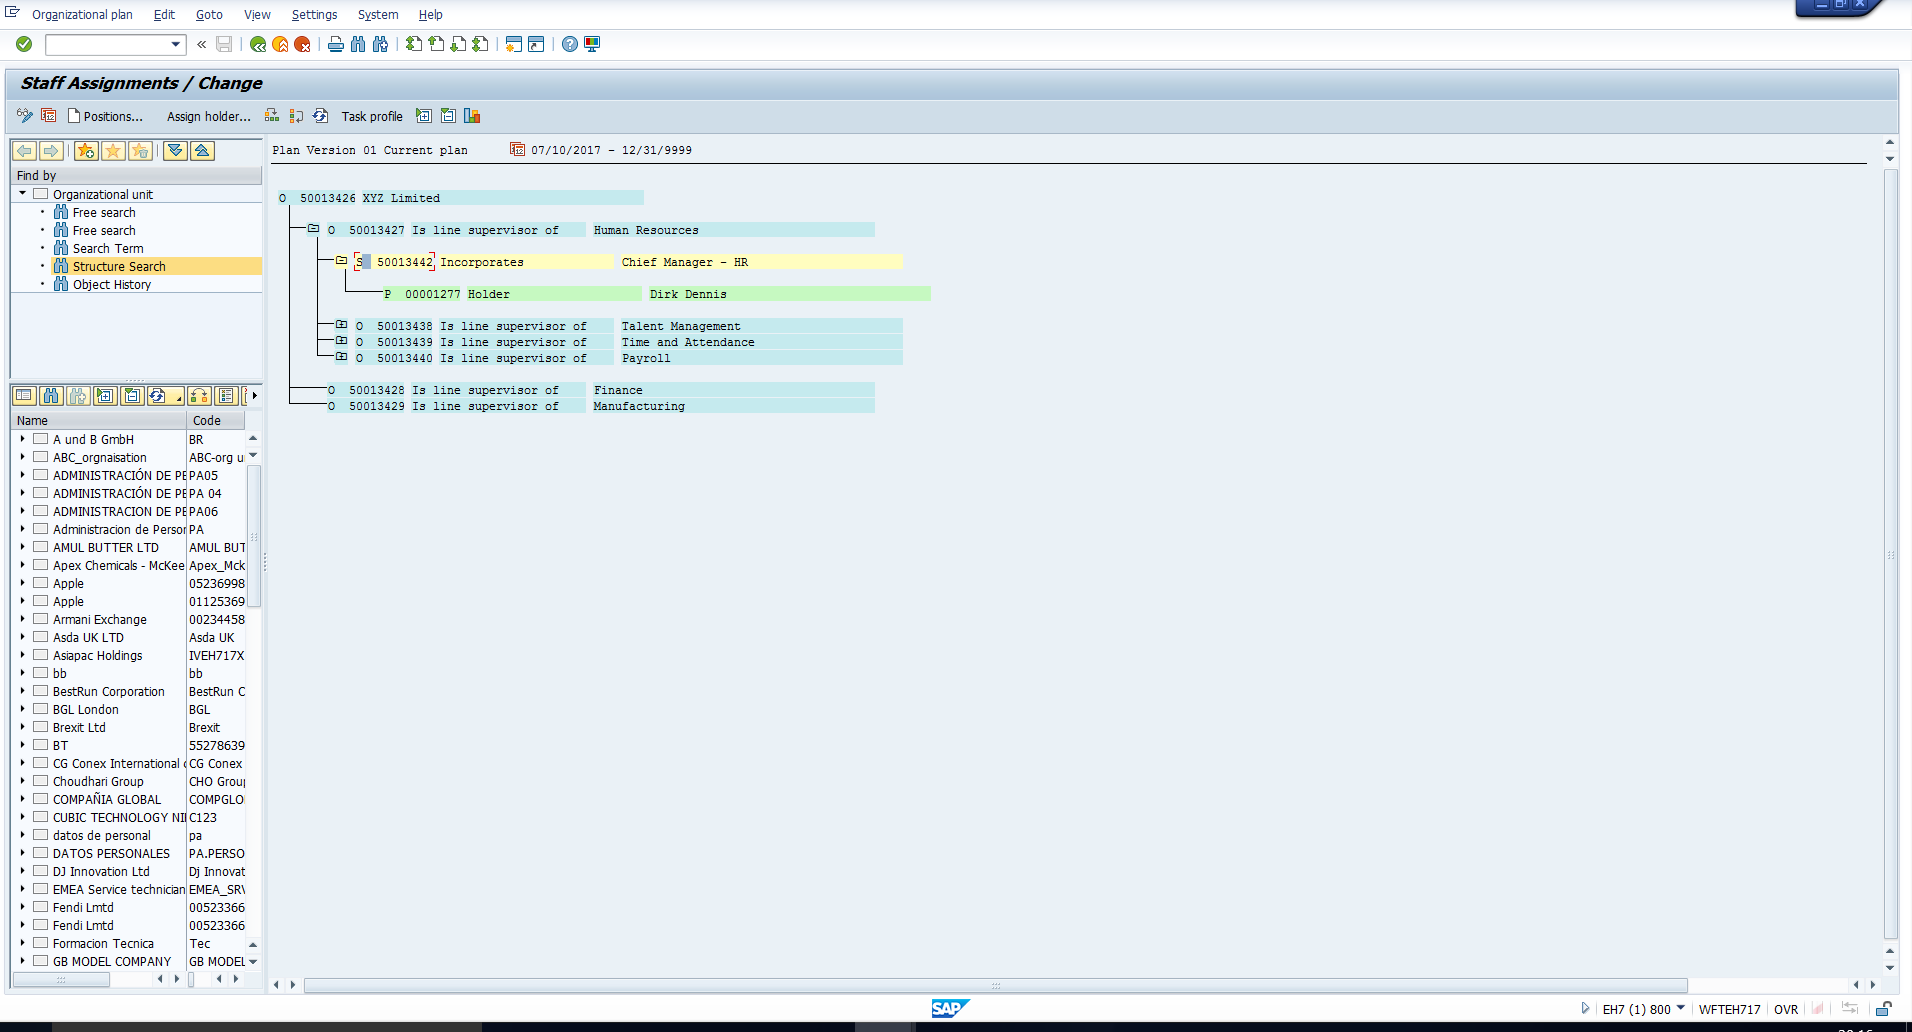
In the staff assignments screen, click on the position to which you want to assign a holder. For example, let us position the cursor on the Chief Manager – HR position. Click on the Assign holder button that has been highlighted in Figure 23.
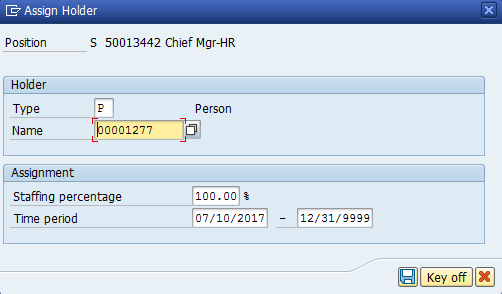
You will see the pop-up as shown in Figure 24.
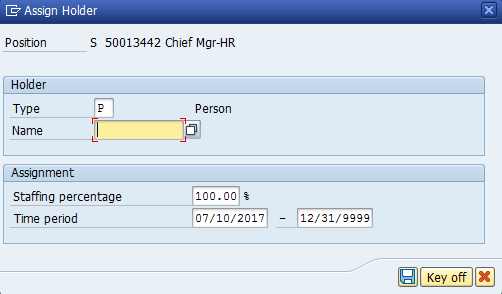
Using the search help in the ‘Name’ field, search for the employee Dirk Dennis, who, as per Figure 12, must be assigned to this position. This is shown in Figure 25.

Once you locate the personnel number, assign it in the corresponding field as shown in Figure 26. Also enter the correct validity period. Click on the Save icon.
You can now see the holder assigned to the position as shown in Figure 27.
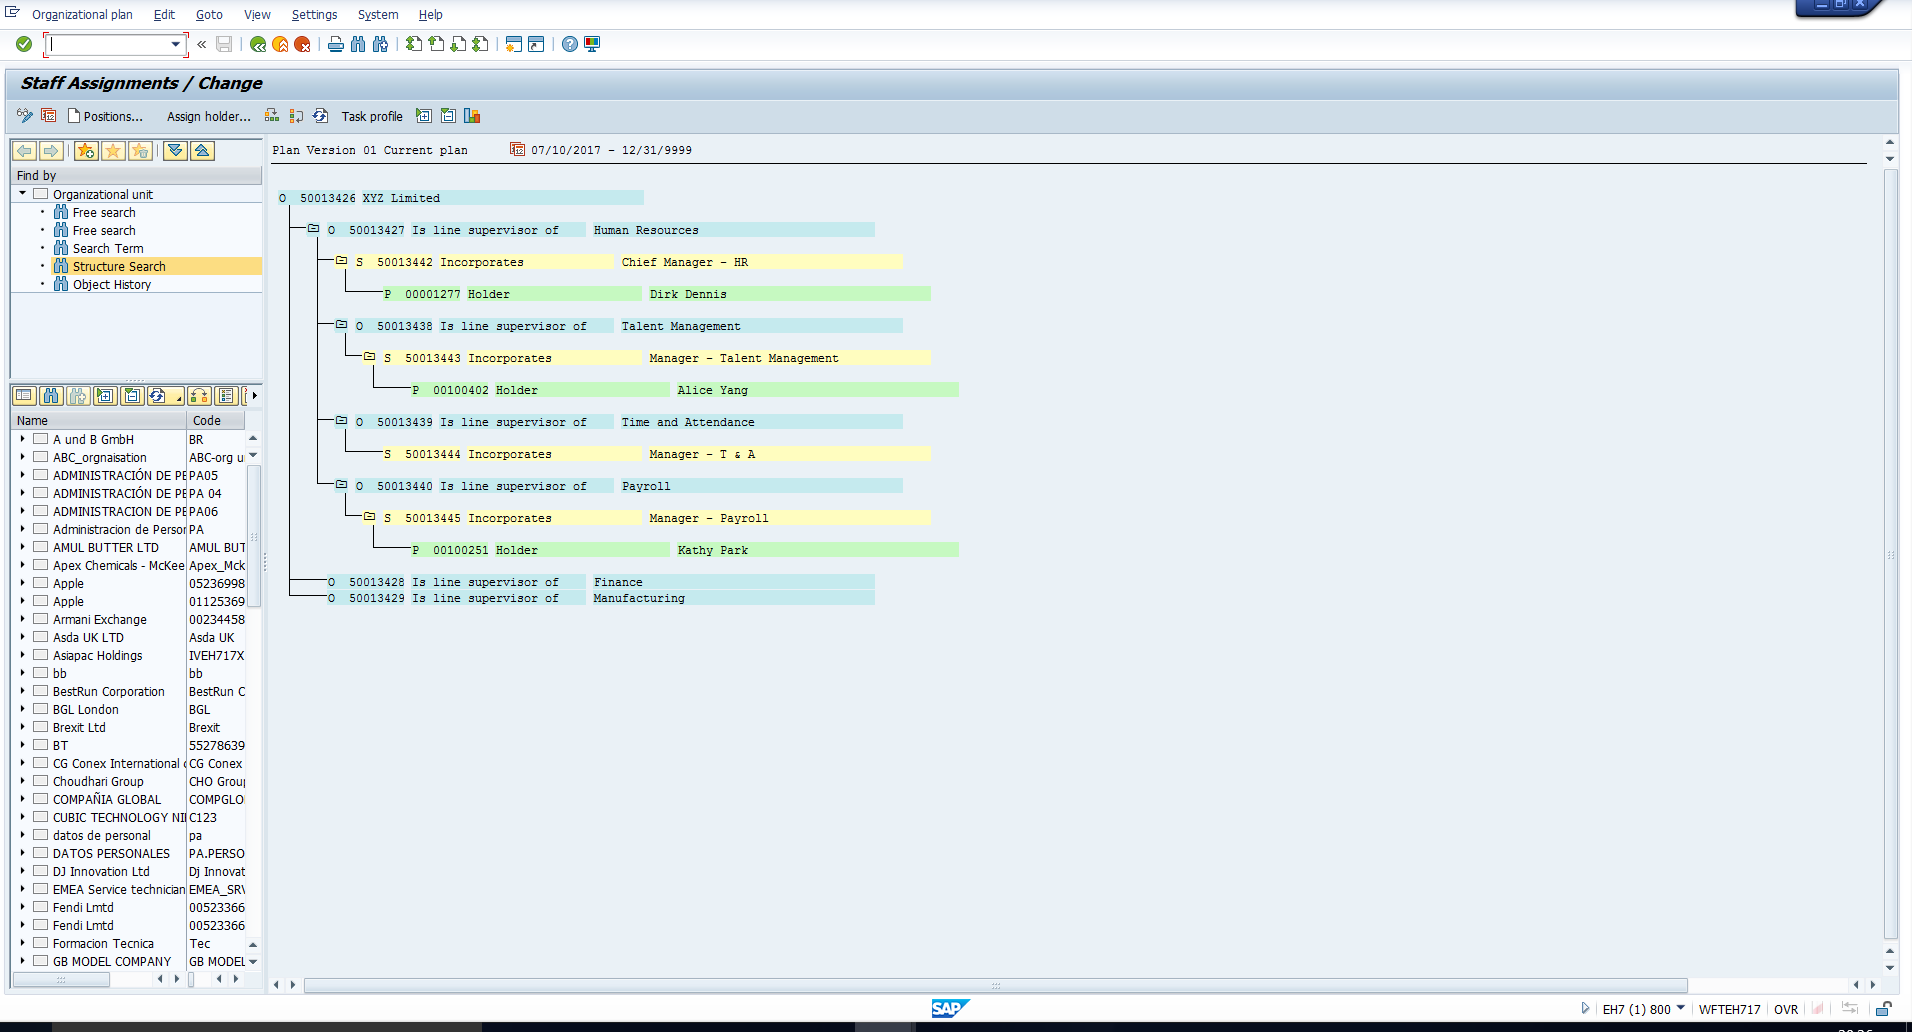
Similarly, assign the other holders until you see the staff assignments shown in Figure 28.
Building a Reporting Structure
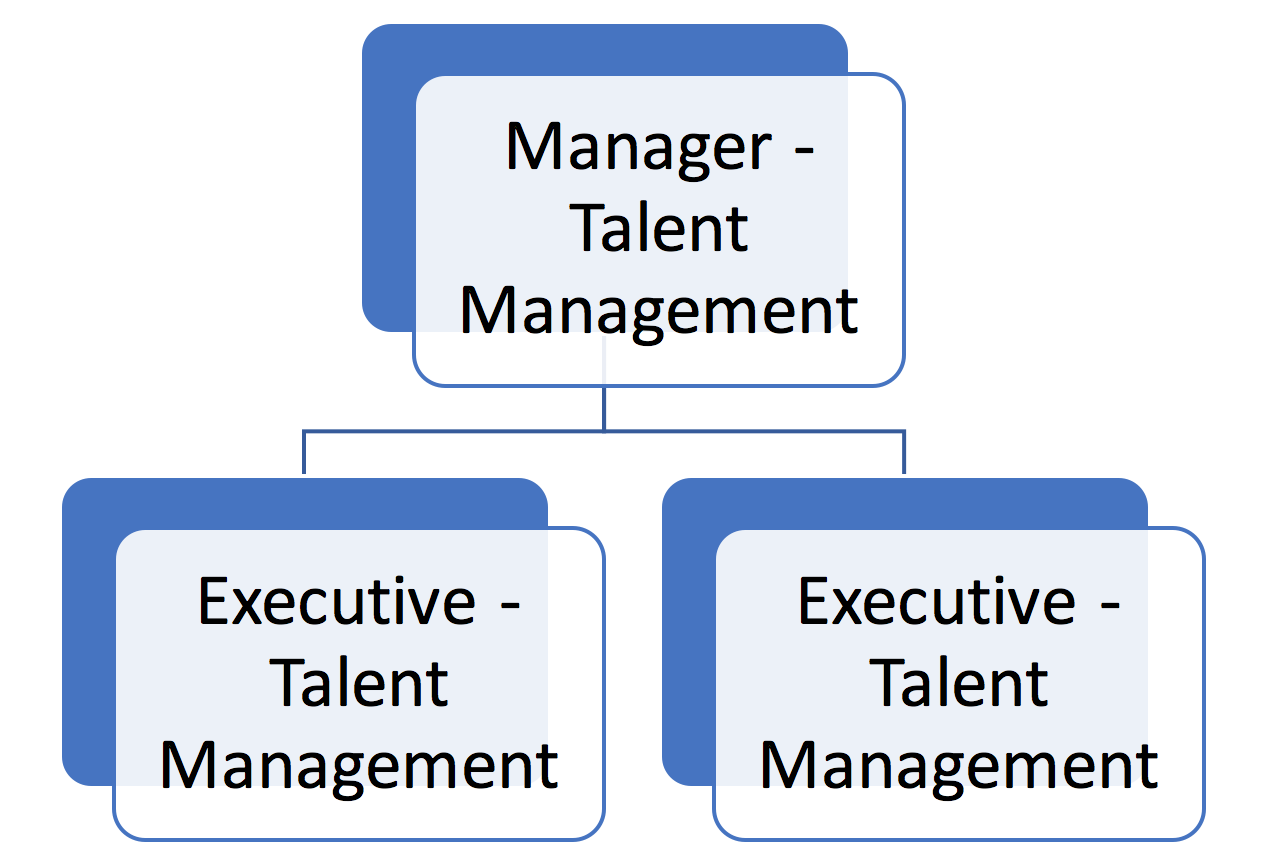
Next, consider a simple reporting structure within the Talent Management organizational unit illustrated in Figure 29.
Let us see how to map this in SAP. Again, we access SAP HR Simple Maintenance “Change’ transaction by executing the transaction highlighted in Figure 13 or by directly executing the transaction code PPOM_OLD.
In the following screen, select the Talent management organizational unit and the “Reporting structure” radio button as illustrated in Figure 30.
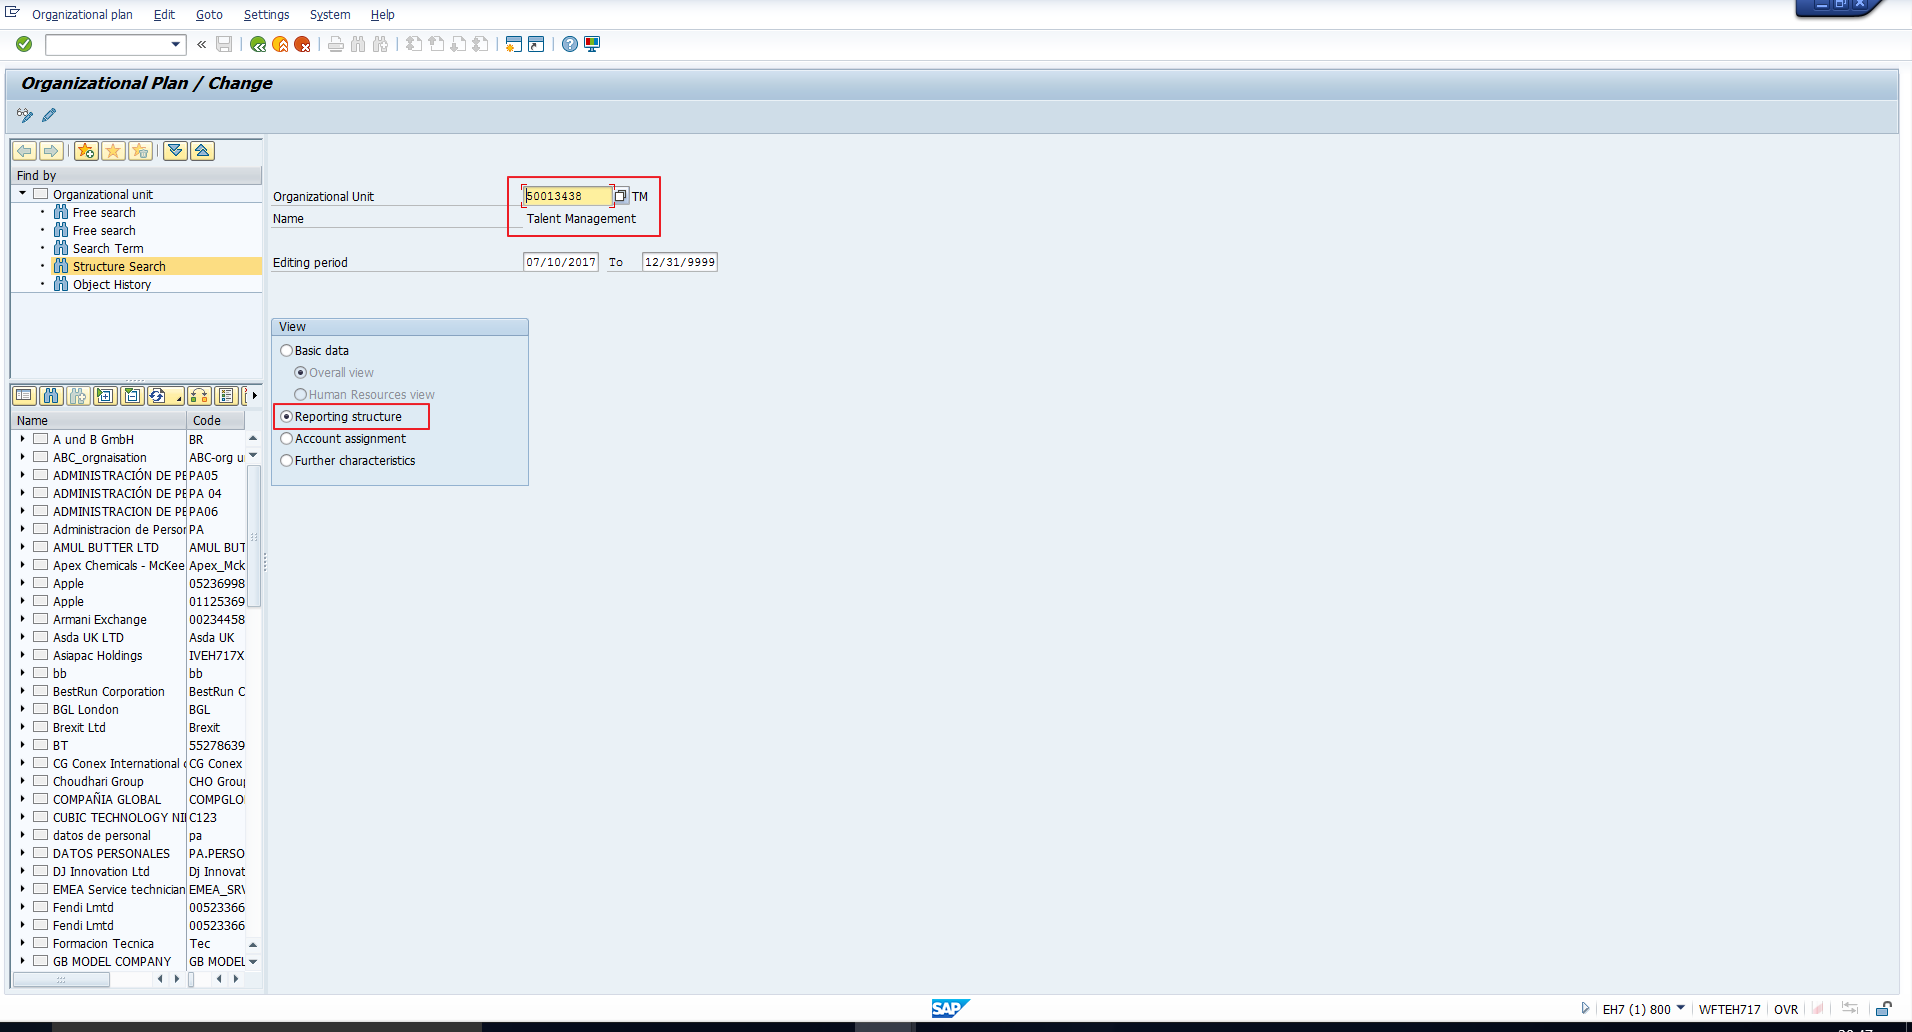
Click on the Change icon to reach the screen shown in Figure 31.
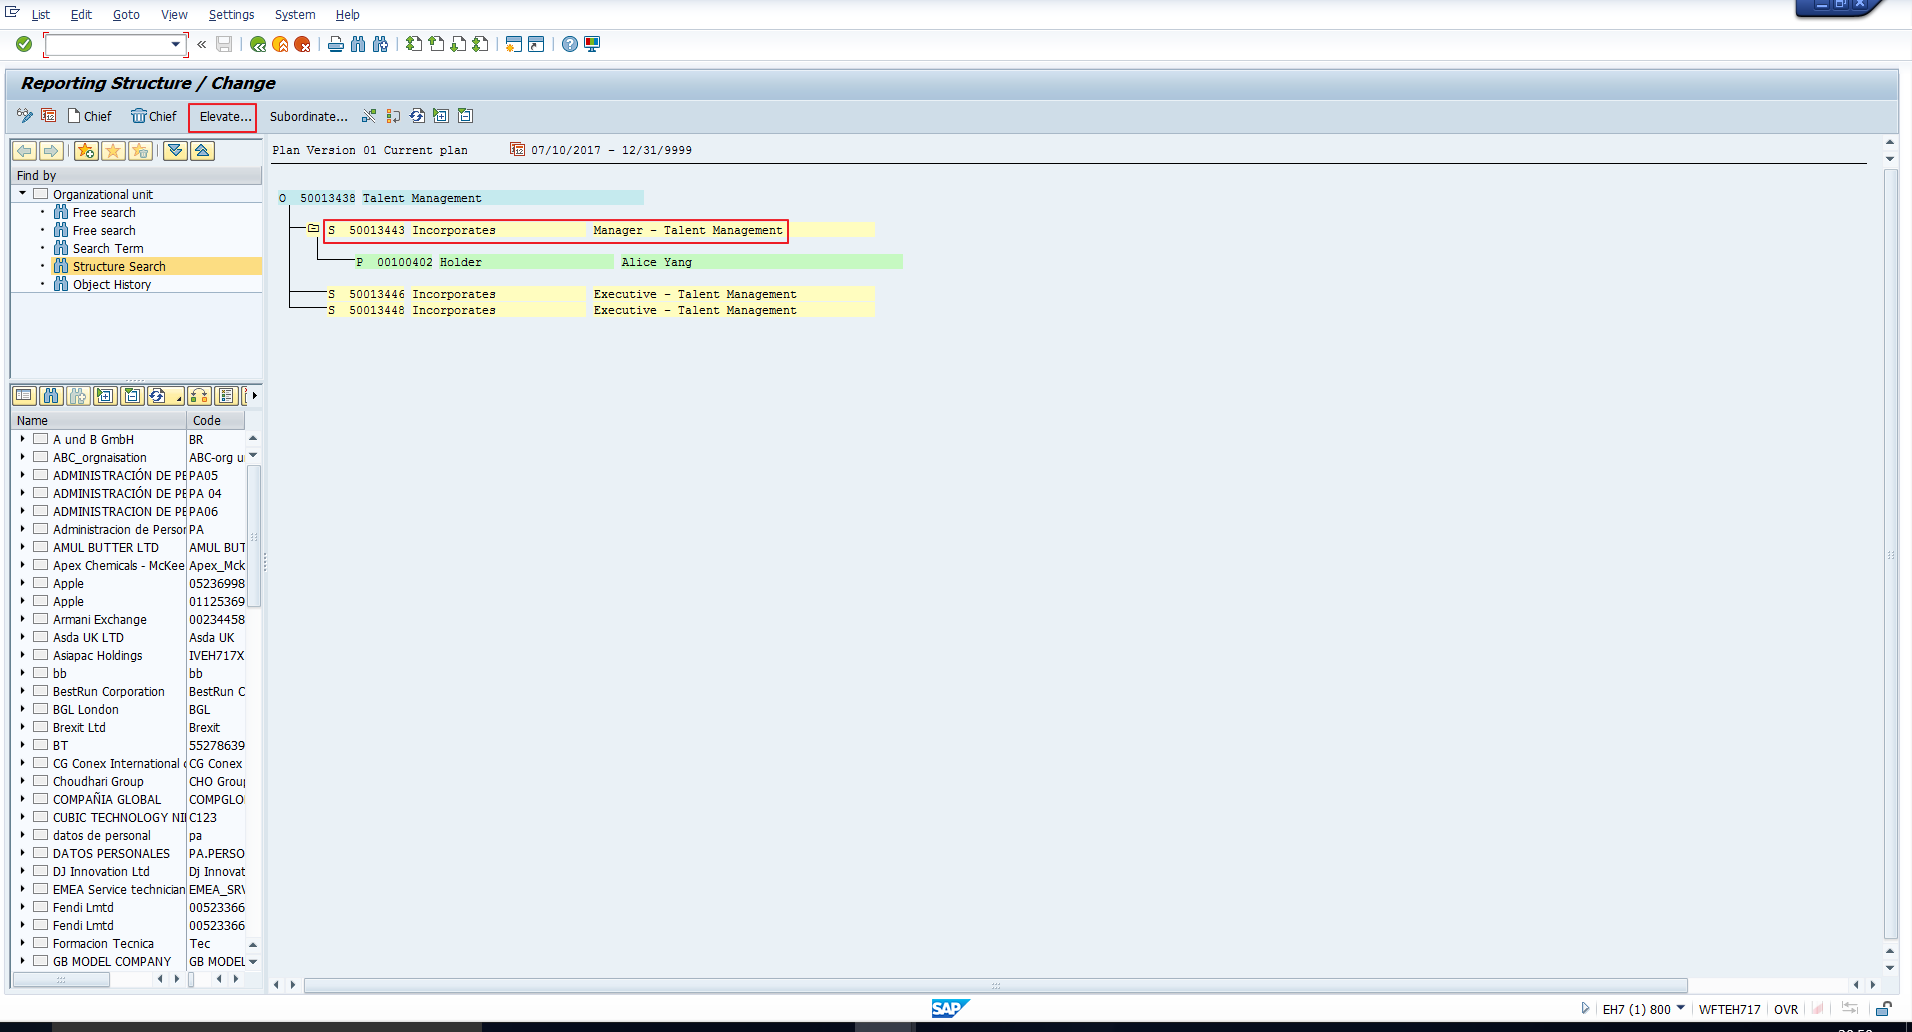
Note that we have created two new positions for “Executive – Talent management”. We need to indicate that these two positions report to the position “Manager- Talent Management”.
To do this, position the cursor on the position “Manager- Talent Management” and click on the Elevate button highlighted in Figure 31. This takes you to the “Choose Positions for Subordination” screen shown in Figure 32.
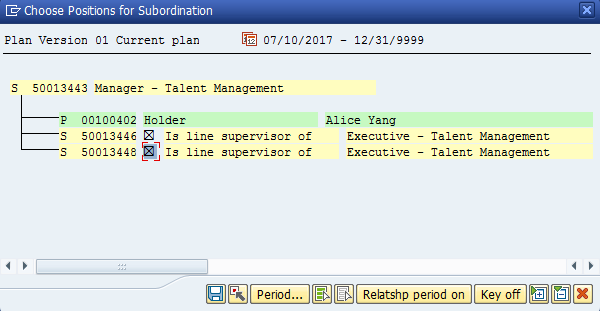
Select both “Executive – Talent management” positions as both are subordinate to the position “Manager- Talent Management”. You can use the “Period” button to change the validity of the relationships, if required.
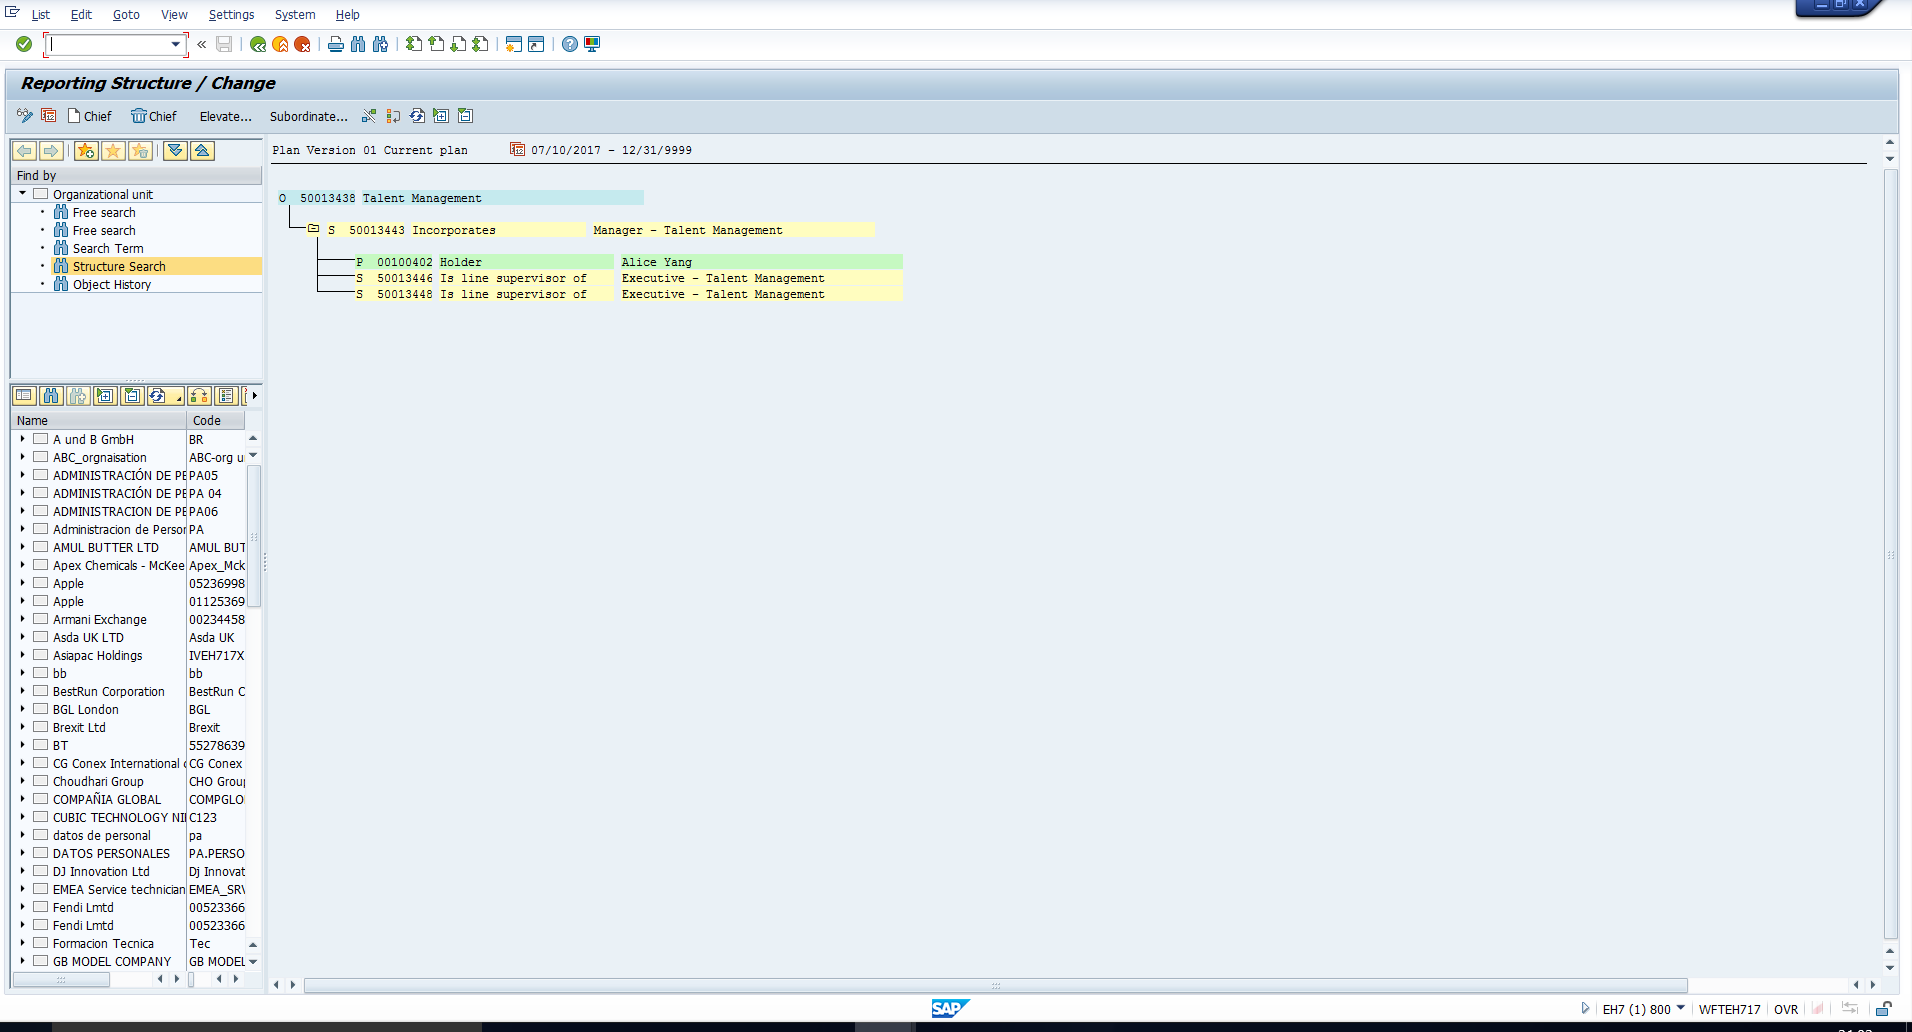
Then save the data. You can now see the newly created reporting structure as illustrated in Figure 33.
—
Did you like this tutorial? Have any questions or comments? We would love to hear your feedback in the comments section below. It’d be a big help for us, and hopefully it’s something we can address for you in improvement of our free SAP HR tutorials.
Navigation Links
Go to next lesson: SAP Infotype Maintenance in Expert Mode
Go to previous lesson: SAP Organizational Management Structures
Go to overview of the course: SAP HR Training