
 In this tutorial, we are going to learn about SAP vendor accounts. SAP vendor account is a master record in accounts payable and it is created once for each supplier. This tutorial will help you to understand the structure of vendor accounts in SAP and understand how to control and maintain vendor accounts. We will go through a step-by-step process of creating a new SAP vendor account from scratch and explain meaning of the most common fields. This tutorial is part of our free SAP FI training that consists of many free lessons covering various topics in Financial Accounting module of SAP.
If you are interested in vendors from the point of view of Materials Management (MM) module, have a look at this tutorial: SAP Vendor Master Data.
An SAP vendor account has three segments which are:
- General data at client level
- Company code segment
- Purchasing area segment
General Data
Contains general data of a vendor account that can be accessed throughout the organization. This data includes vendor number, vendor name and vendor address.
Company code data
Contains company code specific data. Any company code that wishes to do business with a specific vendor has to create a company code segment for this vendor.
Purchasing organization data
Since the procurement department interacts with vendors, it requires specific data about all of your vendors. For this reason, you can create purchasing organization segment for each vendor. Any purchasing organization that needs to do business with a vendor has to first create a purchasing segment. This segment contains data specific to this purchasing organization.
How to Create SAP Vendor Account?
SAP ERP system offers two possibilities for maintaining vendor accounts. Organizational requirements will determine which possibility you should use. In the first option, the data records for all segments can be maintained centrally. In the second option, the data records for financial accounting and purchasing can be maintained separately. In this tutorial, we are going to demonstrate the first option where we maintain the records centrally.
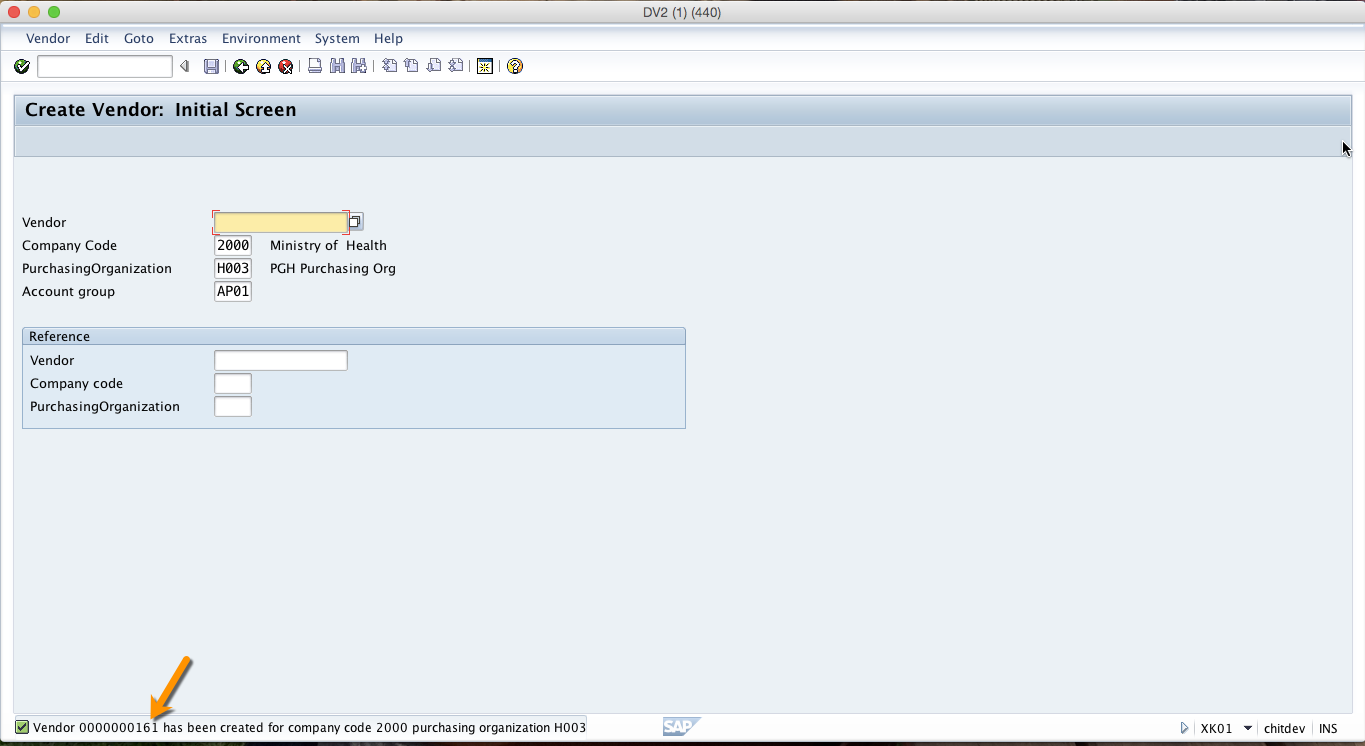
To create a new vendor master record, we use the transaction code XK01 or we can navigate to the following menu path.
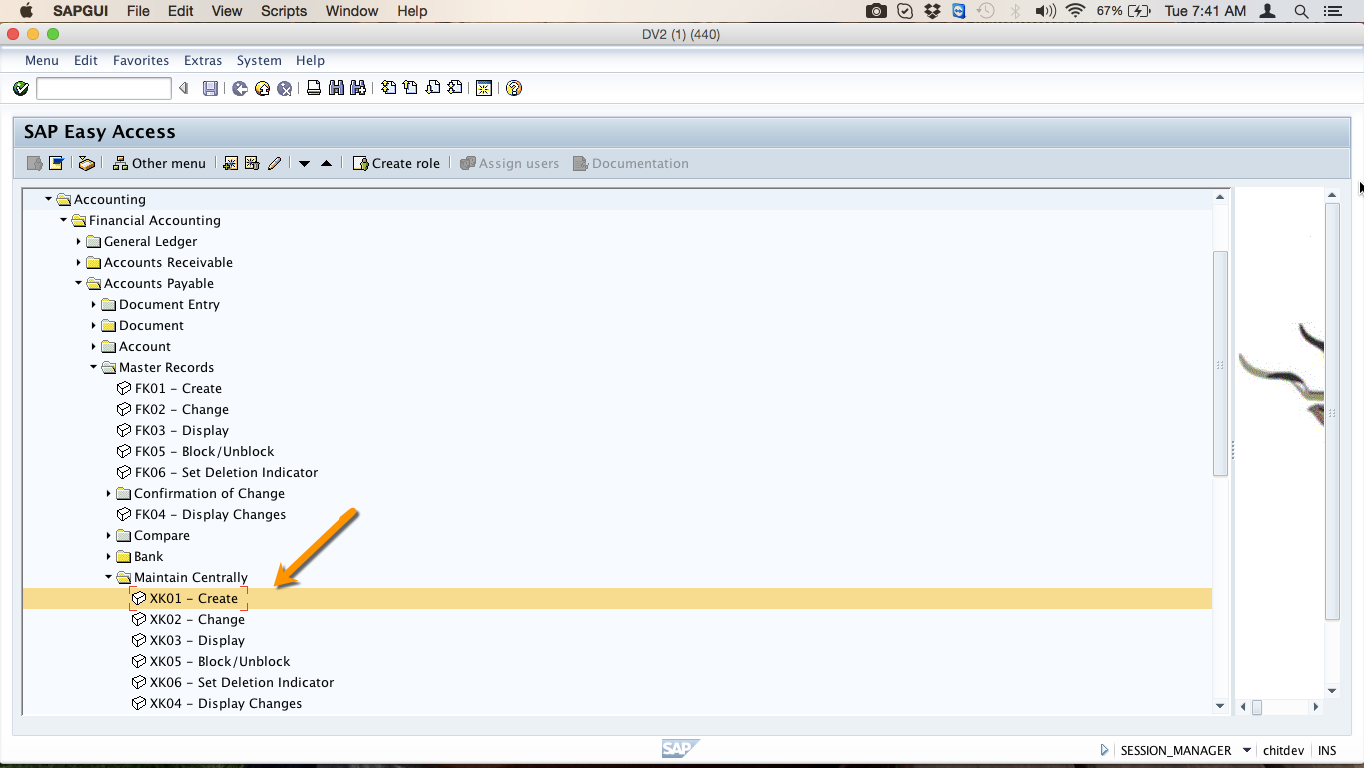
When you double click on the transaction XK01 you will get to the initial page and we are going to explain the meaning of fields on the screen.
Account group
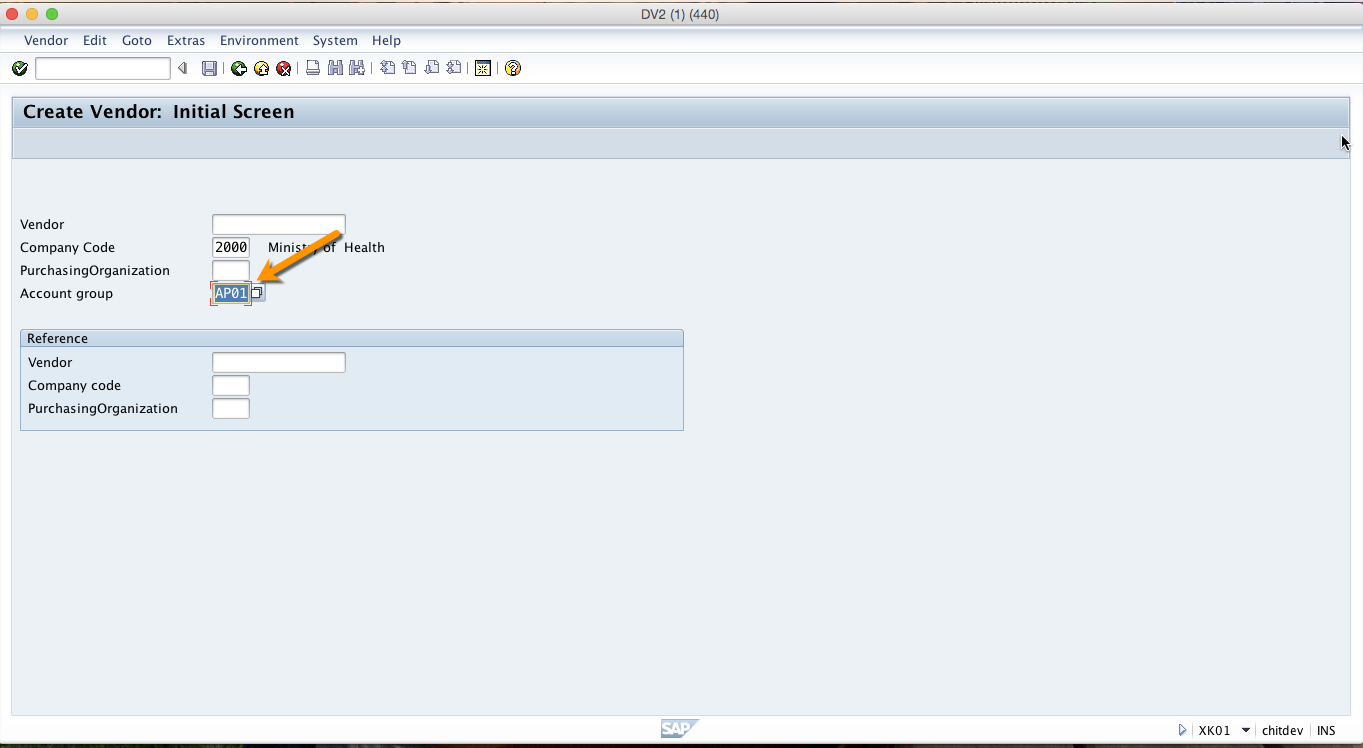
Account group is a classifying feature for vendor accounts. The account group determines in which number range the vendor account number should be, whether the vendor number is assigned by the user or by the system and input in which fields is necessary or possible in the master record.
Company code
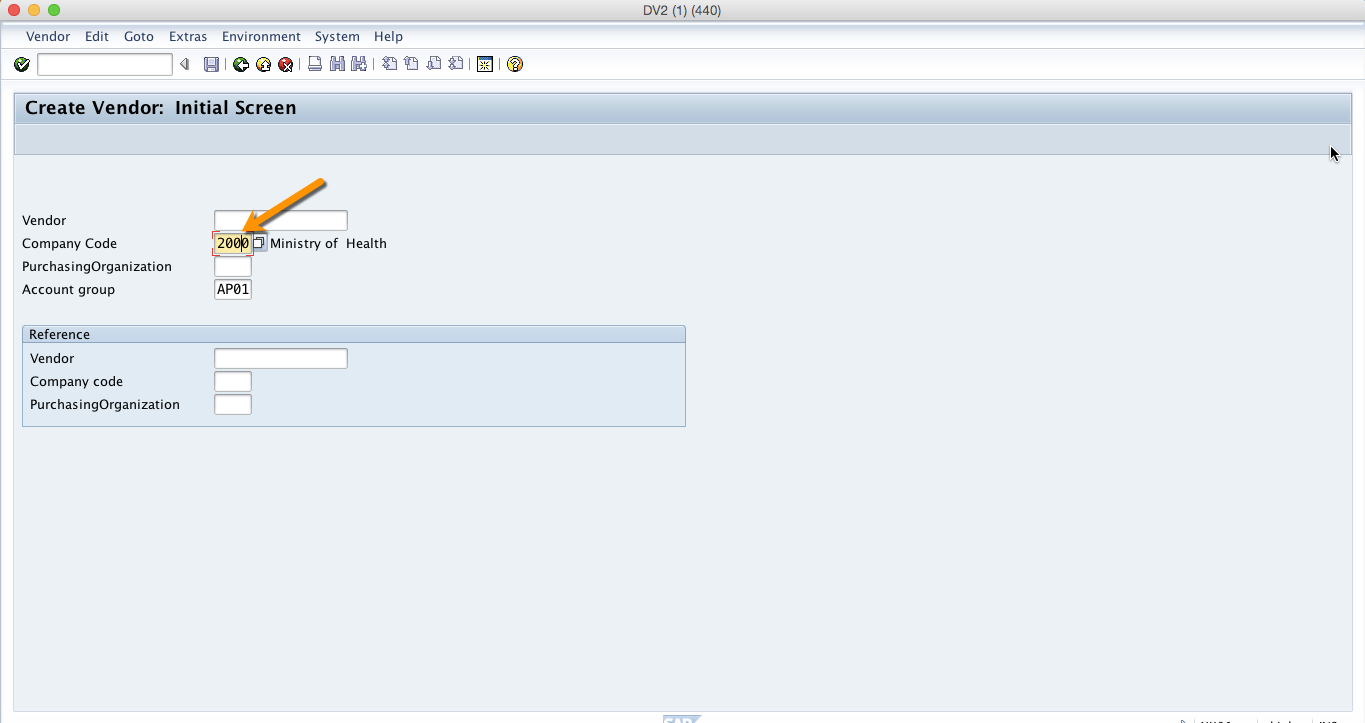
The company code is an organizational unit within financial accounting.
Purchasing organization
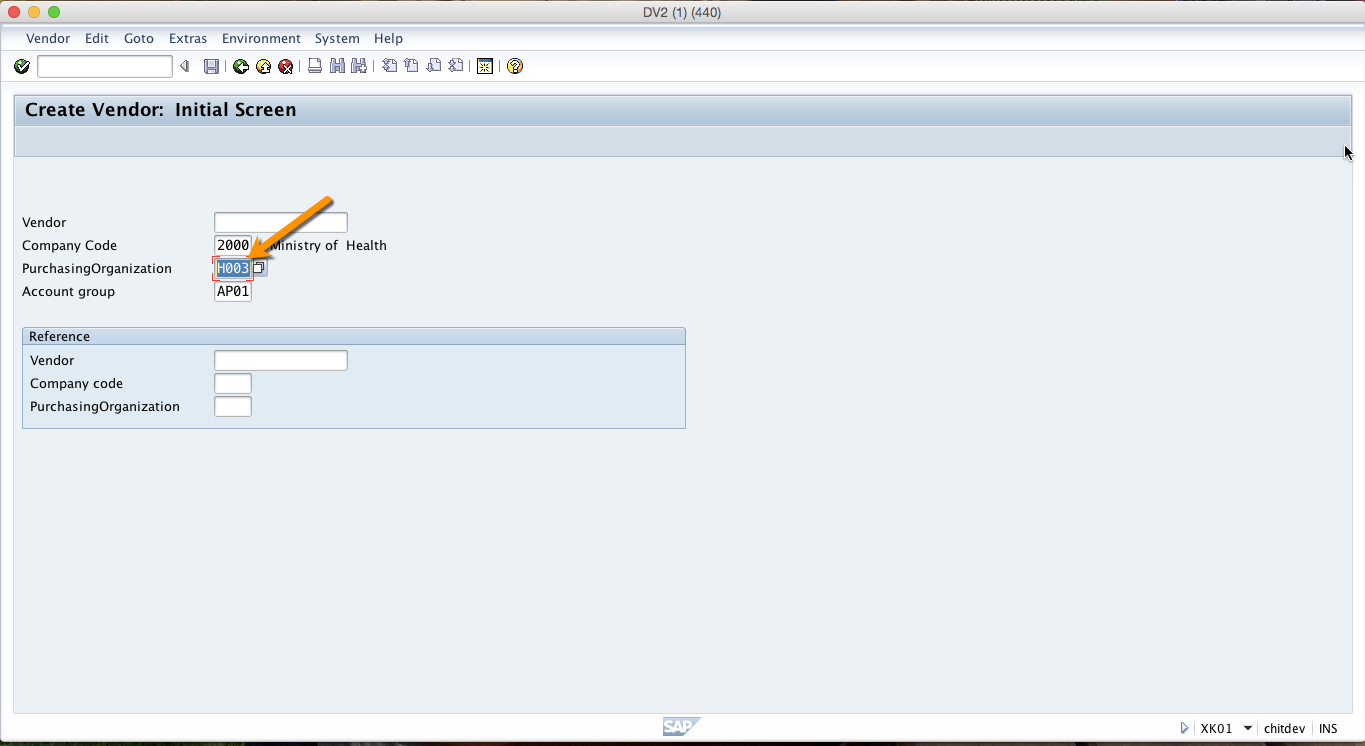
Purchasing organization is responsible for procurement of certain products or services. The responsibility of a purchasing organization may include finding the best suppliers, negotiating purchasing agreements and procurement of goods.
To go to the next screen, press Enter button on the keyboard or the green tick in top left corner of your SAP screen and you will be taken to the next screen of create vendor transaction.
Title

Possible titles are stored in a checking table. They are language dependent. Choose the title from the entries in the drop-down box. The title is displayed in the text form in the screen field in the logon language.
Name
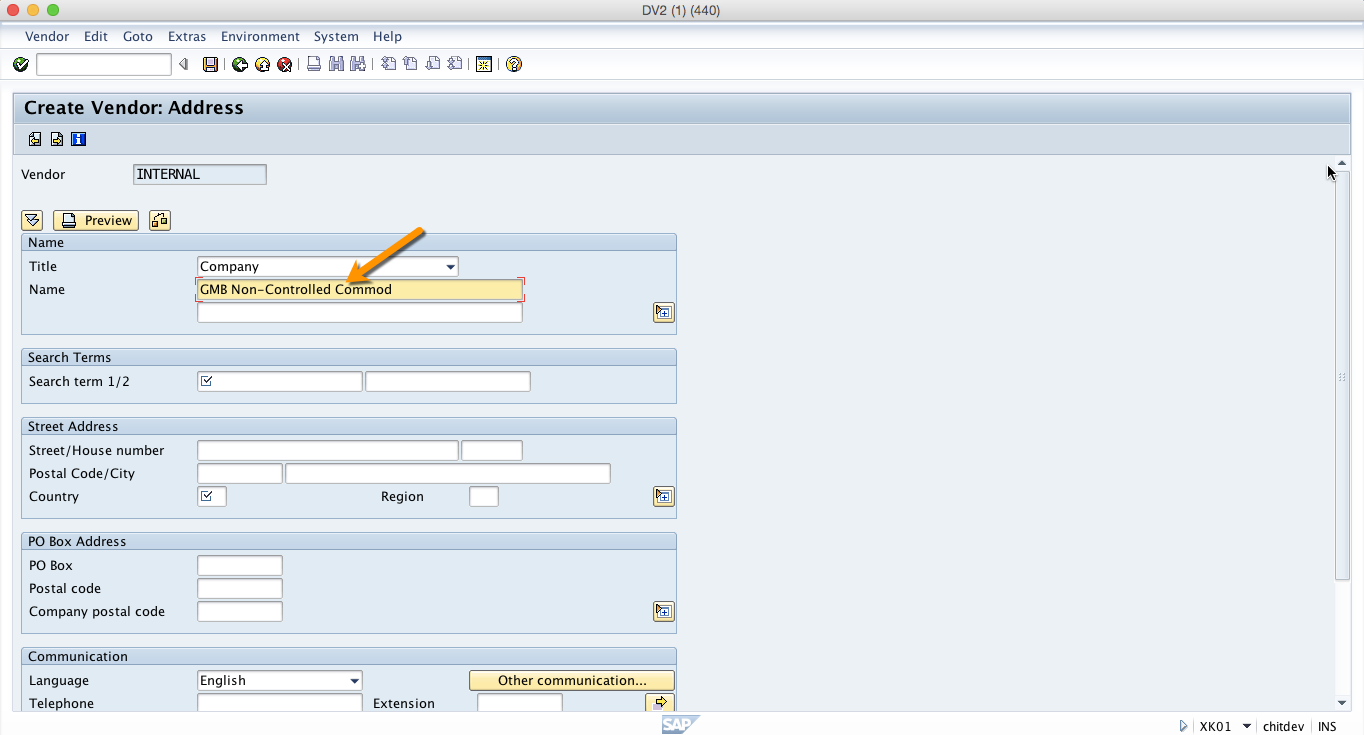
This is the address component showing the name of the vendor.
Search term
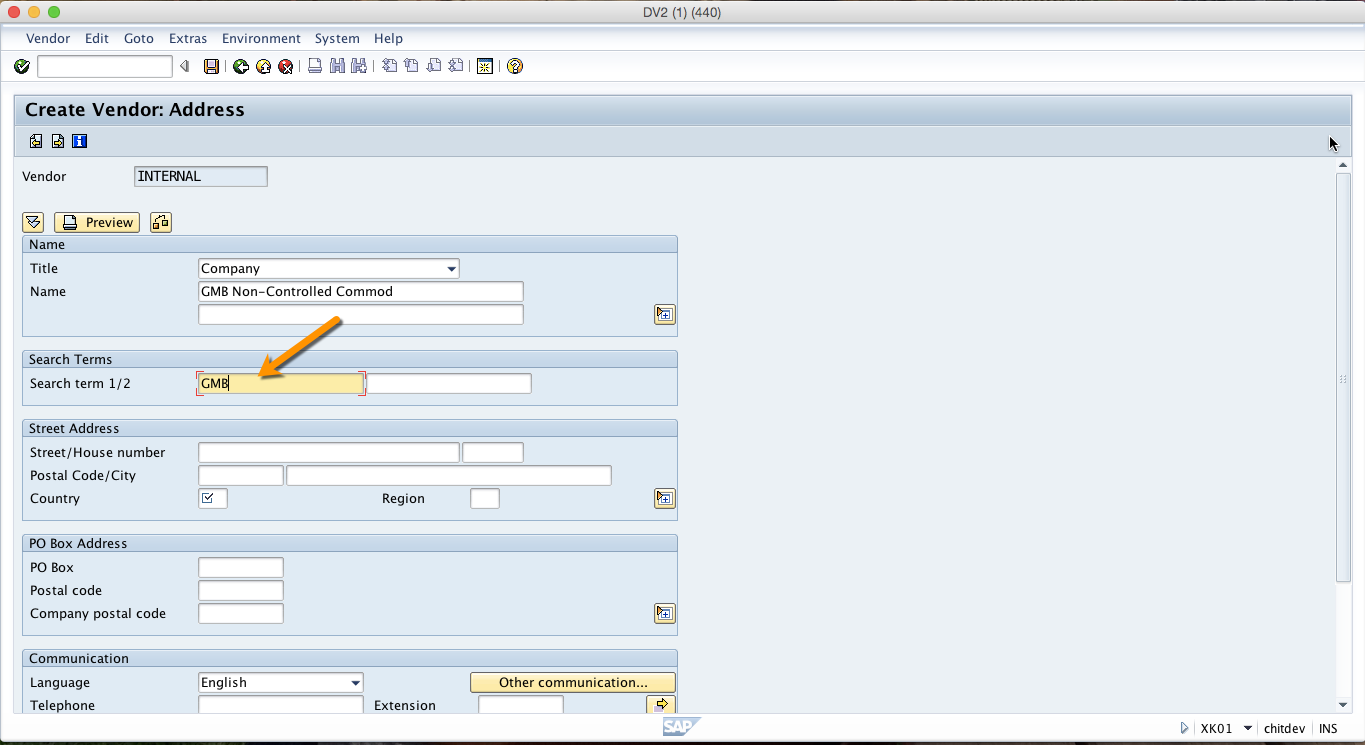
Short description used for search help. Only capital letters are saved in this field. All entries are automatically converted into capital letters. You can, for example, enter the significant part of the name or an identifier used within an organization for this vendor.
Street/House number
Street name as part of the address.
Postal Code/City
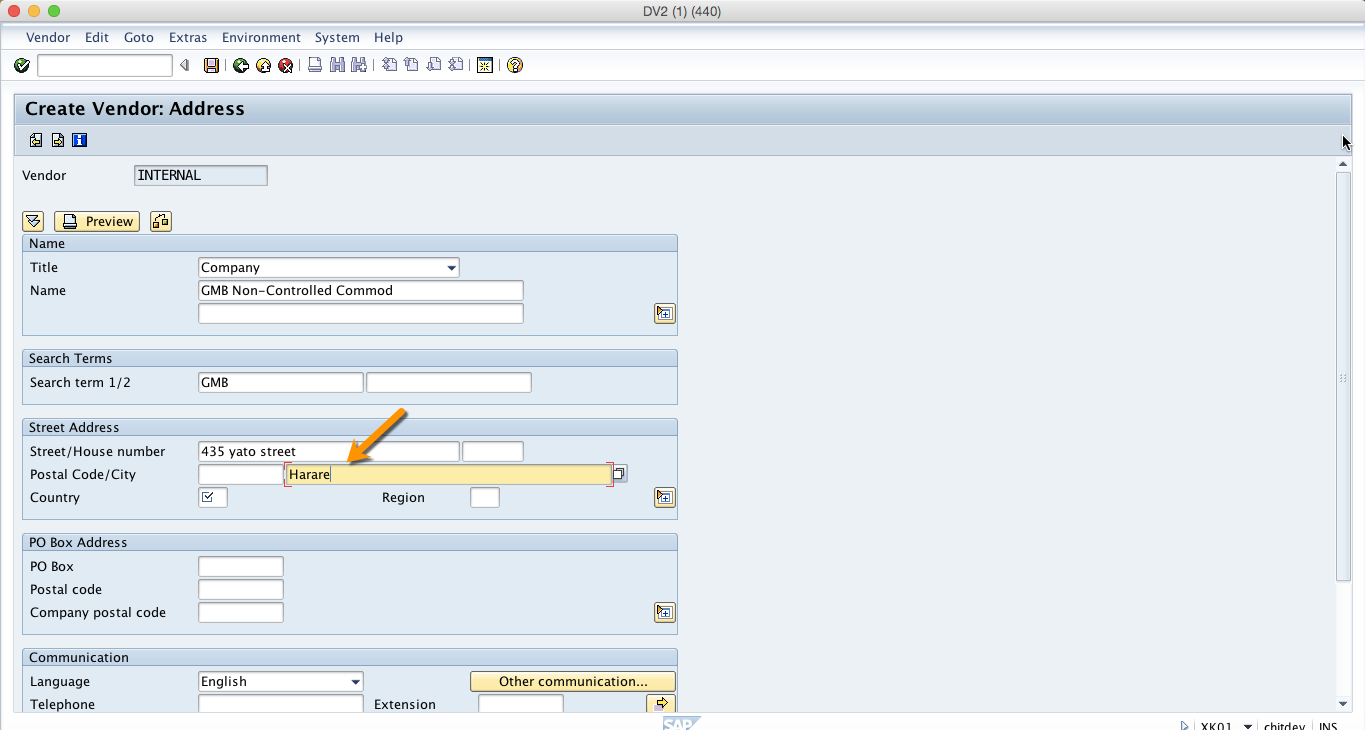
City name and postal code as part of the address.
Country
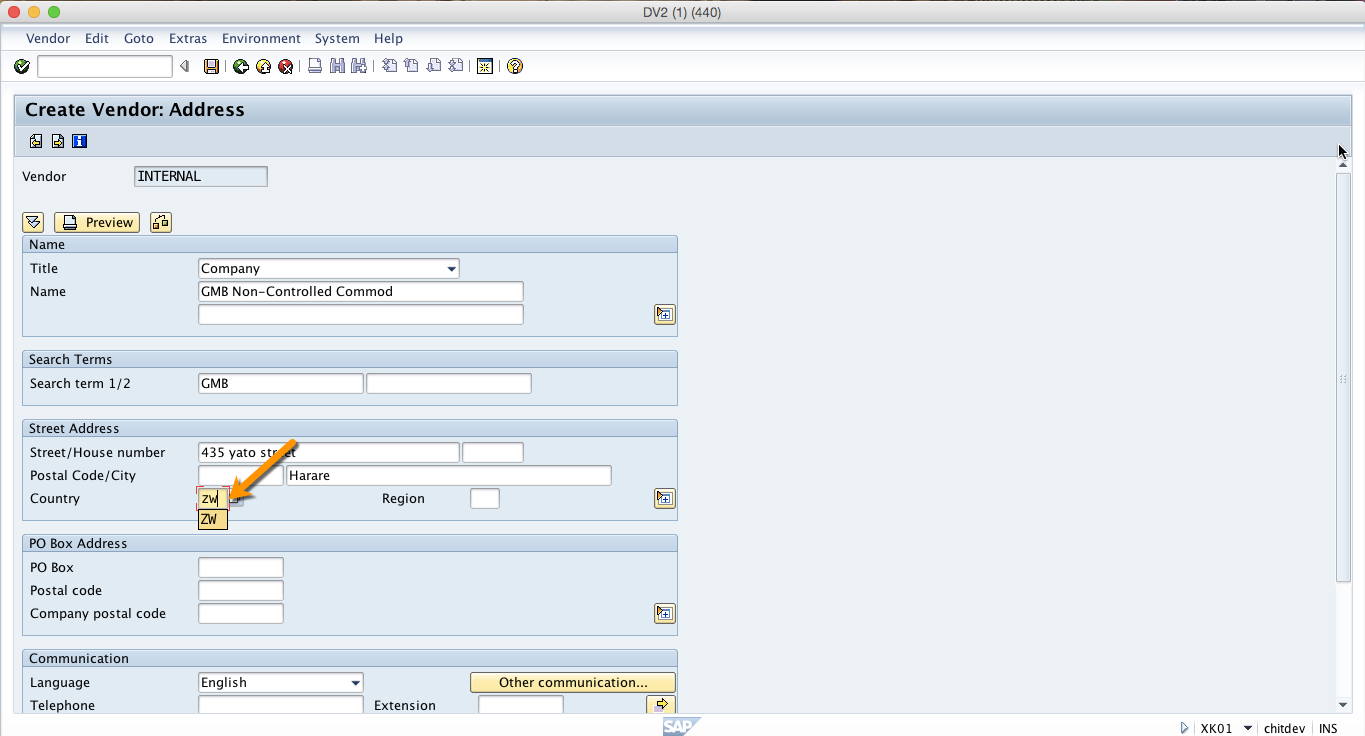
The country key contains information that the system uses to check entries such as the length of the postal code or bank account number.
PO Box
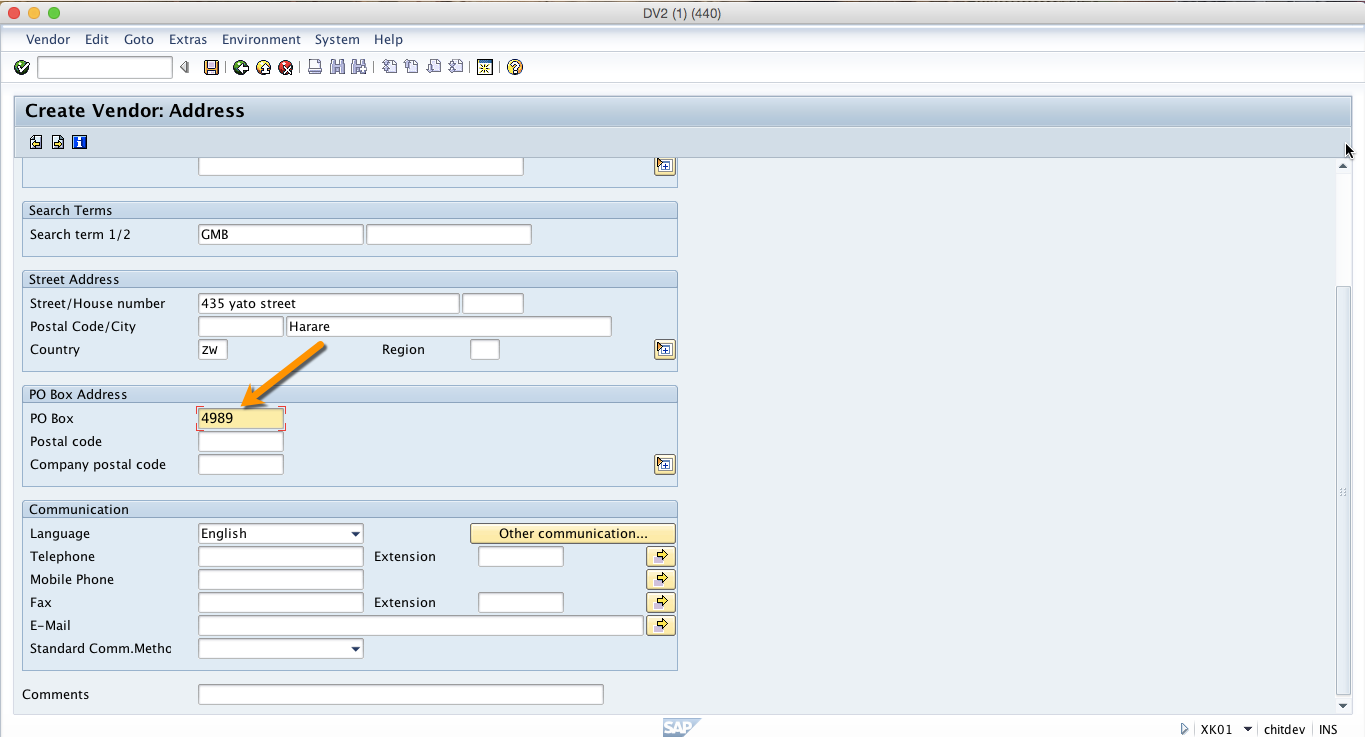
PO Box number as part of an address. When you print the address, the street address and the PO Box address are distinguished. The print program determines which of them has priority if both are maintained in an address record.
Telephone
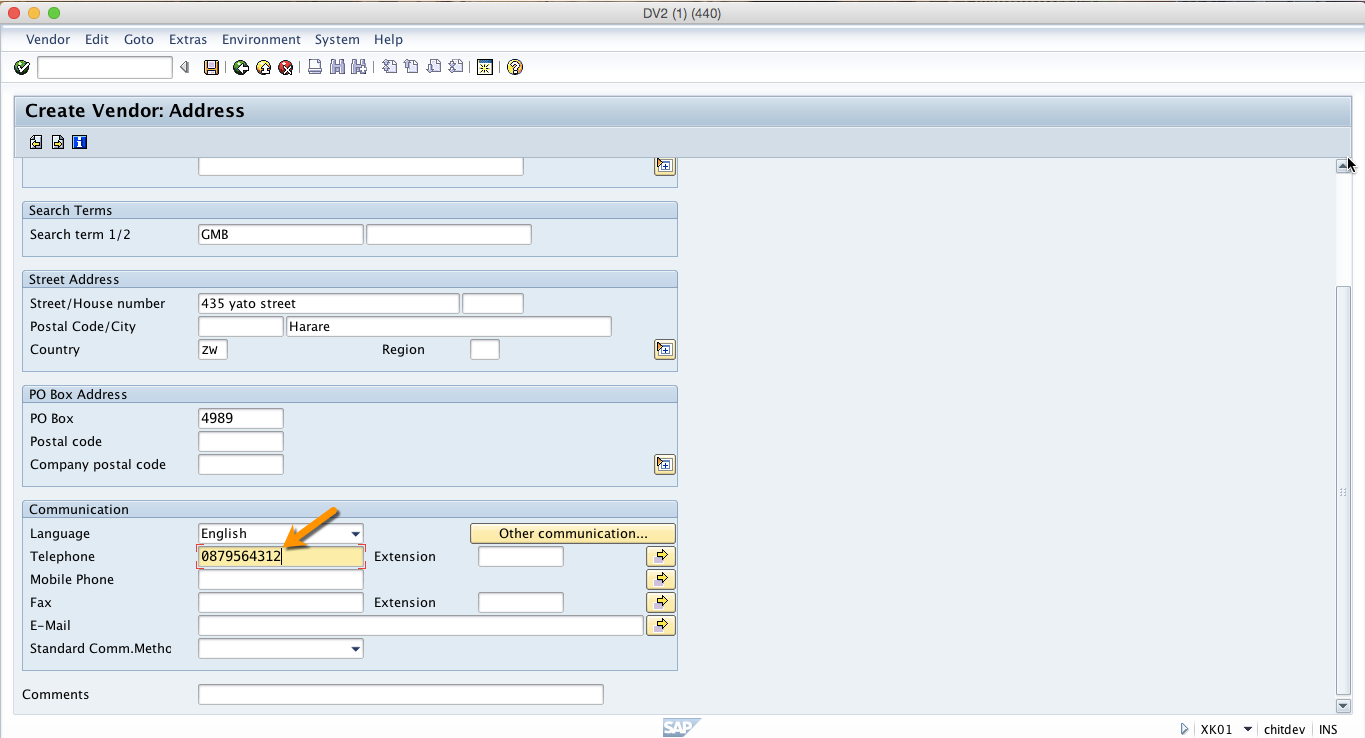
Telephone number consisting of a dialing code and number but without the country code. If the telephone number consists of a company number and an extension, the extension must be entered in the field extension.
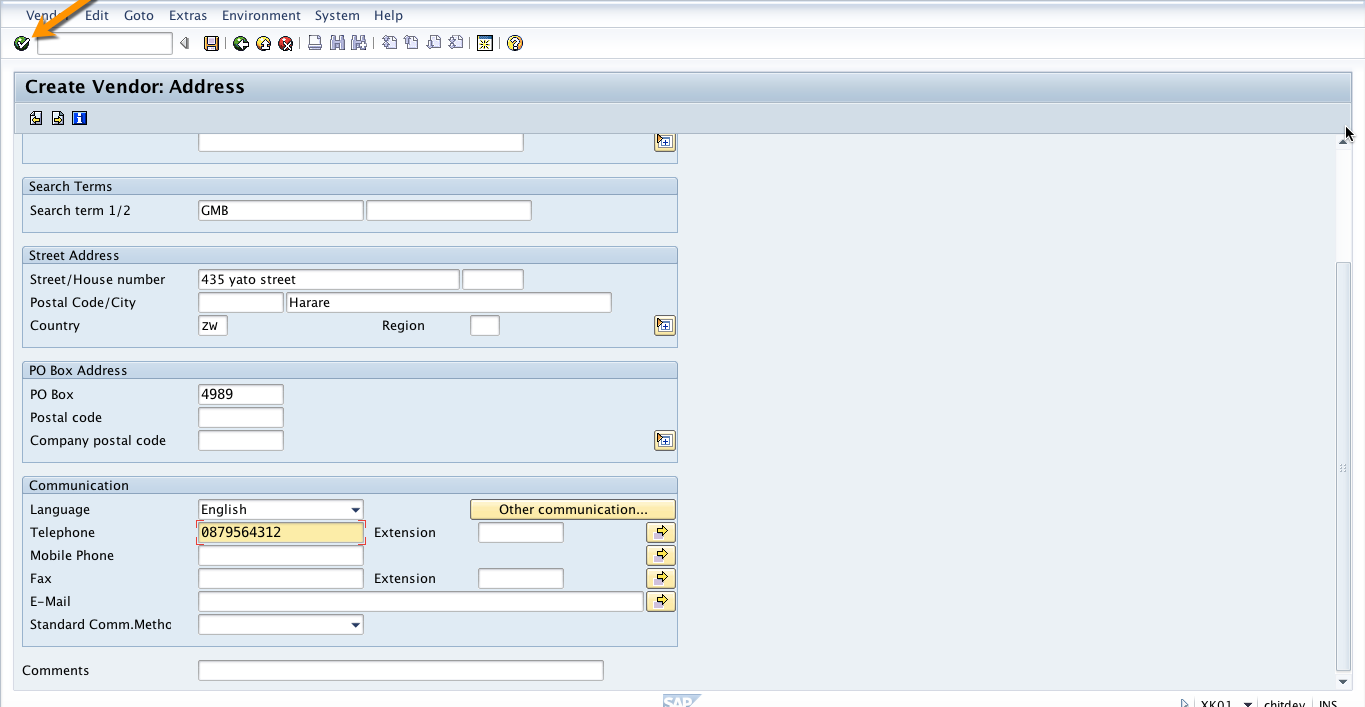
Next, let’s proceed to the Control screen by clicking on Enter icon as shown below.
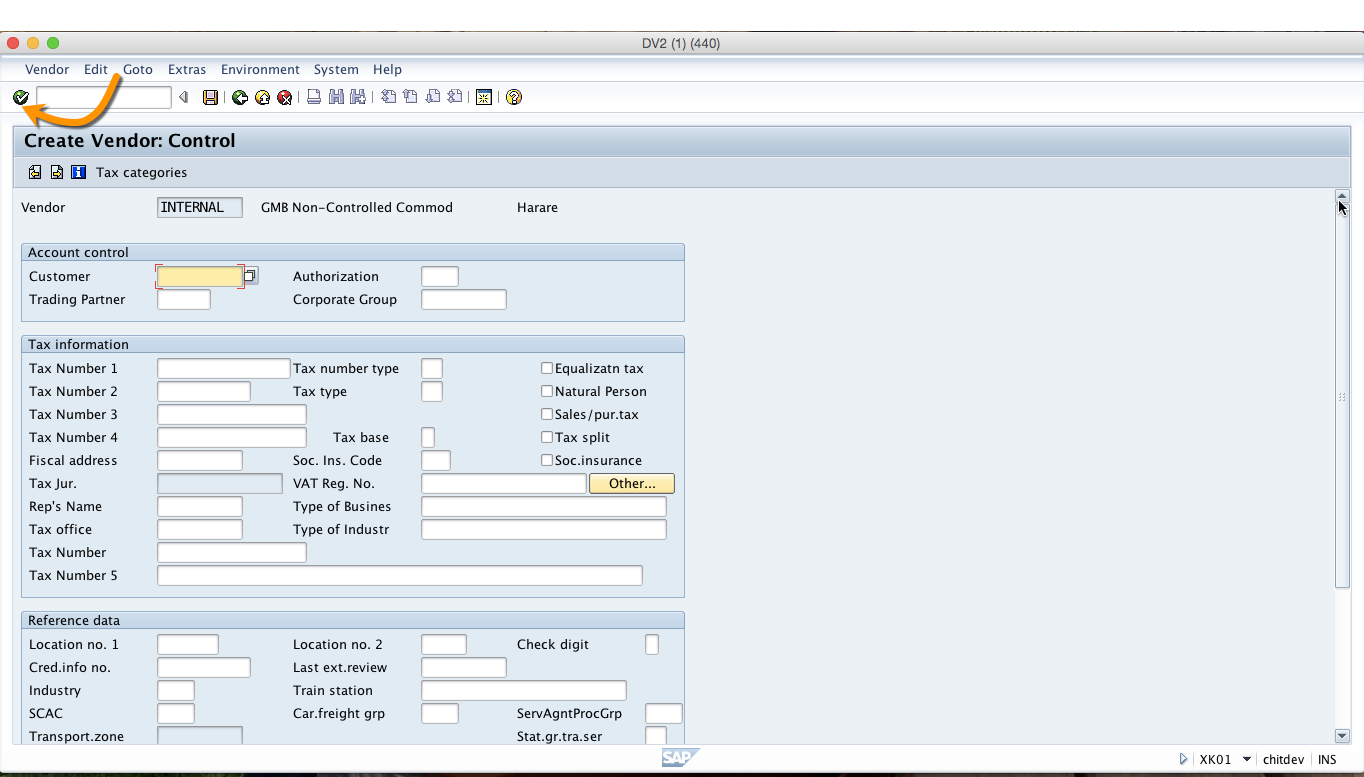
The SAP system will show the next screen of the create vendor transaction that is called Control. Here we also need to enter data in a number of fields. We will not explain every field but you can always read about the purpose of each field using help function.
Customer
This fields indicates an alphanumeric key that uniquely identifies a customer in the SAP system. This field is used to link the SAP vendor account with the existing SAP customer account. It is useful in situations when the same company is your vendor and customer and the same time.

To go to the next screen, you should click Enter icon again as shown below.
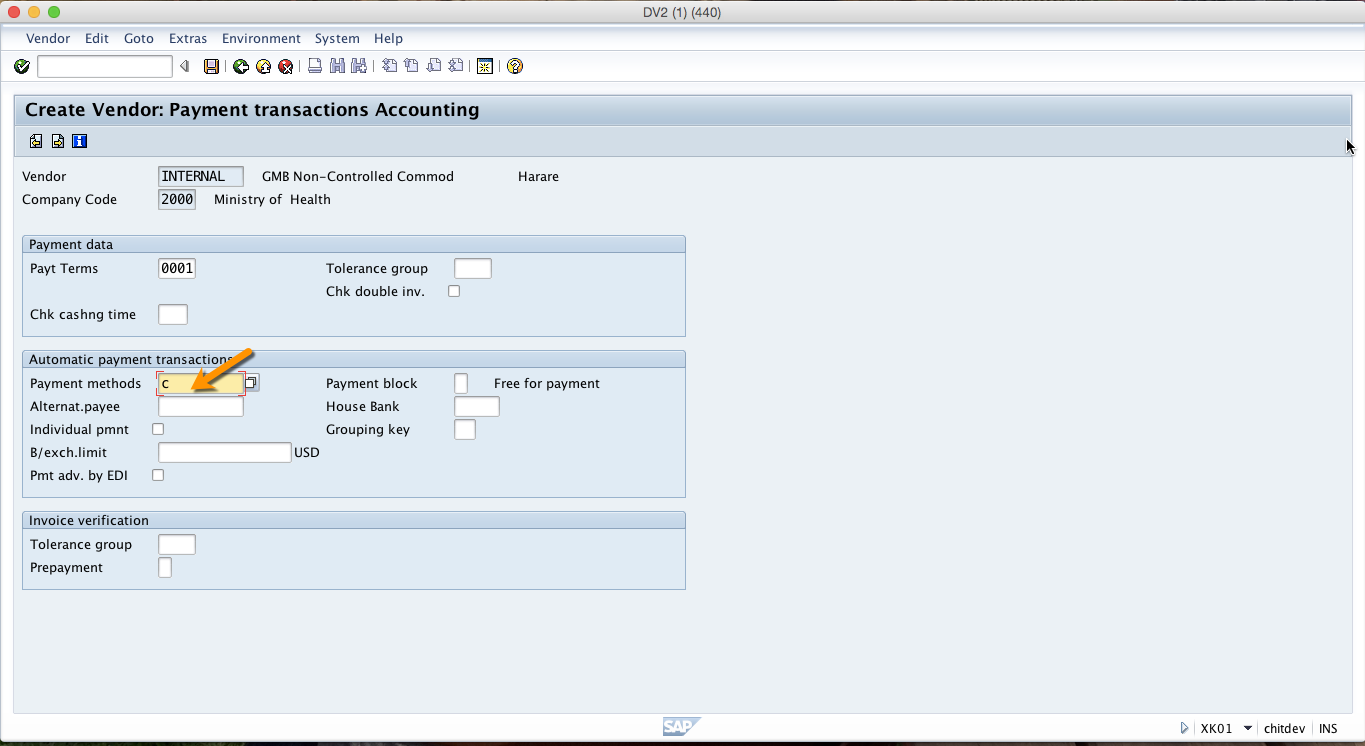
The next screen is called Payment transactions and here we can enter information about payment methods that are used for this vendor account.
Bank Details
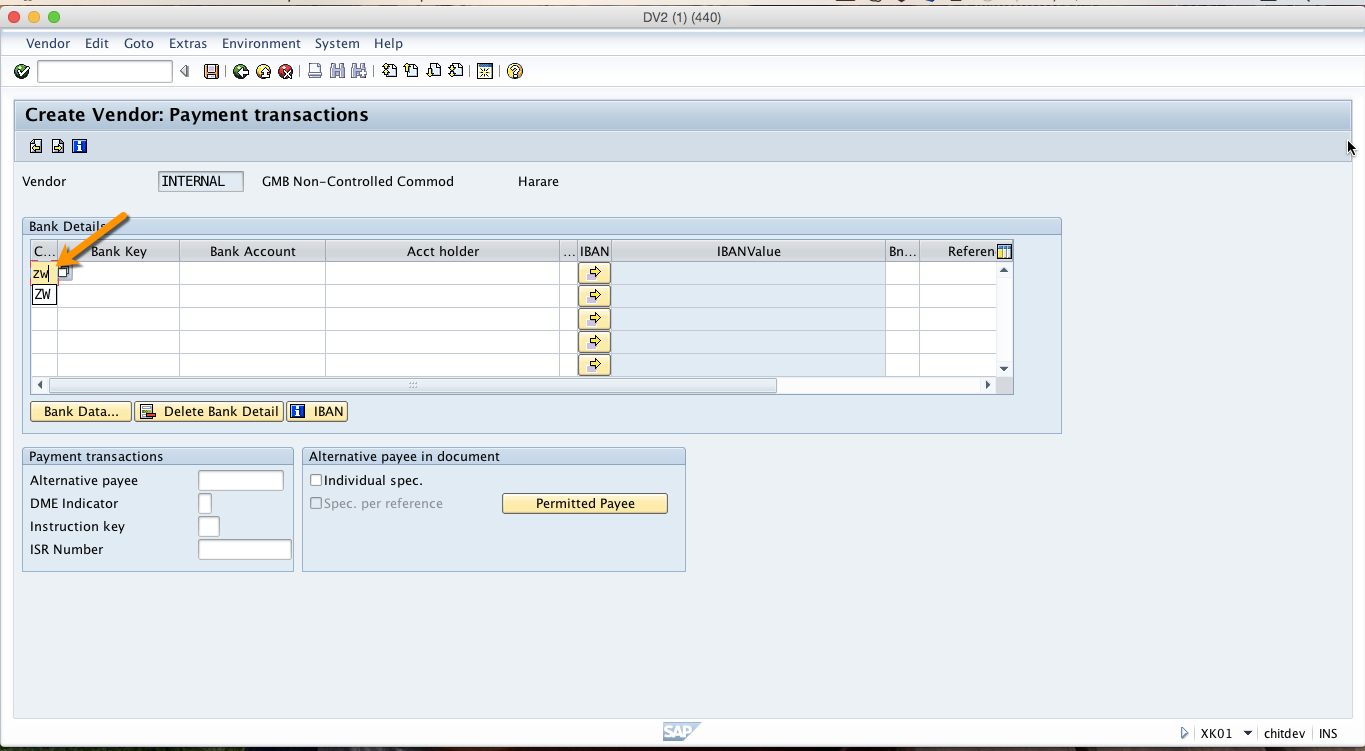
In the country field, you identify the country in which the bank is located. The country key defines the rules according to which bank data account number are processed.
In the bank key field, you should specify the bank key under which bank data from the respective country is located. In the bank account number field, you should specify the number under which the account is managed at the bank
Now, click Enter icon to go to the next screen where we will enter accounting information.
Recon. Account
The reconciliation account is the account which is updated in parallel to the sub-ledger account for normal postings, for example invoice payment.

Sort Key
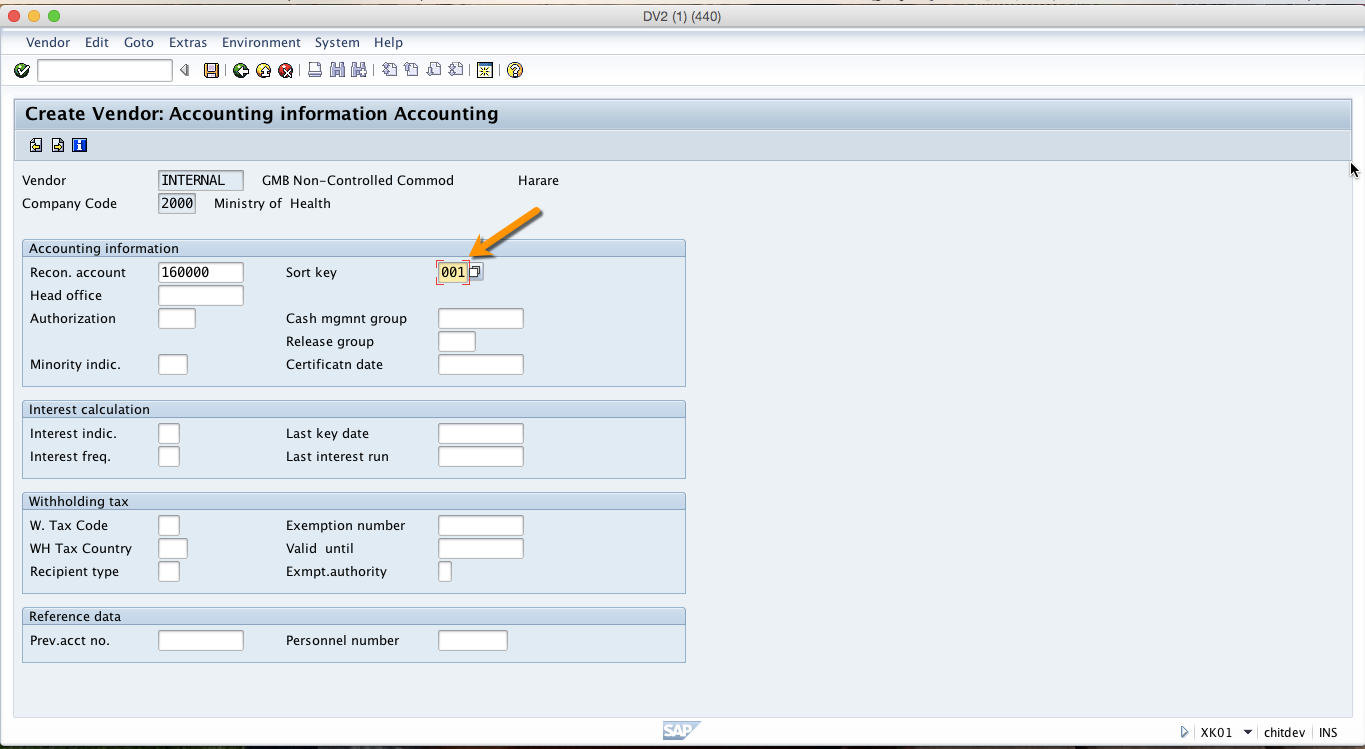
This is a key for sorting according to assignment numbers. It defines how the assignment field will be automatically generated in a document line item.
Let’s click on Enter icon and go to the next screen (related to Payment transactions).
Terms of payment
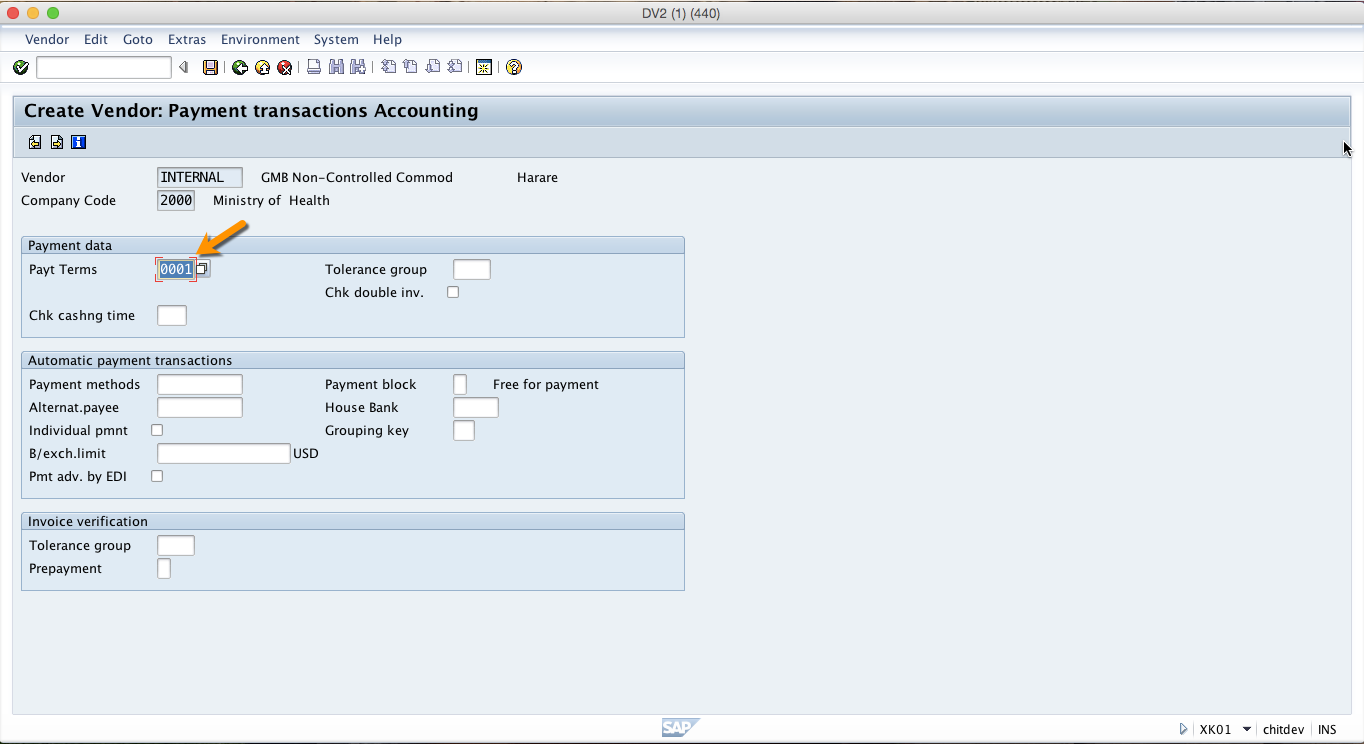
This field is used to define payment terms composed of cash discount percentages and payment periods. It is used in purchase orders and invoices.
Payment methods
List of the payment methods to be considered. This is a list of all payment methods which may be used in automatic payment transactions with this vendor if you do not manually specify a payment method in the item to be paid.
Now, let proceed to the next screen by clicking on Enter icon. This screen is called Correspondence. Here we specify various information related to ways of communicating with this vendor.
Dunn. Procedure
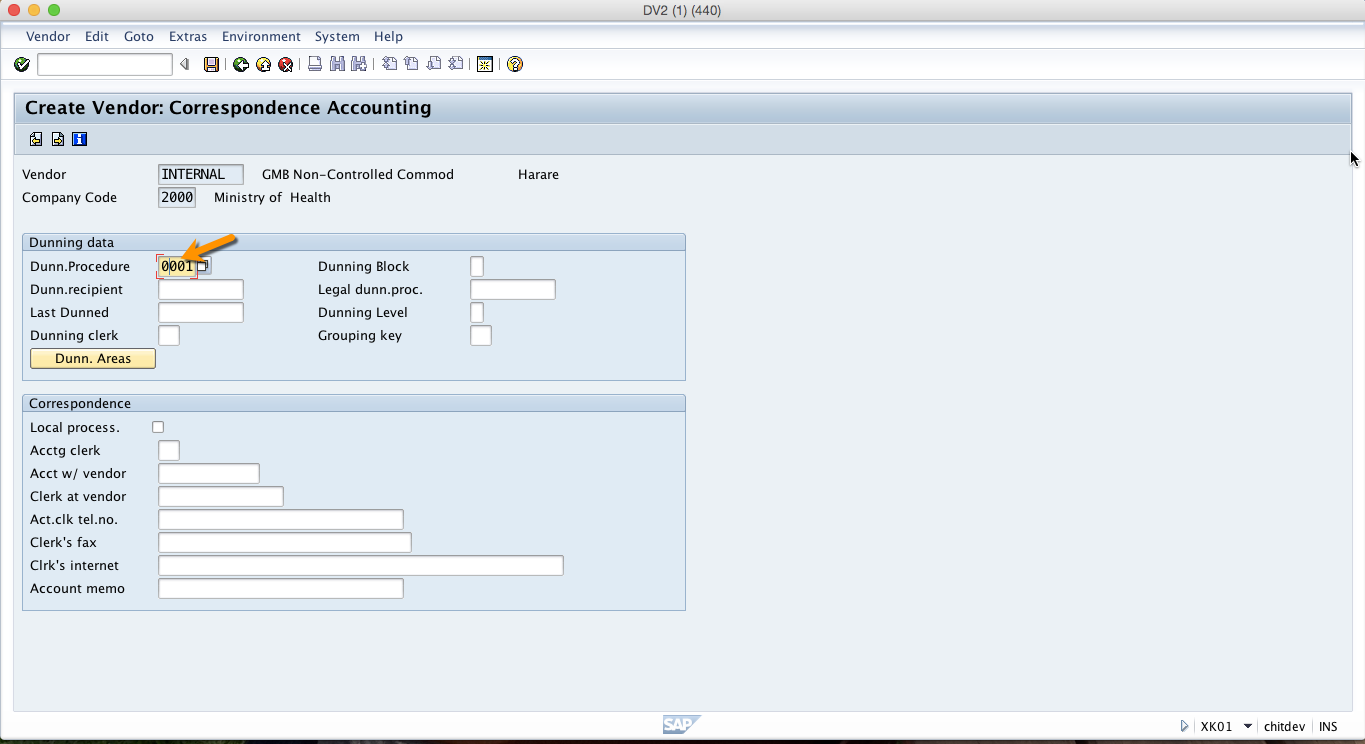
This field contains the key for the dunning procedure to be used. Dunning is the process of reminding vendors using output documents (e.g., with letters).
After populating these fields, you should click on Save button in the top toolbar and the vendor will be created.
—
Did you like this tutorial? Have any questions or comments? We would love to hear your feedback in the comments section below. It’d be a big help for us, and hopefully it’s something we can address for you in improvement of our free SAP FI tutorials.
Navigation Links
Go to next lesson: SAP Bank Master Data
Go to previous lesson: SAP Customer Account
Go to overview of the course: Free SAP FI Training